SpringBoot测试之@SpringBootTest与MockMvc的实战应用小结
目录
- 引言
- 一、SpringBoot测试基础
- 1.1 测试环境配置
- 1.2 测试目录结构
- 二、@SpringBootTest注解详解
- 2.1 基本用法与配置选项
- 2.2 不同WebEnvironment模式的应用场景
- 三、MockMvc实战应用
- 3.1 MockMvc基本使用方法
- 3.2 高级请求构建和响应验证
- 四、模拟服务层与依赖
- 4.1 使用@MockBean模拟服务
- 4.2 测试异常处理和边界情况
- 五、测试最佳实践
- 5.1 测试数据准备与清理
- 5.2 测试覆盖率与持续集成
- 总结
引言
在现代企业级应用开发中,测试已成为确保软件质量的关键环节。SpringBoot作为当前最流行的Java开发框架,提供了完善的测试支持机制。本文将深入探讨SpringBoot测试中两个核心工具:@SpringBootTest注解与MockMvc测试框架的实战应用,帮助开发者构建更稳健的测试体系,提高代码质量与可维护性。
一、SpringBoot测试基础
1.1 测试环境配置
SpringBoot提供了丰富的测试支持,使开发者能够方便地进行单元测试和集成测试。在SpringBoot项目中进行测试需要引入spring-boot-starter-test依赖,该依赖包含JUnit、Spring Test、AssertJ等测试相关库。测试环境的正确配置是高效测试的基础,确保测试用例能够在与生产环境相似的条件下运行,从而提高测试结果的可靠性。
// build.gradle配置
dependencies {
    // SpringBoot基础依赖
    implementation 'org.springframework.boot:spring-boot-starter-web'
    // 测试相关依赖
    testImplementation 'org.springframework.boot:spring-boot-starter-test'
    // JUnit 5支持
    testImplementation 'org.junit.jupiter:junit-jupiter-api:5.8.2'
    testRuntimeOnly 'org.junit.jupiter:junit-jupiter-engine:5.8.2'
}
// 或者在Maven中的pom.XML配置
/*
<dependencies>
    <!-- SpringBoot基础依赖 -->
    <dependency>
        <groupId>org.springframework.boot</groupId>
        <artifactId>spring-boot-starter-web</artifactId>
    </dependency>
    <!-- 测试相关依赖 -->
    <dependency>
        <groupId>org.springframework.boot</groupId>
        <artifactId>spring-boot-starter-test</artifactId>
        <scope>test</scope编程>
    </dependency>
</dependencies>
*/
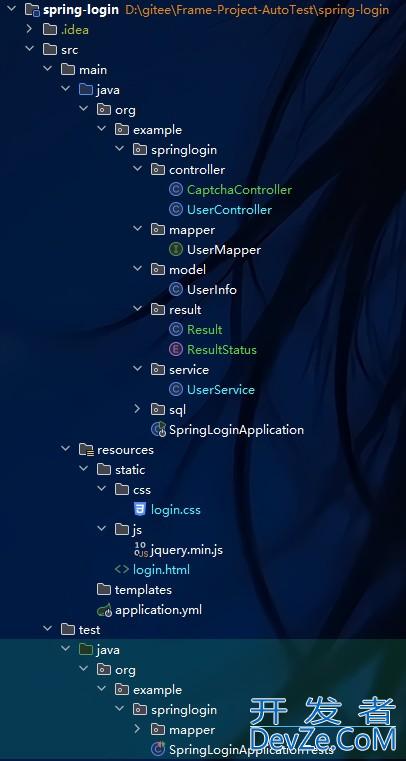
1.2 测试目录结构
一个规范的测试目录结构有助于测试用例的组织和管理。在SpringBoot项目中,测试代码通常位于src/test/java目录下,测试资源文件位于src/test/resources目录。测试类的包结构应与主代码保持一致,便于关联和维护。测试配置文件可以覆盖主配置,为测试提供专用环境参数。
src
 ├── main
 │    ├── java
 │    │    └── com.example.demo
 │    │         ├── controller
 │    │         ├── service
 │    │         └── repository
 │    └── resources
 │         └── application.properties
 └── test
      ├── java
      │    └── com.example.demo
      │         ├── controller  // 控制器测试类
      │         ├── service     // 服务测试类
      │         └── repository  // 数据访问测试类
      └── resources
           └── application-test.properties  // 测试专用配置
二、@SpringBootTest注解详解
2.1 基本用法与配置选项
@SpringBootTest注解是SpringBoot测试的核心,它提供了加载完整应用程序上下文的能力。通过这个注解,可以创建接近真实环境的测试环境,使集成测试更加可靠。@SpringBootTest支持多种配置选项,可以根据测试需求进行灵活调整,包括指定启动类、测试配置文件、Web环境类型等。
package com.example.demo;
import org.junit.jupiter.api.Test;
import org.springframework.beans.factory.annotation.Autowired;
import org.springframework.boot.test.context.SpringBootTest;
import org.springframework.core.env.Environment;
import static org.junit.jupiter.api.Assertions.assertNotNull;
// 基本用法:加载完整的Spring应用上下文
@SpringBootTest
public class BasicApplicationTests {
    @Autowired
    private Environment environment;  // 注入环境变量
    @Test
    void contextLoads() {
        // 验证上下文是否正确加载
        assertNotNull(environment);
        System.out.println("Active profiles: " + String.join(", ", environment.getActiveProfiles()));
    }
}
// 高级配置:自定义测试属性
@SpringBootTest(
    // 指定启动类
    classes = DemoApplication.class,
    // 指定Web环境类型
    webEnvironment = SpringBootTest.WebEnvironment.RANDOM_PORT,
    // 设置测试属性
    properties = {
        "spring.profiles.active=test",
        "server.servlet.context-path=/api"
    }
)
class CustomizedApplicationTest {
    // 测试代码...
}
2.2 不同WebEnvironment模式的应用场景
@SpringBootTest注解的webEnvironment属性定义了测试的Web环境类型,有四种可选值:MOCK、RANDOM_PORT、DEFINED_PORT和NONE。每种模式适用于不同的测试场景。正确选择Web环境模式可以提高测试效率,减少资源消耗。
package com.example.demo;
import org.junit.jupiter.api.Test;
import org.springframework.beans.factory.annotation.Autowired;
import org.springframework.boot.test.context.SpringBootTest;
import org.springframework.boot.test.web.client.TestRestTemplate;
import org.springframework.boot.test.web.server.LocalServerPort;
import static org.assertj.core.api.Assertions.assertThat;
// MOCK模式:不启动服务器,适用于通过MockMvc测试控制器
@SpringBootTest(webEnvironment = SpringBootTest.WebEnvironment.MOCK)
class MockWebEnvironmentTest {
    // 使用MockMvc测试...
}
// RANDOM_PORT模式:启动真实服务器,随机端口,适用于端到端测试
@SpringBootTest(webEnvironment = SpringBootTest.WebEnvironment.RANDOM_PORT)
class RandomPortWebEnvironmentTest {
    @LocalServerPort
    private int port;  // 获取随机分配的端口
    @Autowired
    private TestRestTemplate restTemplate;
    @Test
    void testHomeEndpoint() {
        // 发送真实HTTP请求
        String response = restTemplate.getForObject(
            "http://localhost:" + port + "/api/home",
            String.class
        );
        assertThat(response).contains("Welcome");
    }
}
// DEFINED_PORT模式:使用application.properties中定义的端口
@SpringBootTest(webEnvironment = SpringBootTest.WebEnvironment.DEFINED_PORT)
class DefinedPortWebEnvironmentTest {
    // 使用固定端口测试...
}
// NONE模式:不启动Web环境,适用于纯业务逻辑测试
@SpringBootTest(webEnvironment = SpringBootTest.WebEnvironment.NONE)
class NoWebEnvironmentTest {
    // 仅测试服务层和存储层...
}
三、MockMvc实战应用
3.1 MockMvc基本使用方法
MockMvc是Spring MVC测试框架的核心组件,它模拟HTTP请求和响应,无需启动真实服务器即可测试控制器。MockMvc提供了流畅的API,可以构建请求、执行调用、验证响应。这种方式的测试执行速度快,资源消耗少,特别适合控制器单元测试。使用MockMvc可以确保Web层代码的正确性和稳定性。
package com.example.demo.controller;
import org.junit.jupiter.api.Test;
import org.springframework.beans.factory.annotation.Autowired;
import org.springframework.boot.test.autoconfigure.web.servlet.WebMvcTest;
import org.springframework.test.web.servlet.MockMvc;
import static org.springframework.test.web.servlet.request.MockMvcRequestBuilders.get;
import static org.springframework.test.web.servlet.result.MockMvcResultMatchers.content;
import static org.springframework.test.web.servlet.result.MockMvcResultMatchers.status;
// @WebMvcTest专注于测试控制器层,只加载MVC相关组件
@WebMvcTest(UserController.class)
public class UserControllerTest {
    @Autowired
    private MockMvc mockMvc;  // MockMvc由Spring自动注入
    @Test
    void testGetUserById() throws Exception {
        // 执行GET请求并验证响应
        mockMvc.perform(get("/users/1"))  // 构建GET请求
               .andExpect(status().isOk())  // 验证HTTP状态码为200
               .andExpect(content().contentType("application/json"))  // 验证内容类型
               .andExpect(content().json("{\"id\":1,\"name\":\"John\"}"));  // 验证JSON响应内容
    }
}
3.2 高级请求构建和响应验证
MockMvc提供了丰富的请求构建选项和响应验证方法,可以全面测试控制器的各种行为。通过高级API,可以模拟复杂的请求场景,包括添加请求头、设置参数、提交表单数据、上传文件等。同时,MockMvc还提供了详细的响应验证机制,可以检查HTTP状态码、响应头、响应体内容等。
package com.example.demo.controller;
import com.fasterxml.jackson.databind.ObjectMapper;
import org.junit.jupiter.api.Test;
import org.springframework.beans.factory.annotation.Autowired;
import org.springframework.boot.test.autoconfigure.web.servlet.WebMvcTest;
import org.springframework.http.MediaType;
import org.springframework.test.web.servlet.MockMvc;
import org.springframjsework.test.web.servlet.result.MockMvcResultHandlers;
import static org.hamcrest.Matchers.*;
import static org.springframework.test.web.servlet.request.MockMvcRequestBuilders.*;
import static org.springframework.test.web.servlet.result.MockMvcResultMatchers.*;
@WebMvcTest(ProductController.class)
public class ProductControllerAdvancedTest {
    @Autowired
    private MockMvc mockMvc;
    @Autowired
    private ObjectMapper objectMapper;  // 用于JSON转换
    @Test
    void testCreateProduct() throws Exception {
        // 创建测试数据
        Product product = new Product(null, "笔记本电脑", 6999.99, 10);
        // 执行POST请求
        mockMvc.perform(
                post("/products")  // POST请求
                    .contentType(MediaType.APPLICATION_JSON)  // 设置Content-Type
                    .header("Authorization", "Bearer token123")  // 添加自定义请求头
                    .content(objectMapper.writeValueAsString(product))  // 请求体JSON
               )
               .andDo(MockMvcResultHandlers.print())  // 打印请求和响应详情
               .andExpect(status().isCreated())  // 期望返回201状态码
               .andExpect(header().exists("Location"))  // 验证响应头包含Location
               .andExpect(jsonPath("$.id", not(nullValue())))  // 验证ID已生成
               .andExpect(jsonPath("$.name", is("笔记本电脑")))  // 验证属性值
               .andExpect(jsonPath("$.price", closeTo(6999.99, 0.01)));  // 验证浮点数
    }
    @Test
    void testSearchProducts() throws Exception {
        // 测试带查询参数的GET请求
        mockMvc.perform(
                get("/products/search")
                    .param("keyword", "电脑")  // 添加查询参数
                    .param("minPrice", "5000")
                    .param("maxPrice", "10000")
               )
               .andExpect(status().isOk())
               .andExpect(jsonPath("$", hasSize(greaterThan(0))))  // 验证数组不为空
               .andExpect(jsonPath("$[0].name", containsString("电脑")));  // 验证结果包含关键词
    }
}
// 简单的产品类
class Product {
    private Long id;
    private String name;
    private double price;
    private int stock;
    // 构造函数、getter和setter略
    public Product(Long id, String name, double price, int stock) {
        this.id = id;
        this.name = name;
        this.price = price;
        this.stock = stock;
    }
    // getter和setter略...
}
四、模拟服务层与依赖
4.1 使用@MockBean模拟服务
在测试控制器时,通常需要模拟服务层的行为。Spring Boot提供了@MockBean注解,可以用来替换Spring容器中的bean为Mockito模拟对象。这种方式使得控制器测试可以专注于控制层逻辑,无需关心服务层的实际实现。通过配置模拟对象的返回值,可以测试控制器在不同场景下的行为。
package com.example.demo.controller;
import com.example.demo.model.User;
import com.example.demo.service.UserService;
import org.junit.jupiter.api.Test;
import org.springframework.beans.factory.annotation.Autowired;
import org.springframework.boot.test.autoconfigure.web.servlet.WebMvcTest;
import org.springframework.boot.test.mock.mockito.MockBean;
import org.springframework.test.web.servlet.MockMvc;
import java.util.Arrays;
import java.util.Optional;
import static org.mockito.ArgumentMatchers.anyLong;
import static org.mockito.Mockito.when;
import static org.springframework.test.web.servlet.request.MockMvcRequestBuilders.get;
import static org.springframework.test.web.servlet.result.MockMvcResultMatchers.jsonPath;
import static org.springframework.test.web.servlet.result.MockMvcResultMatchers.status;
@WebMvcTest(UserController.class)
public class UserControllerWithMockServiceTest {
    @Autowired
    private MockMvc mockMvc;
    @MockBean  // 创建并注入UserService的模拟实现
    private UserService userService;
    @Test
    void testGetUserById() throws Exception {
        // 配置模拟服务的行为
        User mockUser = new User(1L, "张三", "zhangsan@example.com");
        when(userService.findById(1L)).thenReturn(Optional.of(mockUser));
        when(userService.findById(99L)).thenReturn(Optional.empty());  // 模拟用户不存在的情况
        // 测试成功场景
        mockMvc.perform(get("/users/1"))
               .andExpect(status().isOk())
               .andExpect(jsonPath("$.id").value(1))
               .andExpect(jsonPath("$.name").value("张三"));
        // 测试用户不存在的场景
        mockMvc.perform(get("/users/99"))
               .andExpect(status().isNotFound());  // 期望返回404
    }
    @Test
    void testGetAllUsers() throws Exception {
        // 配置模拟服务返回用户列表
        when(userService.findAll()).thenReturn(Arrays.asList(
            new User(1L, "张三", "zhangsan@example.com"),
            new User(2L, "李四", "lisi@example.com")
        ));
        // 测试获取所有用户API
        mockMvc.perform(get("/users"))
               .andExpect(status().isOk())
               .andExpect(jsonPath("$").isArray())
               .andExpect(jsonPath("$.length()").value(2))
               .andExpect(jsonPath("$[0].name").value("张三"))
               .andExpect(jsonPath("$[1].name").value("李四"));
    }
}
// User模型类
class User {
    private Long id;
    private String name;
    private String email;
    // 构造函数、getter和setter略
    public User(Long id, String name, String email) {
        this.id = id;
        this.name = name;
        this.email = email;
    }
    // getter和setter略...
}
4.2 测试异常处理和边界情况
全面的测试应该包括对异常情况和边界条件的处理。在SpringBoot应用中,控制器通常会通过@ExceptionHandler或@ControllerAdvice处理异常。通过MockMvc可以有效地测试这些异常处理机制,确保系统在异常情况下也能够正确响应。测试边界情况可以提高代码的健壮性。
package com.example.demo.controller;
import com.example.demo.exception.ResourceNotFoundException;
import com.example.demo.service.OrderService;
import org.junit.jupiter.api.Test;
import org.springframework.beans.factory.annotation.Autowired;
import org.springframework.boot.test.autoconfigure.web.servlet.WebMvcTest;
import org.springframework.boot.test.mock.mockito.MockBean;
import org.springframework.http.MediaType;
import org.springframework.test.web.servlet.MockMvc;
import static org.mockito.ArgumentMatchers.anyLong;
import static org.mockito.Mockito.doThrow;
import static org.mockito.Mockito.when;
import static org.springframework.test.web.servlet.request.MockMvcRequestBuilders.get;
import static org.springframework.test.web.servlet.request.MockMvcRequestBuilders.post;
import static org.springframework.test.web.servlet.result.MockMvcResultMatchers.jsonPath;
import static org.springframework.test.web.servlet.result.MockMvcResultMatchers.status;
@WebMvcTest(OrderController.class)
public class OrderControllerExceptionTest {
    @Autowired
    private MockMvc mockMvc;
    @MockBean
    private OrderService orderService;
    @Test
    void testResourceNotFoundExceptionHandling() throws Exception {
        // 配置模拟服务抛出异常
        when(orderService.getOrderById(anyLong()))
            .thenThrow(new ResourceNotFoundException("Order not found with id: 999"));
        // 验证异常是否被正确处理
        mockMvc.perform(get("/orders/999"))
               .andExpect(status().isNotFound())  // 期望返回404
               .andExpect(jsonPath("$.message").value("Order not found with id: 999"))
               .andExpect(jsonPath("$.timestamp").exists());
    }
    @Test
    void testInvalidInputHandling() throws Exception {
        // 测试无效输入的处理
        mockMvc.perform(
                post("/orders")
                    .contentType(MediaType.APPLICATION_JSON)
                    .content("{\"customerName\":\"\",\"pythonamount\":-10}")  // 无效数据
               )
               .andExpect(status().isBadRequest())  // 期望返回400
          编程     .andExpect(jsonPath("$.fieldErrors").isArray())
               .andExpect(jsonPath("$.fieldErrors[?(@.field=='customerName')]").exists())
               .andExpect(jsonPath("$.fieldErrors[?(@.field=='amount')]").exists());
    }
    @Test
    void testUnauthorizedAccess() throws Exception {
        // 测试未授权访问的处理
        doThrow(new SecurityException("Unauthorized access")).when(orderService)
            .deleteOrder(anyLong());
        mockMvc.perform(get("/orders/123/delete"))
               .andExpect(status().isUnauthorized())  // 期望返回401
               .andExpect(jsonPath("$.error").value("Unauthorized access"));
    }
}
五、测试最佳实践
5.1 测试数据准备与清理
良好的测试应当具有隔离性和可重复性。在SpringBoot测试中,应当注意测试数据的准备和清理工作。使用@BeforeEach和@AfterEach注解可以在每个测试方法前后执行准备和清理操作。对于数据库测试,可以使用@Sql注解执行SQL脚本,或者配合@Transactional注解自动回滚事务。
package com.example.demo.repository;
import com.example.demo.entity.Employee;
import org.junit.jupiter.api.AfterEach;
import org.junit.jupiter.api.BeforeEach;
import org.junit.jupiter.api.Test;
import org.springframework.beans.factory.annotation.Autowired;
import org.springframework.boot.test.autoconfigure.orm.jpa.DataJpaTest;
import org.springframework.test.context.jdbc.Sql;
import java.time.LocalDate;
import java.util.List;
import static org.assertj.core.api.Assertions.assertThat;
@DataJpaTest  // 专用于JPA仓库层测试的注解
public class EmployeeRepositoryTest {
    @Autowired
    private EmployeeRepository employeeRepository;
    @BeforeEach
    void setUp() {
        // 测试前准备数据
        employeeRepository.saveAll(List.of(
            new Employee(null, "张三", "开发", 12000.0, LocalDate.of(2020, 5, 1)),
            new Employee(null, "李四", "测试", 10000.0, LocalDate.of(2021, 3, 15)),
            new Employee(null, "王五", "开发", 15000.0, LocalDate.of(2019, 8, 12))
        ));
    }
    @AfterEach
    void tearDown() {
        // 测试后清理数据
        employeeRepository.deleteAll();
    }
    @Test
    void testFindByDepartment() {
        // 测试按部门查询
        List<Employee> developers = employeeRepository.findByDepartment("开发");
        assertThat(developers).hasSize(2);
        assertThat(developers).extracting(Employee::getName)
                             .containsExactlyInAnyOrder("张三", "王五");
    }
    @Test
    @Sql("/test-data/additional-employees.sql")  // 执行SQL脚本添加更多测试数据
    void testFindBySalaryRange() {
        // 测试按薪资范围查询
        List<Employee> employees = employeeRepository.findBySalaryBetween(11000.0, 14000.0);
        assertThat(employees).hasSize(2);
        assertThat(employees).extracting(Employee::getName)
                             .contains("张三");
    }
}
// Employee实体类
class Employee {
    private Long id;
    private String name;
    private String department;
    private Double salary;
    private LocalDate hireDate;
    // 构造函数、getter和setter略
    public Employee(Long id, String name, String department, Double salary, LocalDate hireDate) {
        this.id = id;
        this.name = name;
        this.department = department;
        this.salary = salary;
        this.hireDate = hireDate;
    }
    // getter略...
}
5.2 测试覆盖率与持续集成
测试覆盖率是衡量测试质量的重要指标,高覆盖率通常意味着更少的未测试代码和更少的潜在bug。在SpringBoot项目中,可以使用JaCoCo等工具统计测试覆盖率。将测试集成到CI/CD流程中,确保每次代码提交都会触发自动测试,可以尽早发现问题,提高开发效率。
// 在build.gradle中配置JaCoCo测试覆盖率插件
/*
plugins {
    id 'jacoco'
}
jacoco {
    toolVersion = "0.8.7"
}
test {
    finalizedBy jacocoTestReport  // 测试完成后生成覆盖率报告
}
jacocoTestReport {
    dependsOn test  // 确保测试已执行
    reports {
        xml.enabled true
        html.enabled true
    }
}
// 设置覆盖率阈值
jacocoTestCoverageVerification {
    violationRules {
        rule {
            limit {
                minimum = 0.80  // 最低80%覆盖率
            }
        }
    }
}
*/
// 示例测试类 - 确保高覆盖率
package com.example.demo.service;
import org.junit.jupiter.api.Test;
import org.junit.jupiter.params.ParameterizedTest;
import org.junit.jupiter.params.provider.CsvSource;
import org.springframework.beans.factory.annotation.Autowired;
import org.springframework.boot.test.context.SpringBootTest;
import static org.assertj.core.api.Assertions.assertThat;
import static org.assertj.core.api.Assertions.assertThatThrownBy;
@SpringBootTest
public class TaxCalculatorServiceTest {
    @Autowired
    private TaxCalculatorService taxCalculatorService;
    @ParameterizedTest
    @CsvSource({
        "5000.0, 0.0",       // 不超过起征点
        "8000.0, 90.0",      // 第一档税率3%
        "20000.0, 1590.0",   // 第二档税率10%
        "50000.0, 7590.0"    // 第三档税率20%
    })
    void testCalculateIncomeTax(double income, double expectedTax) {
        double tax = taxCalculatorService.calculateIncomeTax(income);
        assertThat(tax).isEqualTo(expectedTax);
    }
    @Test
    void testCalculateIncomeTaxWithNegativeIncome() {
        // 测试边界情况:负收入
        assertThatThrownBy(() -> taxCalculatorService.calculateIncomeTax(-1000.0))
            .isInstanceOf(IllegalArgumentException.class)
            .hasMessageContaining("Income cannot be negative");
    }
    // 更多测试http://www.devze.com用例,确保高覆盖率...
}
总结
本文详细介绍了SpringBoot测试环境中@SpringBootTest注解与MockMvc测试框架的实战应用。@SpringBootTest提供了加载完整应用上下文的能力,支持不同的Web环境模式,适用于各种集成测试场景。MockMvc则专注于控制器层测试,通过模拟HTTP请求和响应,无需启动真实服务器即可验证控制器行为。在实际开发中,合理配置测试环境、准备测试数据、模拟服务依赖、处理异常和边界情况,对于构建健壮的测试体系至关重要。遵循最佳实践,如保持测试隔离性、追求高测试覆盖率、集成自动化测试流程等,能够显著提高代码质量和开发效率。通过本文介绍的技术和方法,开发者可以构建更加可靠和高效的SpringBoot应用测试体系,为项目的长期稳定运行提供有力保障。
到此这篇关于SpringBoot测试之@SpringBootTest与MockMvc的实战应用小结的文章就介绍到这了,更多相关SpringBoot测试@SpringBootTest与MockMvc内容请搜索编程客栈(www.devze.com)以前的文章或继续浏览下面的相关文章希望大家以后多多支持编程客栈(www.devze.com)!


 加载中,请稍侯......
精彩评论