Android自定义ViewGroup实现九宫格布局
目录
- 前言
- 一、九宫格的测量
- 二、九宫格的布局
- 三、单图片与四宫格的单独处理
- 四、自定义布局的抽取
- 4.1 先布局再隐藏的思路
- 4.2 数据适配器的思路
前言
在之前的文章我们复习了 ViewGroup 的测量与布局,那么我们这一篇效果就可以在之前的基础上实现一个灵活的九宫格布局。
那么一个九宫格的 ViewGroup 如何定义,我们分解为如下的几个步骤来实现:
- 先计算与测量九宫格内部的子View的宽度与高度。
- 再计算整体九宫格的宽度和高度。
- 进行子View九宫格的布局。
- 对单独的图片和四宫格的图片进行单独的布局处理
- 对填充的子View的方式进行抽取,可以自由添加布局。
- 对自定义属性的抽取,设置通用的属性。
只要在前文的基础上掌握了 ViewGroup 的测量与布局,其实实现起来一点都不难,甚至我们还能实现一些特别的效果。
好了,话不多说,Let's go
一、九宫格的测量
之前的文章,我们的测量方式是已经知道子 View 的具体大小了,让我们的父布局做宽高的适配,所以我们的逻辑顺序也是先布局,然后再测量,对 ViewGroup 的宽高做限制。
但是在我们做九宫格控件的时候,就和之前有所区别了。我们不管子 View 的宽高测量模式是怎样的,我们都是通过九宫格控件的宽度对子 View 的宽高进行强制赋值。
public class AbstractNineGridLayout extends ViewGroup {

    private static final int MAX_CHILDREN_COUNT = 9;  //最大的子View数量
    private int horizontalSpacing = 20;  //每一个Item的左右间距
    private int verticalSpacing = 20;  //每一个Item的上下间距

    private int itemWidth;
    private int itemHeight;

    public AbstractNineGridLayout(Context context) {
        this(context, null);
    }

    public AbstractNineGridLayout(Context context, AttributeSet attrs) {
        this(context, attrs, 0);
    }

    public AbstractNineGridLayout(Context context, AttributeSet attrs, int defStyleAttr) {
        super(context, attrs, defStyleAttr);
        init(context);
    }

    private void init(Context context) {

        for (int i = 0; i < MAX_CHILDREN_COUNT; i++) {
            ImageView imageView = new ImageView(context);
            imageView.setLayoutParams(new ViewGroup.LayoutParams(LayoutParams.MATCH_PARENT, LayoutParams.MATCH_PARENT));
            imageView.setBackgroundColor(Color.RED);
            addView(imageView);
        }
    }

    @Override
    protected void onMeasure(int widthMeasureSpec, int heightMeasureSpec) {
        int heightMode = MeasureSpec.getMode(heightMeasureSpec);
        int widthSize = MeasureSpec.getSize(widthMeasureSpec) - getPaddingLeft() - getPaddingRight();
        int notGoneChildCount = getNotGoneChildCount();

        //不管什么模式,都是指定的固定宽高
        itemWidth = (widthSize - horizontalSpacing * 2) / 3;
        itemHeight = itemWidth;

        //measureChildren内部调用measureChild,这里我们就可以指定宽高
        m开发者_开发教程easureChildren(MeasureSpec.makeMeasureSpec(itemWidth, MeasureSpec.EXACTLY),
                MeasureSpec.makeMeasureSpec(itemHeight, MeasureSpec.EXACTLY));

        if (heightMode == MeasureSpec.EXACTLY) {
            super.onMeasure(widthMeasureSpec, heightMeasureSpec);
        } else {

            notGoneChildCount = Math.min(notGoneChildCount, MAX_CHILDREN_COUNT);
            int heightSize = ((notGoneChildCount - 1) / 3 + 1) *
                    (itemHeight + verticalSpacing) - verticalSpacing + getPaddingTop() + getPaddingBottom();

            setMeasuredDimension(widthSize, heightSize);
        }
    }

}
刚开始的时候我们在布局初始化的时候先添加5个 mathc_parent 的9个子 View 作为测试。那么我们在布局的时候,就需要对宽度进行分割,并且强制性的测量每一个子 View 的宽高为 EXACTLY 模式。
测量完每一个子 View 之后,我们再动态的给 ViewGroup 设置宽高。
这样测量之后的效果为:


为了方便查看效果,加上了测试的灰色背景,看着大小是符合预期的。接下来我们就开始布局。
二、九宫格的布局
在之前流式布局的 onLayout 方法中,我们是通过动态的拿到每一个子 View 的宽度去判断当前是否会超过总宽度,是否需要换行。
而这里我们就无需这么做了,因为每一个子 View 都是固定的宽度,一行就是三个,一列最多也是三个。我们直接通过子 View 的数量就可以确定当前的行数与列数。
然后我们就能行数和列数进行布局了,具体的看代码:
 @Override
    protected void onLayout(boolean changed, int l, int t, int r, int b) {

        int childCount = getChildCount();
        int notGoneChildCount = getNotGoneChildCount();
        int position = 0;

        for (int i = 0; i < childCount; i++) {
            View child = getChildAt(i);
            if (child.getVisibility() == View.GONE) {
                continue;
            }

            int row = position / 3;    //当前子View是第几行(索引)
            int column = position % 3; //当前子View是第几列(索引)

            //当前需要绘制的光标的X与Y值
            int x = column * itemWidth + getPaddingLeft() + horizontalSpacing * column;
            int y = row * itemHeight + getPaddingTop() + verticalSpacing * row;

            child.layout(x, y, x + itemWidth, y + itemHeight);

            //最多只摆放9个
            position++;
            if (position == MAX_CHILDREN_COUNT) {
                break;
            }
        }

    }
效果为:
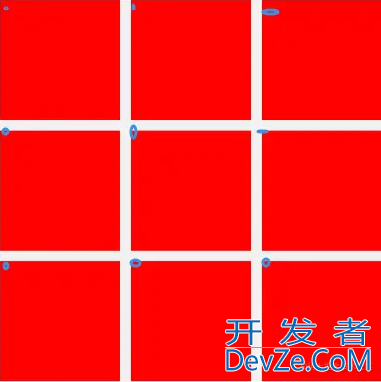
如果对行和列的计算不清楚的,我们可以对每一个子 View 的位置进行回顾,总共最多也就 9 个,当为第 0 个子 View 的时候,position为 0 ,那么 position / 3 是 0,row 就是 0, position % 3 也是 0,就是第最左上角的位置了。
当为第1个子 View 的时候,position为1 ,那么 position / 3 还是0,row就是0, position % 3是1了,就是第一排中间的位置了。
只有当View超过三个之后,position /3 就是 1 了,row为 1 之后,才是第二行的位置。依次类推就可以定位到每一个子 View 需要绘制的位置。
而 x 与 y 的值与计算逻辑,我们可以想象为需要绘制当前 View 的时候,当前画笔需要所在的位置。加上左右和上下的间距之后,我们通过这样的方式也可以实现 margin 的效果。还记得前文流式布局是怎么实现 margin 效果的吗?殊途同归的效果。
最后具体的 child.layout 反而是最简单的,只需要绘制子 View 本身的宽高即可。
三、单图片与四宫格的单独处理
一般来说我们需要单独的处理一张图片与四张图片的逻辑。包括测量与布局都需要单独的处理。
一张图片的时候,我们需要通过方法单独的指定图片的宽度与高度。而四张图片我们需要固定两行的高度即可。
public class AbstractNineGridLayout extends ViewGroup {

    private static final int MAX_CHILDREN_COUNT = 9;  //最大的子View数量
    private int horizontalSpacing = 20;  //每一个Item的左右间距
    private int verticalSpacing = 20;  //每一个Item的上下间距
    private boolean fourGphpridMode = true;  //是否支持四宫格模式
    private boolean singleMode = true;  //是否支持单布局模式
    private boolean singleModeScale = true;  //是否支持单布局模式按比例缩放
    private int singleWidth;
    private int singleHeight;

    private int itemWidth;
    private int itemHeight;


    @Override
    protected void onMeasure(int widthMeasureSpec, int heightMeasureSpec) {
        int heightMode = MeasureSpec.getMode(heightMeasureSpec);
        int widthSize = MeasureSpec.getSize(widthMeasureSpec) - getPaddingLeft() - getPaddingRight();
        int notGoneChildCount = getNotGoneChildCount();

        if (no编程客栈tGoneChildCount == 1 && singleMode) {
            itemWidth = singleWidth > 0 ? singleWidth : widthSize;
            itemHeight = singleHeight > 0 ? singleHeight : widthSize;
            if (itemWidth > widthSize && singleModeScale) {
                itemWidth = widthSize;  //单张图片先定宽度。
                itemHeight = (int) (widthSize * 1f / singleWidth * singleHeight);  //根据宽度计算高度
            }
        } else {
            //除了单布局模式,其他的都是指定的固定宽高
            itemWidth = (widthSize - horizontalSpacing * 2) / 3;
            itemHeight = itemWidth;
        }

        ...
    }

    /**
     * 设置单独布局的宽和高
     */
    public void setSingleModeSize(int w, int h) {
        if (w != 0 && h != 0) {
            this.singleMode = true;
            this.singleWidth = w;
            this.singleHeight = h;
        }
    }
}
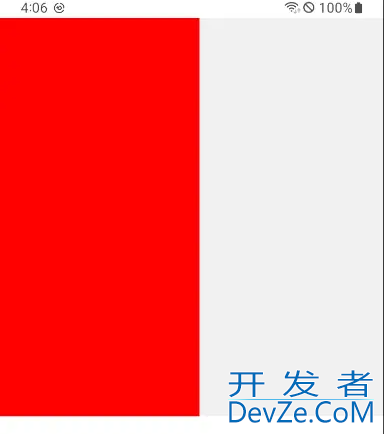
测量的时候我们对单布局进行测量,并且对超过宽度的一些布局做等比例的缩放。然后再测量父布局。
findViewById<AbstractNineGridLayout>(R.id.nine_grid).setSingleModeSize(dp2px(200f), dp2px(400f))
效果:
而如果是四宫格模式,我们好像也不需要重新测量,反正也是二行的高度,但是布局的时候我们需要处理一下,不然第三个子 View 的位置就会不对了。我们只需要修改x 与 y的计算方式,它们是根据行和列动态计算你的,那么修改行和列的计算方式即可。
    @Override
    protected void onLayout(boolean changed, int l, int t, int r, int b) {

        int childCount = getChildCount();
        int notGoneChildCount = getNotGoneChildCount();
        int position = 0;

        for (int i = 0; i < childCount; i++) {
            View child = getChildAt(i);
            if (child.getVisibility() == View.GONE) {
                continue;
            }

            int row = position / 3;    //当前子View是第几行(索引)
            int column = position % 3; //当前子View是第几列(索引)

            if (notGoneChildCount == 4 && fourGridMode) {
                row = position / 2;
                column = position % 2;
            }

            //当前需要绘制的光标的X与Y值
            int x = column * itemWidth + getPaddingLeft() + horizontalSpacing * column;
            int y = row * itemHeight + getPaddingTop() + verticalSpacing * row;

            child.layout(x, y, x + itemWidth, y + itemHeight);

            //最多只摆放9个
            position++;
            if (position == MAX_CHILDREN_COUNT) {
                break;
            }
        }

    }

    /**
     * 单独设置是否支持四宫格模式
     */
    public void setFourGridMode(boolean enable) {
        this.fourGridMode = enable;
    }
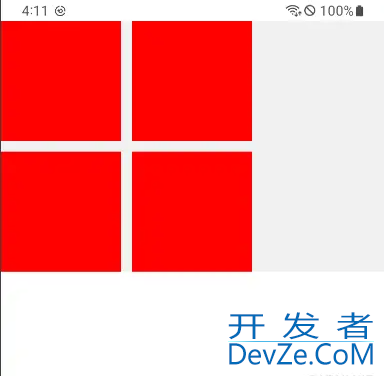
这样我们就可以支持四宫格的布局模式,效果如下:
到此,我们的九宫格控件大体上是完工了,但是还不够灵活,内部的子 View 都是我们自己 new 出来的,我们接下来就要暴露出去让其可以自定义布局。
四、自定义布局的抽取
如何把填充布局的逻辑抽取出来呢?一般分为两种思路:
- 每次初始化九宫格的时候就把九个布局全部添加进来,先测量布局了再说,然后通过暴露的方法隐藏多余的布局。
- 通过一个定义一个数据适配器Adapter,内部封装一些逻辑,让具体实现的类去完成具体的逻辑。
两种方法都可以,没有好坏之分。但是使用数据适配器的方案由于内部的View会少,性能会好那么一丢丢,总体来说差别不大。
4.1 先布局再隐藏的思路
一般我们在抽象的九宫格类中就需要暴露这两个重要方法,一个是填充子布局的,一个是填充数据并且隐藏多余的布局。
    //子类去实现-填充布局文件
    protected abstract void fillChildView();

    //子类去实现-对布局文件赋值数据(一般专门去给adapter去调用的)
    public abstract void renderData(T data);
例如我们的实现类:
    @Override
    protected void fillChildView() {
        inflateChildLayout(R.layout.item_image_grid);

        imageViews = findInChildren(R.id.iv_image, ImageView.class);
    }

    @Override
    public void renderData(List<ImageInfo> imageInfos) {

        setSingleModeSize(imageInfos.get(0).getImageViewWidth(), imageInfos.ge编程t(0).getImageViewHeight());

        setDisplayCount(imageInfos.size());

        for (int i = 0; i < imageInfos.size(); i++) {
            String url = imageInfos.get(i).getThumbnailUrl();

            ImageView imageView = imageViews[i];

            //使用自定义的Loader加载
            mImageLoader.onDisplayImage(getContext(), imageView, url);

            //点击事件
            setClickListener(imageView, i, imageInfos);
        }
    }
重点是填充的方法 inflateChildLayout 分为两种情况,一种是布局都一样的情况,一种是根据索引填充不同的布局情况。
    /**
     * 可以为每一个子布局加载对应的布局文件(不同的文件)
     */
    protected void inflateChildLayoutCustom(ViewGetter viewGetter) {
        removeAllViews();
        for (int i = 0; i < MAX_CHILDREN_COUNT; i++) {
            addView(viewGetter.getView(i));
        }
    }

    /**
     * 一般用这个方法填充布局,每一个小布局的布局文件(相同的文件)
     */
    protected void inflateChildLayout(int layoutId) {
        removeAllViews();
        for (int i = 0; i < MAX_CHILDREN_COUNT; i++) {
            LayoutInflater.from(getContext()).inflate(layoutId, this);
        }
    }
而我们设置数据的方法中调用的 setDisplayCount 方法则是隐藏多余的控件的。
    /**
     * 设置显示的数量
     */
    public void setDisplayCount(int count) {
        int childCount = getChildCount();
        for javascript(int i = 0; i < childCount; i++) {
            getChildAt(i).setVisibility(i < count ? VISIBLE : GONE);
        }
    }
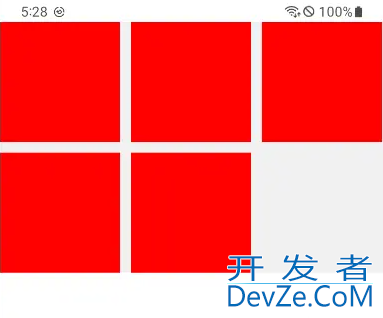
效果:
4.2 数据适配器的思路
而使用数据适配器的方案,就无需每次上来就先填充9个子布局,而是通过Adapter动态的配置当前需要填充的数量,并且创建对应的子 View 和绑定对应的子 View 的数据。
听起来是不是很像RV的Apdater,没错就是参考它的实现方式。
我们先创建一个基类的Adapter:
    public static abstract class编程客栈 Adapter {

        //返回总共子View的数量
        public abstract int getItemCount();

        //根据索引创建不同的布局类型,如果都是一样的布局则不需要重写
        public int getItemViewType(int position) {
            return 0;
        }

        //根据类型创建对应的View布局
        public abstract View onCreateItemView(Context context, ViewGroup parent, int itemType);

        //可以根据类型或索引绑定数据
        public abstract void onBindItemView(View itemView, int itemType, int position);

    }
然后我们需要暴露一个方法,设置Adapter,设置完成之后我们就可以添加对应的布局了。
 public void setAdapter(Adapter adapter) {
        mAdapter = adapter;
        inflateAllViews();
    }

    private void inflateAllViews() {
        removeAllViewsInLayout();

        if (mAdapter == null || mAdapter.getItemCount() == 0) {
            return;
        }

        int displayCount = Math.min(mAdapter.getItemCount(), MAX_CHILDREN_COUNT);

        //单布局处理
        if (singleMode && displayCount == 1) {
            View view = mAdapter.onCreateItemView(getContext(), this, -1);
            addView(view);
            requestLayout();
            return;
        }

        //多布局处理
        for (int i = 0; i < displayCount; i++) {
            int itemType = mAdapter.getItemViewType(i);

            View view = mAdapter.onCreateItemView(getContext(), this, itemType);
            view.setLayoutParams(new ViewGroup.LayoutParams(LayoutParams.MATCH_PARENT, LayoutParams.MATCH_PARENT));
            addView(view);
        }
        requestLayout();
    }
需要注意的是我们再测量的布局的时候,如果没有 Adpter 或者没有子布局的时候,我们需要单独处理一下九宫格ViewGroup的高度。
    @Override
    protected void onMeasure(int widthMeasureSpec, int heightMeasureSpec) {

        int heightMode = MeasureSpec.getMode(heightMeasureSpec);
        int widthSize = MeasureSpec.getSize(widthMeasureSpec) - getPaddingLeft() - getPaddingRight();
        int notGoneChildCount = getNotGoneChildCount();

        if (mAdapter == null || mAdapter.getItemCount() == 0 || notGoneChildCount == 0) {
            setMeasuredDimension(widthSize, 0);
            return;
        }

        ...
    }
那么如何绑定布局呢?在我们 onLayout完成之后我们就可以绑定数据了。
 @Override
    protected void onLayout(boolean changed, int l, int t, int r, int b) {

        ...

        performBind();

    }

    /**
     * 布局完成之后绑定对应的数据到对应的ItemView
     */
    private void performBind() {

        if (mAdapter == null || mAdapter.getItemCount() == 0) {
            return;
        }

        post(() -> {

            for (int i = 0; i < getNotGoneChildCount(); i++) {
                int itemType = mAdapter.getItemViewType(i);
                View view = getChildAt(i);

                mAdapter.onBindItemView(view, itemType, i);
            }

        });

    }
具体的实现就是在 Adapter 中实现了。
例如我们创建一个最简单的图片九宫格适配器。
public class ImageNineGridAdapter extends AbstractNineGridLayout.Adapter {
    private List<String> mDatas = new ArrayList<>();

    public ImageNineGridAdapter(List<String> data) {
        mDatas.addAll(data);
    }

    @Override
    public int getItemCount() {
        return mDatas.size();
    }

    @Override
    public View onCreateItemView(Context context, ViewGroup parent, int itemType) {
        return LayoutInflater.from(context).inflate(R.layout.item_img, parent, false);
    }

    @Override
    public void onBindItemView(View itemView, int itemType, int position) {

        itemView.findViewById(R.id.iv_img).setBackgroundColor(Color.RED);
    }

}
在Activity中设置对应的数据适配器:
     findViewById<AbstractNineGridLayout>(R.id.nine_grid).run {
            setSingleModeSize(dp2px(200f), dp2px(400f))
            setAdapter(ImageNineGridAdapter(imgs))
        }
我们就能得到同样的效果:
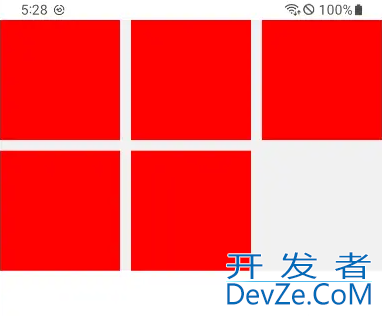
如果想九宫格内使用不同的布局,不同的索引展示不同的逻辑,都可以很方便的实现:
public class ImageNineGridAdapter extends AbstractNineGridLayout.Adapter {
    private List<String> mDatas = new ArrayList<>();

    public ImageNineGridAdapter(List<String> data) {
        mDatas.addAll(data);
    }

    @Override
    public int getItemViewType(int position) {
        if (position == 1) {
            return 10;
        } else {
            return 0;
        }
    }

    @Override
    public int getItemCount() {
        return mDatas.size();
    }

    @Override
    public View onCreateItemView(Context context, ViewGroup parent, int itemType) {
        if (itemType == 0) {
            return LayoutInflater.from(context).inflate(R.layout.item_img, parent, false);
        } else {
            return LayoutInflater.from(context).inflate(R.layout.item_img_icon, parent, false);
        }

    }

    @Override
    public void onBindItemView(View itemView, int itemType, int position) {

        if (itemType == 0) {
            itemView.findViewById(R.id.iv_img).setBackgroundColor(position == 0 ? Color.RED : Color.YELLOW);
        }

    }

}
效果:
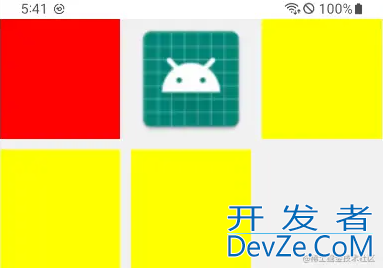
到这里我们的控件就基本上能实现大部分业务需求了,接下来我会对一些属性与配置进行抽取,并开源上传到云端。
到此这篇关于android自定义ViewGroup实现九宫格布局的文章就介绍到这了,更多相关Android ViewGroup九宫格布局内容请搜索我们以前的文章或继续浏览下面的相关文章希望大家以后多多支持我们!


 加载中,请稍侯......
精彩评论