springAI结合ollama简单实现小结
目录
- 一、ollama安装下载
- 1、官方下载地址
- 2、修改模型的安装地址
- 3、模型参考
- 二、springAI的使用
- 1、环境准备
- 2、添加依赖
- 3、编写一个公共的调用组件
- 4、调用接口
- 5、测试调用
- 6、前端使用fetch处理流式数据
一、ollama安装下载
1、官方下载地址
https://ollama.com/
2、修改模型的安装地址
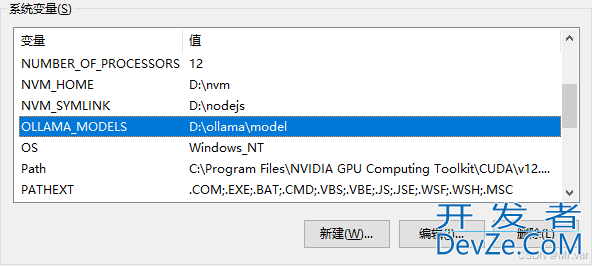
Ollama的模型会占用较大的磁盘空间,默认会在C盘用户文件夹下的.ollama/models文件夹中,可以配置环境变量OLLAMA_MODELS,设置为指定的路径:
3、模型参考
https://ollama.com/library
下载命令:
# 电脑性能好的可以装一个高版本的,例如4b、7b等
ollama run qwen:0.5b

# 查看已安装的模型
ollama list
二、springAI的使用
1、环境准备
jdk17、springboot3.0+
2、添加依赖

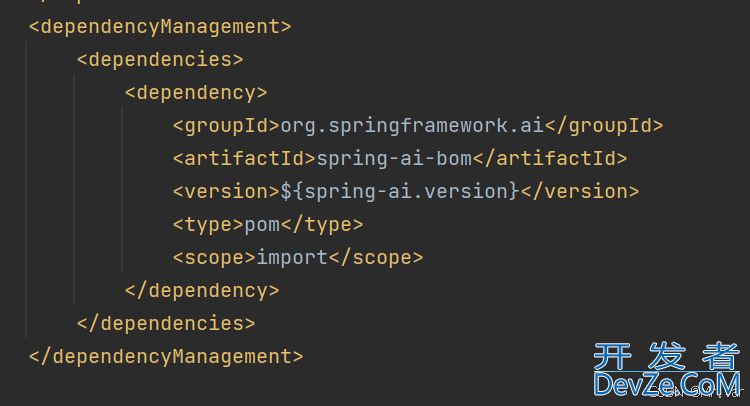

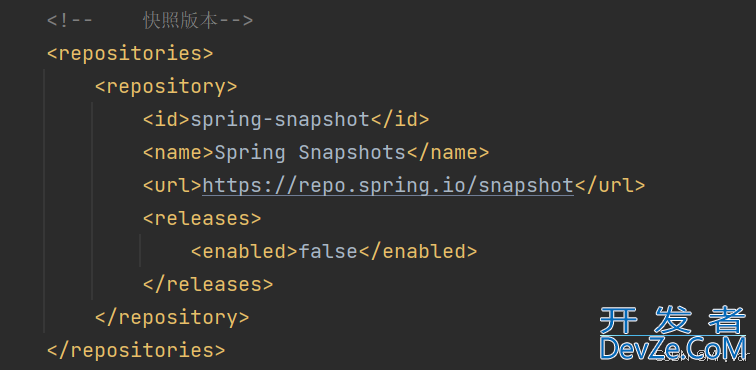
这里贴出完整pom:
<?XML version="1.0" encoding="UTF-8"?>
<project xmlns="http://maven.apache.org/POM/4.0.0" xmlns:xsi="http://www.w3.org/2001/XMLSchema-instance"
         xsi:schemaLocation="http://maven.apache.org/POM/4.0.0 https://maven.apache.org/xsd/maven-4.0.0.xsd">
    <modelVersion>4.0.0</modelVersion>
    <parent>
        <groupId>org.springframework.boot</groupId>
        <artifactId>spring-boot-starter-parent</artifactId>
        <version>3.3.2</version>
        <relativePath/> <!-- lookup parent from repository -->
    </parent>
    <groupId>com.example</groupId>
    <artifactId>ollamaTest</artifactId>
    <version>0.0.1-SNAPSHOT</version>
    <name>spring-ai-ollama</name>
    <description>spring-ai-ollama</description>
    <properties>
        <Java.version>17</java.version>
        <!--        快照版本-->
        <spring-ai.version>1.0.0-SNAPSHOT</spring-ai.version>
    </properties>
    <dependencies>
        <dependency>
            <groupId>org.springframework.boot</groupId>
            <artifactId>spring-boot-starter-web</artifactId>
        </dependency>

        <dependency>
            <groupId>org.springframework.ai</groupId>
            <artifactId>spring-ai-ollama-spring-boot-starter</artifactId>
        </dependency>

        <dependency>
            <group编程Id>org.springframework.boot</groupId>
            <artifactId>spring-boot-devtools</artifactId>
            <scope>runtime</scope>
            <optional>true</optional>
        </dependency>
        <dependency>
            <groupId>org.projectlombok</groupId>
            <artifactId>lombok</artifactId>
            <optional>true</optional>
        </dependency>
        <dependency>
            <groupId>org.springframework.boot</groupId>
            <artifactId>spring-boot-starter-test</artifactId>
            <scope>test</scope>
        </dependency>
    </dependencies>
    <dependencyManagement>
        <dependencies>
            <dependency>
                <groupId>org.springframework.ai</groupId>
                <artifactId>spring-ai-bom</artifactId>
                <version>${spring-ai.version}</version>
                <type>pom</type>
                <scope>import</scope>
            </dependency>
        </dependencies>
    </dependencyManagement>

    <build>
        <plugins>
            <plugin>
                <groupId>org.springframework.boot</groupId>
                <artifactId>spring-boot-maven-plugin</artifactId>
                <configuration>
                    <excludes>
                        <exclude>
                            <groupId>org.projectlombok</groupId>
                            <artifactId>lombok</artifactId>
                        </exclude>
                    </excludes>
                </configuration>
            </plugin>
        </plugins>
    </build>
    <!--    快照版本-->
    <repositories>
        <repository>
            <id>spring-snapshot</id>
            <name>Spring Snapshots</name>
            <url>https://repo.spring.io/snapshot</url>
            <releases>
                <enabled>false</enabled>
            </releases>
        </repository>
    </repositories>
</project>
3、编写一个公共的调用组件
/**
 * 存入上下文信息,并调用接口进行聊天
 */
@Component
public class Completion {
    @Resource
    private OllaMAChatModel aiClient;

    /**
     * 最大消息记录数
     */
    private final static Integer MAX_SIZE = 10;

    /**
     * 消息记录
     */
    private List<Message> messages = new ArrayList<>();


    /**
     * 初始化存入系统消息
     */
    @PostConstruct
    private void addSystemMessage() {
        String message = "李白(701年2月28日—762年12月),字太白,号青莲居士,出生于蜀郡绵州昌隆县(今四川省绵阳市江油市青莲镇),一说出生于西域碎叶 ,祖籍陇西成纪(今甘肃省秦安县)。唐朝伟大的浪漫主义诗人,凉武昭王李暠九世孙 。" +
                "为人爽朗大方,乐于交友,爱好饮酒作诗,名列“酒中八仙” 。曾经得到唐玄宗李隆基赏识,担任翰林供奉,赐金放还后,游历全国,先后迎娶宰相许圉师、宗楚客的孙女。唐肃宗李亨即位后,卷入永王之乱,流放夜郎,辗转到达当涂县令李阳冰家。上元二年,去世,时年六十二 。" +
                "著有《李太白集》,代表作有《望庐山瀑布》《行路难》《蜀道难》《将进酒》《早发白帝城》《黄鹤楼送孟浩然之广陵》等。李白所作词赋,就其开创意义及艺术成就而言,享有极为崇高的地位,后世誉为“诗仙”,与诗圣杜甫并称“李杜”。";
        Message systemMessage = new SystemMessage(message);
        messages.add(systemMessage);
    }

    /**
     * 存储用户发送的消息
     */
    private void addUserMessage(String message) {
        Message userMessage = new UserMessage(message);
        messages.add(userMessage);
    }

    /**
     * 存储AI回复的消息
     */
    private void addAssistantMessage(String message) {
        Message assistantMessage = new AssistantMessage(message);
        messages.add(assistantMessage);
    }

    /**
     * 聊天接口
     */
    public String chat(String message) {
        addUserMessage(message);
        String result = aiClient.call(new Prompt(messages)).getResult().getOutphttp://www.devze.comut().getContent();
        addAssistantMessage(result);
        update();
        return result;
    }

    /**
     * 流式聊天接口
     */
    public Flux<String> chatStream(String message) {
        addUserMessage(message);

        StringBuffer fullReply = new StringBuffer();

        Flux<String> fluxResult = aiClient.stream(new Prompt(messages))
                .flatMap(response -> {
                    String reply = response.getResult().getOutput().getContent();

                    //拼接回复内容
                    fullReply.append(reply);

                    return Flux.just(reply);
                })
                .doOnComplete(() -> {
                    //监听流式响应完成,完整回复存入消息记录
                    System.out.println(fullReply);
                    addAssistantMessage(String.valueOf(fullReply));
                });

        update();
   gFlwEGoW     return fluxResult;
    }

    /**
     * 更新消息记录
     */
    private void update() {
        if (messages.size() > MAX_SIZE) {
            messages = messages.subList(messages.size() - MAX_SIZE, messages.size());
        }
    }
}
4、调用接口
@RestController
@RequestMapping("/ollama")
public class OllamaController {

    @Resource
    private OllamaChatModel ollamaChatModel;

    /**
     * 简单调用
     */
    @PostMapping(value = "/ai/ask")
    public Object ask(String msg) {
        String called = ollamaChatModel.call(msg);
        System.out.println(called);
        return called;
    }

    /***
     * 流式方式
     */
    @PostMapping(value = "/stream", produces = MediaType.TEXT_EVENT_STREAM_VALUE)
   php public Flux<String> stream(String msg) {
        return ollamaChatModel.stream(msg).flatMapSequential(Flux::just);
    }

    private final Completion completion;

    public OllamaController(Completion completion) {
        this.completion = completion;
    }

    /**
     * 分析上下文聊天
     */
    @PostMapping("/chat")
    public String chat(String message) {
        return completion.chat(message);
    }

    /**
     * 流式上下文
     */
    @PostMapping(value = "/chatStream", produces = MediaType.TEXT_EVENT_STREAM_VALUE)
    public Flux<String> chatStream(@RequestBody String message) {
        return completion.chatStream(message);
    }
}
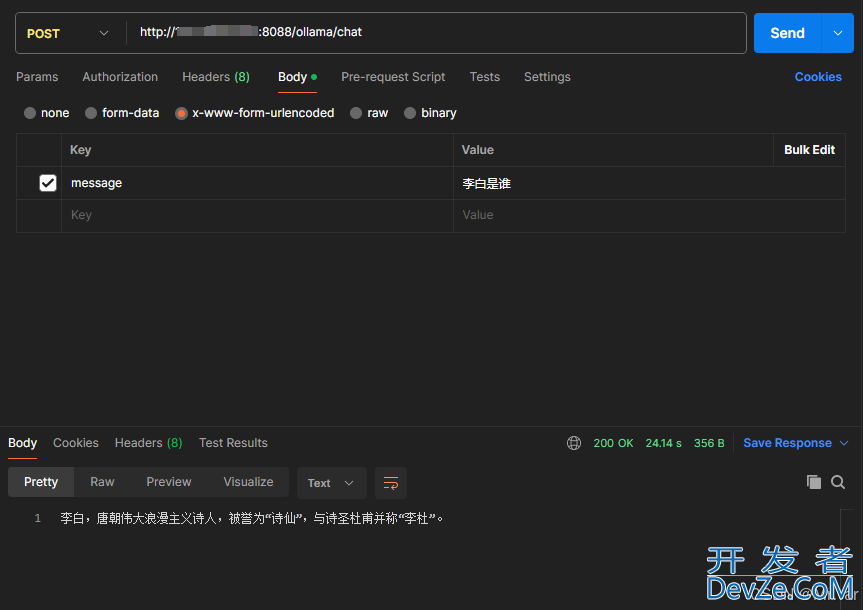
5、测试调用
6、前端使用fetch处理流式数据
<!DOCTYPE html>
<html>
	<head>
		<meta name="viewport" content="width=device-width, initial-scale=1.0">
		<title>Test Page</title>
	</head>
	<body>
		<input type="text" id="inputData">
		<button onclick="sendRequest()">发送</button>
		<div id="output"></div>
		<script>
			const s = document.getElementById('output'); //获取元素ID

			function sendRequest(msg) {
				const inputData = document.getElementById('inputData').value;

				s.innerText += (inputData + "\n");

				// 发送 POST 请求
				fetch('http://localhost:8088/ollama/chatStream', {
					method: "POST",
					body: jsON.stringify({
						"message": inputData
					}),
					timeout: 0,
					dataType: "text/event-stream",
					headers: {
						"Content-Type": "application/json"
					},
				}).then(response => {
					// 检查响应是否成功
					if (!response.ok) {
						throw new Error('Network response was not ok');
					}
					// 返回一个可读流
					return response.body;
				}).then(body => {
					const reader = body.getReader();
					// 读取数据流
					function read() {
						return reader.read().then(({
							done,
	js						value
						}) => {
							// 检查是否读取完毕
							if (done) {
								console.log('已传输完毕');
								s.innerText += "\n";
								return;
							}
							// 处理每个数据块
							// console.log('收到的数据:', value);
							let data = new TextDecoder().decode(value);

							//处理data:字样,格式化流数据
							s.innerText += data.replace(/data:/g, "").replace(/\n/g, "");;

							// 继续读取下一个数据块
							read();
						});
					}
					// 开始读取数据流
					read();
				}).catch(error => {
					console.error('Fetch error:', error);
				});
			}
		</script>
	</body>

</html>
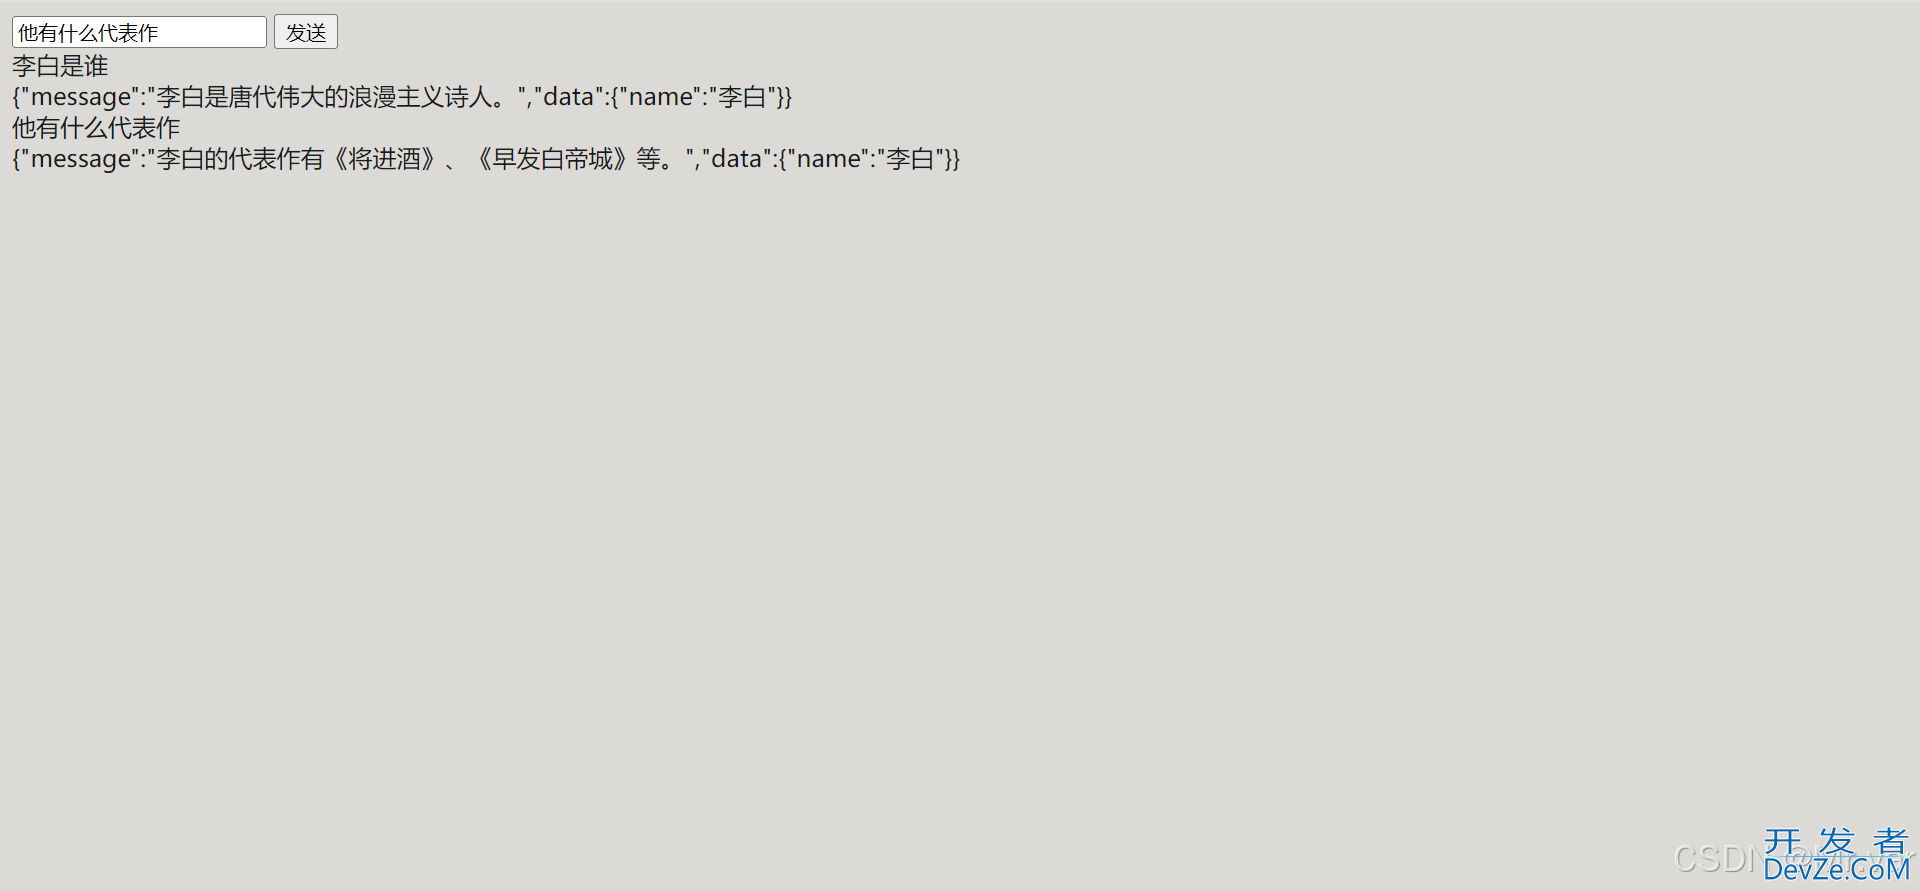
到此这篇关于springAI结合ollama简单实现小结的文章就介绍到这了,更多相关springAI结合ollama内容请搜索编程客栈(www.devze.com)以前的文章或继续浏览下面的相关文章希望大家以后多多支持编程客栈(www.devze.com)!


 加载中,请稍侯......
精彩评论