Python结合Flask框架构建一个简易的远程控制系统
目录
- 1.概述
- 2.功能使用
- 系统命令执行
- 实时屏幕监控
- 3. BUG修复过程
- 1. Authorization认证失败
- 2. 截图质量差
- 3. 系统命令执行延迟
- 4. 运行效果
- 5.相关源码
- 6.总结
1.概述
随着信息化进程的加速,远程控制和系统管理工具越来越受到关注。尤其在企业环境中,管理员需要通过远程方式对计算机系统进行管理和维护。本文将详细介绍如何使用python与Flask框架构建一个简易的远程控制系统。这个系统不仅能够远程执行操作命令(如关机、重启、锁屏等),还具备实时屏幕截图功能,适合用于学习与开发小型远程控制工具。
通过实现这一功能,我们不仅能够深入理解Flask的使用,还能实践一些与操作系统交互的命令执行技术。本文还会讲解开发过程中遇到的一些技术难题,并分享如何进行修复和优化。
2.功能使用
双击运行exe文件运行后台服务,在浏览器中访问服务器中ip地址及固定端口,即可实现远程控制系统功能。
系统命令执行
本远程控制系统的核心功能是通过HTTP请求来远程执行系统命令。具体包括以下操作:
关机与重启:
- 使用Windows自带的shutdown命令实现关机和重启功能。
- shutdown /s /t 0:立即关机。
- shutdown /r /t 0:立即重启。
锁屏:通过rundll32.exe user32.dll,LockWorkStation命令锁定当前用户的屏幕。
清空回收站:使用PowerShell命令Clear-RecycleBin清空系统回收站。
禁用防火墙:通过REG ADD命令修改注册表,禁用Windows防火墙服务。
删除休眠文件:通过powercfg -h off命令关闭系统休眠功能,从而删除休眠文件。
延迟window更新:通过更改注册表更改windows延迟最大天数到54321天来无限推迟windows更新,重启后生效。
win10右键/win11右键切换:无缝切换win11右键菜单风格以及恢复win10右键风格。
实时屏幕截图:使用Pillow库的ImageGrab.grab()方法截取当前屏幕,并通过Flask返回给客户端。
关闭代理:
- 使用VPN后电脑开机浏览器网页访问请求失败,可以试着点这个功能修复。
- 每个功能都通过一个独立的路由实现,用户只需要点击对应按钮,系统就会在后台执行命令,并反馈操作结果。
实python时屏幕监控
通过Flask,我们实现了一个实时的屏幕监控功能。每3秒,客户端页面会请求一次服务器,获取当前屏幕的截图,并更新页面显示。这一功能对于远程桌面控制、设备监控等场景具有很大的应用潜力。
截图功能的实现依赖于Pillow库的ImageGrab.grab()方法,这是一个强大的图像捕获工具,适合在Windows系统中截取当前屏幕。为了减少服务器的负担和网络带宽的压力,我们可以考虑对截图进行压缩处理,尤其是在高分辨率的环境下。
3. BUG修复过程
在开发过程中,我们遇到了一些技术挑战,其中最主要的几个问题如下:
1. Authorization认证失败
在实现API的认证时,我们通过在HTTP请求的Authorization头部传递API密钥进行验证。初步实现时,认证机制似乎工作正常,但我们发现有时即使API密钥正确,某些请求仍然无法通过验证。经检查,问题出在浏览器的缓存机制上。为了避免缓存带来的问题,我们修改了前端代码,在每次请求时动态更新请求URL(通过添加时间戳),确保每次请求都是最新的。
2. 截图质量差
在实现屏幕截图功能时,我们发现直接返回截图时图片质量较差,尤其是在高分辨率屏幕上。为了解决这个问题,我们对图像进行无损压缩,以保持较高的图像质量,同时又不占用过多的带宽。
修复代码:
image.save(buffer, format='PNG') # 无损PNG格式
通过这种方式,图像的质量得到了有效提升,且不会对性能造成过大影响。
3. 系统命令执行延迟
在执行系统命令时,尤其是涉及到重启、关机等操作,subprocess.run()方法可能会存在一定的延迟。这主要是因为执行这些命令会启动新的进程,导致主进程暂时阻塞。为了解决这个问题,我们采用了异步方式执行这些命令,避免了用户在执行命令时界面的卡顿。
修复代码:
subprocess.Popen(command, shell=True) # 异步执行命令
这种方式提高了响应速度,确保了系统在执行命令时能够流畅地响应其他请求。
4. 运行效果
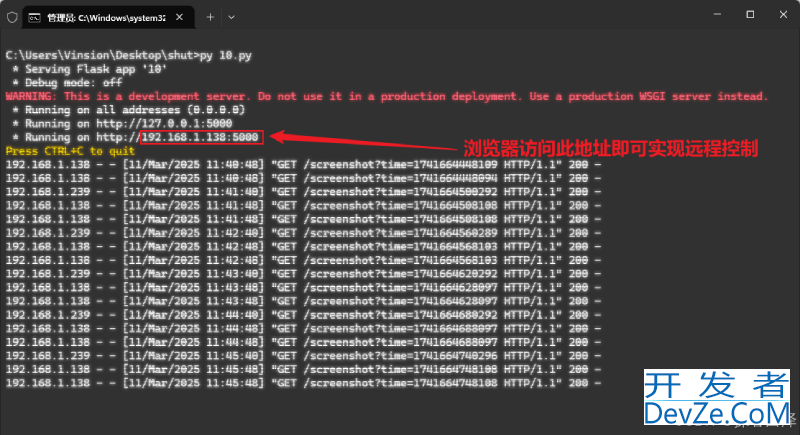
服务端开启效果

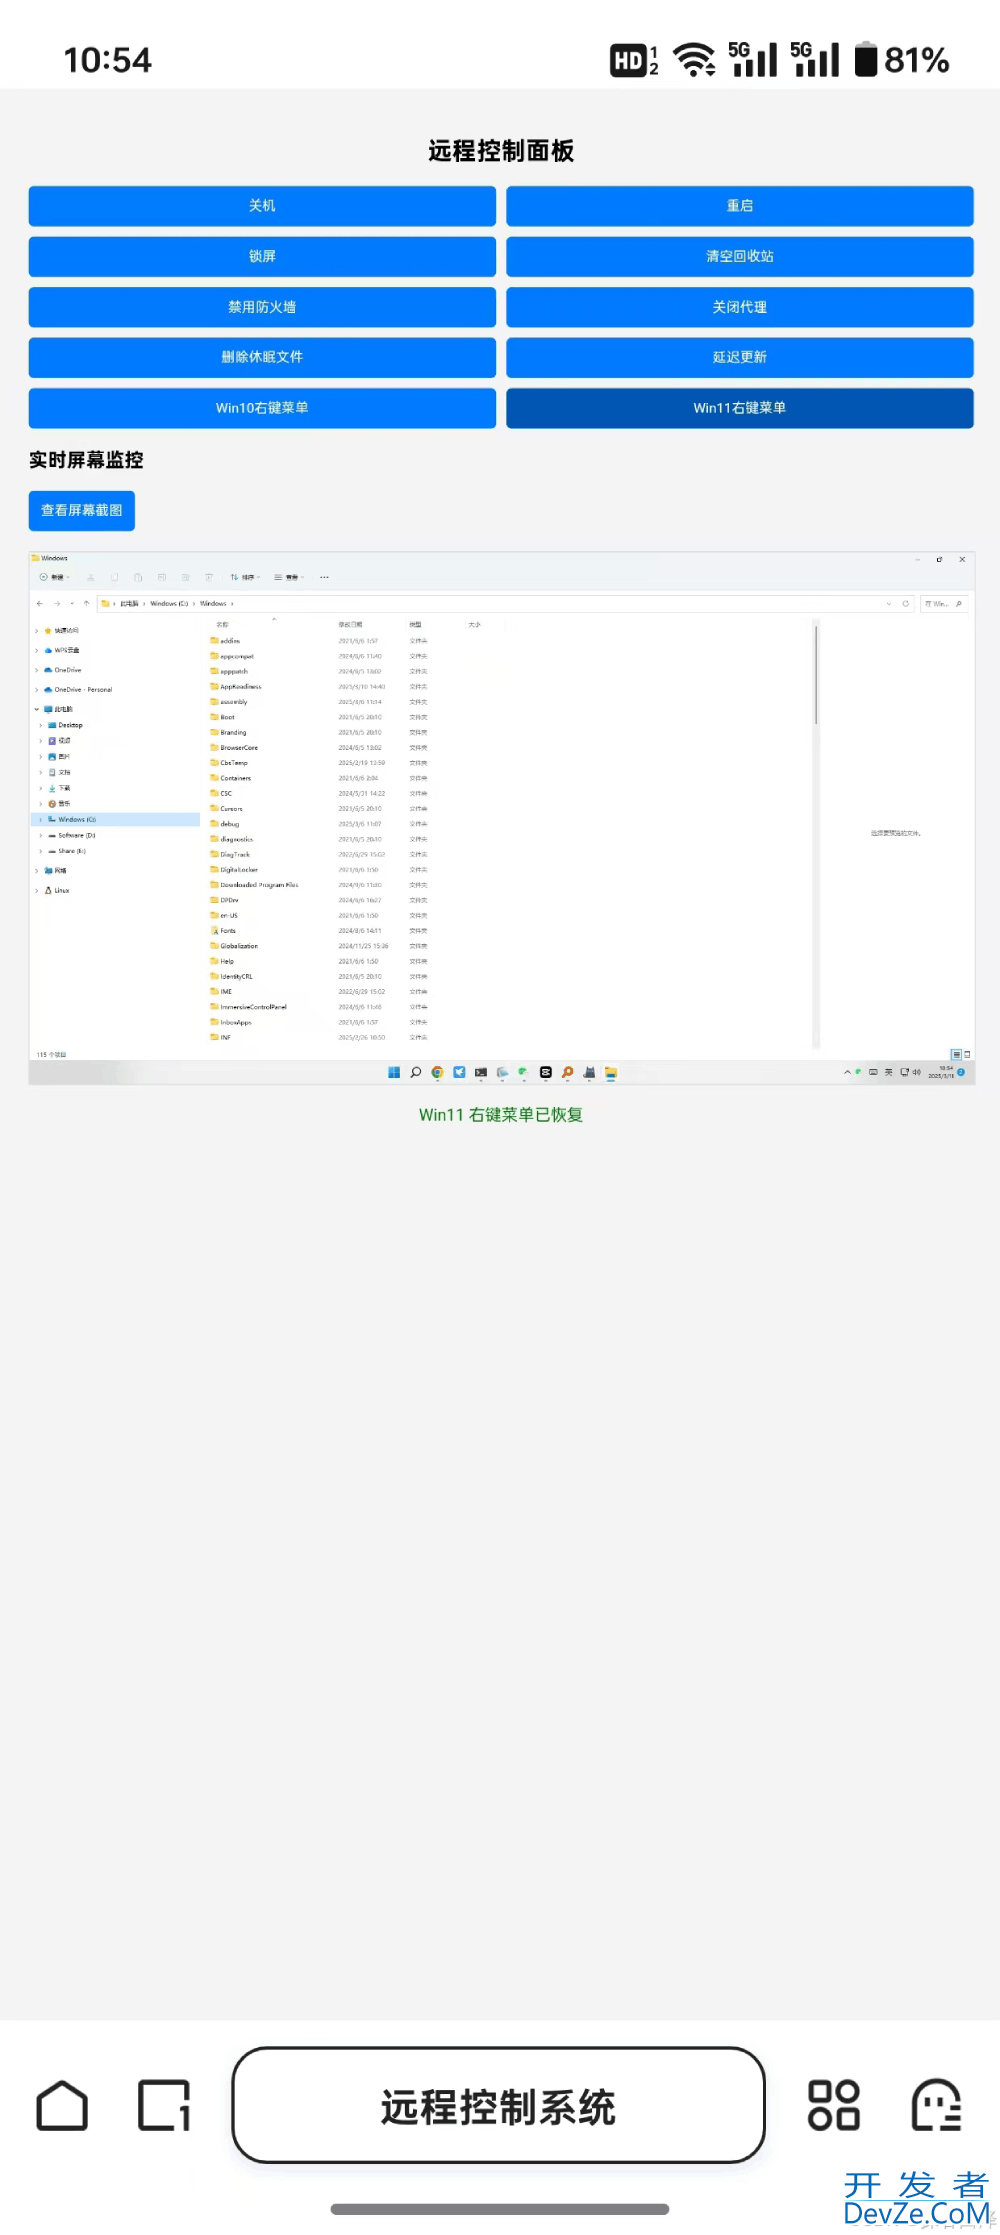
手机浏览器端效果:

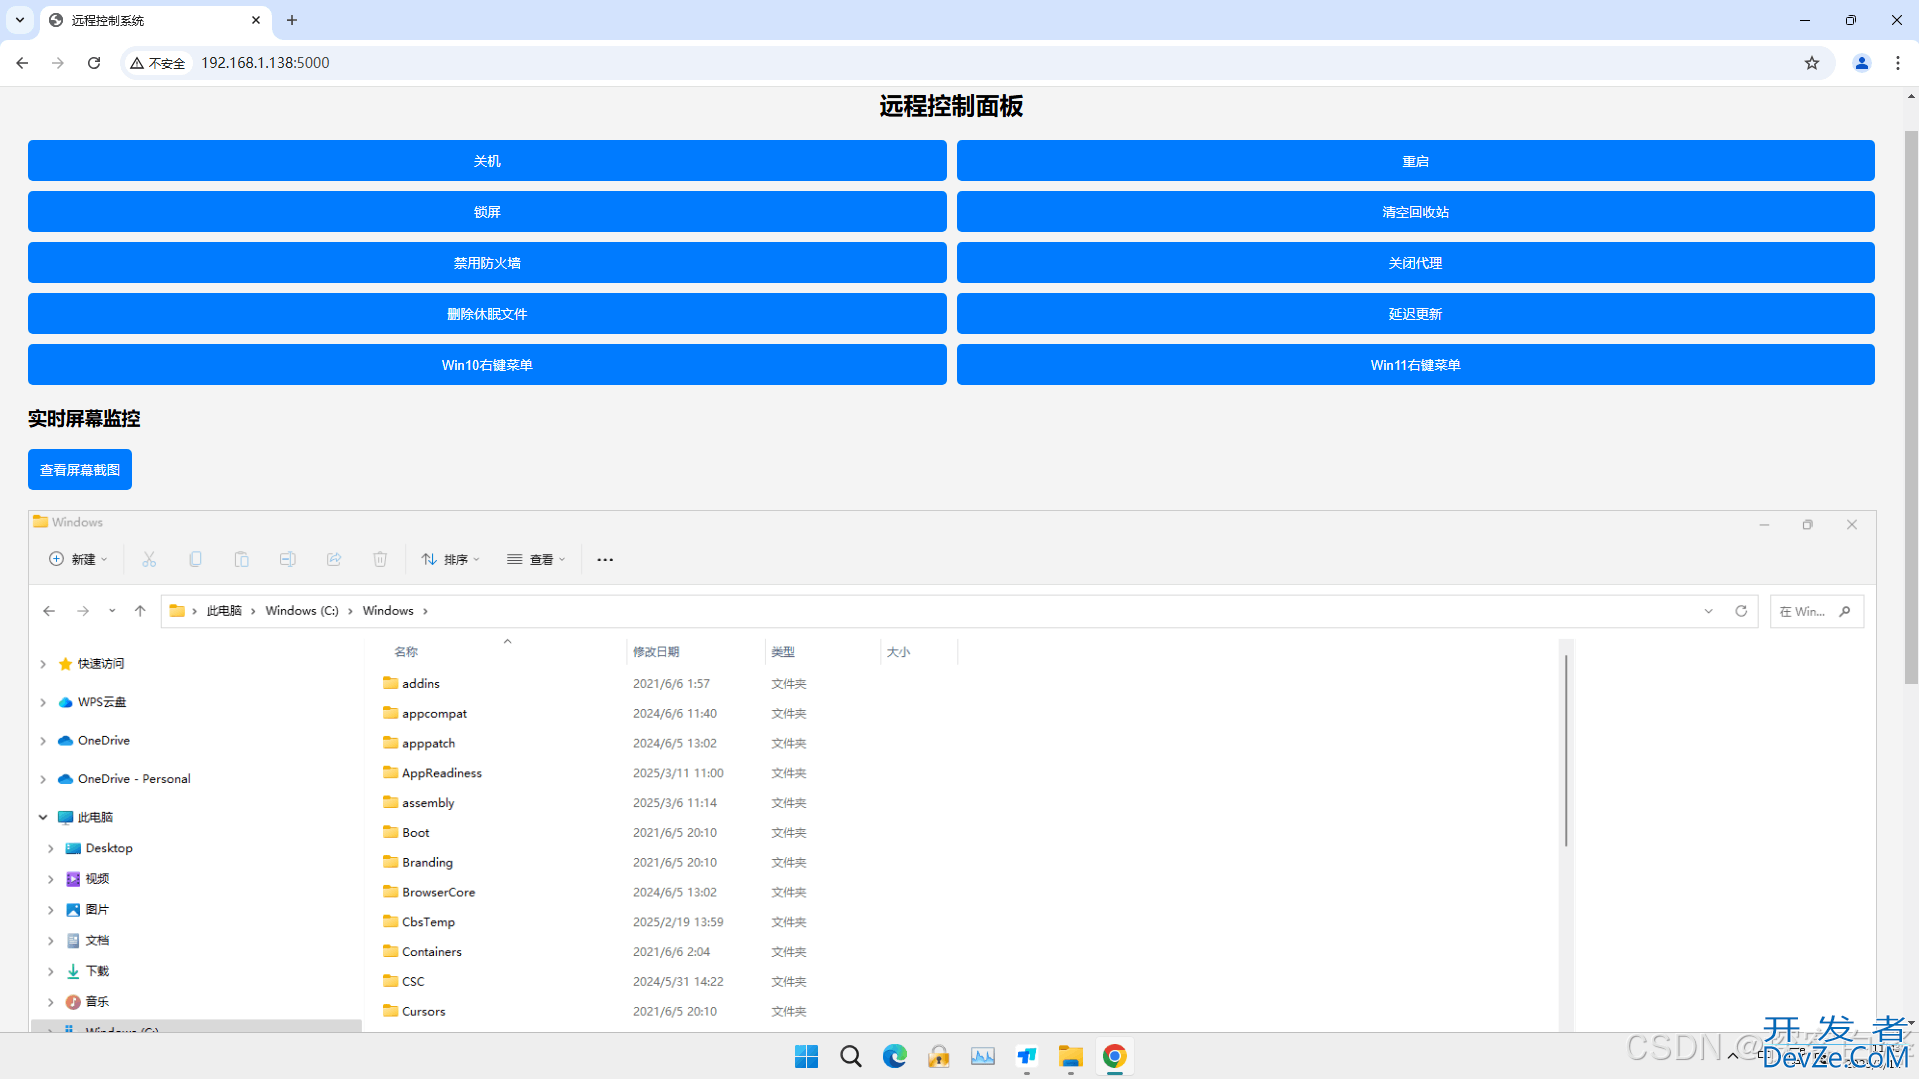
PC端浏览器效果:

5.相关源码
from flask import Flask, render_template_string, request, jsonify, send_file
import subprocess
import os
import io
from PIL import ImageGrab, Image

app = Flask(__name__)

API_KEY = "your_secure_key_here"  # 替换成你的密钥

html_PAGE = """
<!DOCTYPE html>
<html lang="zh">
<head>
    <meta charset="UTF-8">
    <title>远程控制系统</title>
    <style>
        body { font-family: Arial, sans-serif; padding: 20px; background: #f4f4f4; }
        h2 { text-align: center; }
        .button-container { display: grid; grid-template-columns: repeat(2, 1fr); gap: 10px; margin-bottom: 20px; }
        button { padding: 12px; border: none; background: #007BFF; color: white; border-radius: 5px; cursor: pointer; }
        button:hover { background: #0056b3; }
        #status { text-align: center; margin-top: 20px; color: green; }
        #screenshot { display: block; m编程客栈argin: 20px auto; max-width: 100%; border: 1px solid #ccc; }
    </style>
</head>
<body>
    <h2>远程控制面板</h2>
    <div class="button-container">
        <button onclick="sendCommand('shutdown')">关机</button>
        <button onclick="sendCommand('reboot')">重启</button>
        <button onclick="sendCommand('lock_screen')">锁屏</button>
        <button onclick="sendCommand('clear_recycle_bin')">清空回收站</button>
        <button onclick="sendCommand('disable_firewall')">禁用防火墙</button>
        <button onclick="sendCommand('disable_proxy')">关闭代理</button>
        <button onclick="sendCommand('disable_hibernation')">删除休眠文件</button>
        <button onclick="sendCommand('delay_windows_update')">延迟更新</button>
        <button onclick="sendCommand('change_win10_context_menu')">Win10右键菜单</button>
        <button onclick="sendCommand('restore_win11_context_menu')">Win11右键菜单</button>
    </div>
    <h3>实时屏幕监控</h3>
    <button onclick="refreshScreenshot()">查看屏幕截图</button>
    <img id="screenshot" src="" alt="Python结合Flask框架构建一个简易的远程控制系统">
    <p id="status"></p>

    <script&编程客栈gt;
        function sendCommand(action) {
            fetch('/' + action, {
                method: 'POST',
                headers: { 'Authorization': 'Bearer your_secure_key_here' }
            })
            .then(response => response.json())
            .then(data => document.getElementById("status").innerText = data.message)
            .catch(() => document.getElementById("status").innerText = "请求失败");
        }

        function refreshScreenshot() {
            const img = document.getElementById('screenshot');
            img.src = '/screenshot?time=' + new Date().getTime();  // 防止缓存
        }

        setInterval(refreshScreenshot, 3000);  // 每3秒自动刷新截图
        window.onload = refreshScreenshot;    // 页面加载时刷新截图
    </script>
</body>
</html>
"""

# ----------------- 安全认证 -----------------
def check_auth():
    return request.headers.get("Authorization", "") == f"Bearer {API_KEY}"

# ----------------- 系统控制命令 -----------------
@app.route('/')
def home():
    return render_template_string(HTML_PAGE)

@app.route('/shutdown', methods=['POST'])
def shutdown():
    return run_command("shutdown /s /t 0", "关机命令已执行")

@app.route('/reboot', methods=['POST'])
def reboot():
    return run_command("shutdown /r /t 0", "重启命令已执行")

@app.route('/lock_screen', methods=['POST'])
def lock_screen():
    return run_command("rundll32.exe user32.dll,LockWorkStation", "锁屏命令已执行")

@app.route('/clear_recycle_bin', methods=['POST'])
def clear_recycle_bin():
    return run_command('powershell -Command "Clear-RecycleBin -Confirm:$false"', "回收站已清空")

@app.route('/disable_firewall', methods=['POST'])
def disable_firewall():
    return run_command('REG ADD "HKEY_LOCAL_MACHINE\\SYSTEM\\CurrentControlSet\\services\\mpssvc" /v Start /t REG_dwORD /d 4 /f', "防火墙已禁用")

@app.route('/disable_proxy', methods=['POST'])
def disable_proxy():
    return run_command('REG ADD "HKEY_CURRENT_USER\\Software\\Microsoft\\Windows\\CurrentVersion\\Internet Settings" /v ProxyEnable /t REG_DWORD /d 0 /f', "全局代理已关闭")

@app.route('/disable_hibernation', methods=['POST'])
def disable_hibernation():
    return run_command("powercfg -h off", "休眠文件已删除")

@app.route('/delay_windows_update', methods=['POST'])
def delay_windows_update():
    cmd = 'reg add "HKEY_LOCAL_MACHINE\\SOFTWARE\\Microsoft\\WindowsUpdate\\UX\\Settings" /v "FlightSettingsMaxPauseDays" /t REG_DWORD /d 54321 /f'
    return run_command(cmd, "Windows 更新已延迟")

@app.route('/change_win10_context_menu', methods=['POST'])
def change_win10_context_menu():
    cmd = 'reg add "HKCU\\Software\\Classes\\CLSID\\{86ca1aa0-34aa-4e8b-a509-50c905bae2a2}\\InprocServer32" /f /ve & taskkill /f /im explohttp://www.devze.comrer.exe & start explorer.exe'
    return run_command(cmd, "Win10 右键菜单已更改")

@app.route('/restore_win11_context_menu', methods=['POST'])
def restore_win11_context_menu():
    cmd = 'reg delete "HKCU\\Software\\Classes\\CLSID\\{86ca1aa0-34aa-4e8b-a509-50c905bae2a2}" /f & taskkill /f /im explorer.exe & start explorer.exe'
    return run_command(cmd, "Win11 右键菜单已恢复")

# ----------------- 截http://www.devze.com图接口 (无压缩) -----------------
@app.route('/screenshot')
def screenshot():
    try:
        image = ImageGrab.grab()
        buffer = io.BytesIO()
        image.save(buffer, format='PNG')  # 无损PNG格式
        buffer.seek(0)
        return send_file(buffer, mimetype='image/png')
    except Exception as e:
        return jsonify({"message": f"截图失败: {str(e)}"}), 500

# ----------------- 命令执行 -----------------
def run_command(command, success_message):
    if not check_auth():
        return jsonify({"message": "未授权"}), 401
    try:
        subprocess.run(command, shell=True, check=True)
        return jsonify({"message": success_message}), 200
    except Exception as e:
        return jsonify({"message": f"操作失败: {str(e)}"}), 500

# ----------------- 启动 -----------------
if __name__ == '__main__':
    app.run(host='0.0.0.0', port=5000)
6.总结
本文展示了如何使用Python和Flask构建一个简单的远程控制系统,能够远程执行系统命令、截图以及进行屏幕监控。通过这次开发实践,我们不仅熟悉了Flask的使用,还深入了解了如何与操作系统交互,并处理一些常见的开发难题。
在开发过程中,我们不仅解决了认证、截图质量、命令延迟等问题,还深入了解了如何优化Web应用的性能和用户体验。然而,值得注意的是,这个系统主要适用于Windows操作系统,对于linux或Mac用户,需要针对不同平台进行适配。
最后,虽然这个远程控制系统具备了基本的功能,但它依然存在一定的安全隐患。例如,API密钥的暴露可能导致不法分子进行恶意操作,因此在实际部署中,建议进一步加强安全机制(如使用OAuth认证、数据加密等)。此外,考虑到大规模部署,系统的稳定性、性能以及扩展性也是我们需要关注的重点。
在未来的开发中,我们还可以考虑增加更多功能,如多用户管理、实时消息推送、操作记录日志等,使得系统更加完善和可靠。
以上就是Python结合Flask框架构建一个简易的远程控制系统的详细内容,更多关于Python远程控制的资料请关注编程客栈(www.devze.com)其它相关文章!


 加载中,请稍侯......
精彩评论