Android Springboot 实现SSE通信案例详解
目录
- SSE
- 案例
- 服务端接口开发
- 客户端功能开发
- 效果测试
- 调用stream-sse接口
- 调用stream-sse1接口
SSE
SSE(Server-Sent Events)是一种用于实现服务器主动向客户端推送数据的技术,它基于 HTTP 协议,利用了其长连接特性,在客户端与服务器之间建立一条持久化连接,并通过这条连接实现服务器向客户端的实时数据推送。
Server-Sent Events (SSE) 和 Sockets 都可以用于实现服务器向客户端推送消息的实时通信,差异对比:
SSE:优点: 使用简单,只需发送 HTTP 流式响应。 自动处理网络中断和重连。 支持由浏览器原生实现的事件,如 "error" 和 "message"。 缺点: 单向通信,服务器只能发送消息给客户端。 每个连接需要服务器端的一个线程或进程。
Socket:
优点:
双向通信,客户端和服务器都可以发送或接收消息。
可以处理更复杂的应用场景,如双向对话、多人游戏等。
服务器可以更精细地管理连接,如使用长连接或短连接。
缺点:
需要处理网络中断和重连,相对复杂。
需要客户端和服务器端的代码都能处理 Socket 通信。
对开发者要求较高,需要对网络编程有深入了解。
Swww.devze.comSE使用场景:
使用场景主要包括需要服务器主动向客户端推送数据的应用场景,如AI问答聊天、实时新闻、股票行情等。
案例
服务端基于springboot实现,默认支持SSE;
android客户端基于OkHttp实现,同样也支SSE;服务端接口开发
SSEController.Java
package com.qxc.server.controller.sse;
import org.slf4j.Logger;
import org.slf4j.LoggerFactory;
import org.springframework.web.bind.annotation.GetMapping;
import org.springframework.web.bind.annotation.RequestMapping;
import org.springframework.web.bind.annotation.RequestParam;
import org.springframework.web.bind.annotation.RestController;
import org.springframework.web.servlet.mvc.method.annotajstion.SseEmitter;
import java.io.IOException;
import java.util.HashMap;
import java.util.Map;
import java.util.concurrent.ConcurrentHashMap;
@RestController
@RequestMapping("/sse")
public class SSEController {
    Logger logger = LoggerFactory.getLogger(SSEController.class);
    public static Map<String, SseEmitter> sseEmitters = new ConcurrentHashMap<>();
    /**
     * 接收sse请求,异步处理,分批次返回结果,然后关闭SseEmitter
     * @return SseEmitter
     */
    @GetMapping("/stream-sse")
    public SseEmitter handleSse() {
        SseEmitter emitter = new SseEmitter();
        // 在新线程中发送消息,以避免阻塞主线程
        new Thread(() -> {
            try {
                for (int i = 0; i < 10; i++) {
                    Map<String, Object> event = new HashMap<>();
                    String mes = "Hello, SSE " + (i+1);
                    event.put("message", mes);
                    logger.debug("emitter.send:  "+mes);
                    emitter.send(event);
                    Thread.sleep(200);
                }
                emitter.complete(); // 完成发送
            } catch (IOException | InterruptedException e) {
                emitter.completeWithError(e); // 发送错误
            }
        }).start();
        return emitter;
    }
    /**
     * 接收sse请求,异步处理,分批次返回结果,并存储SseEmitter,可通过外界调用sendMsg接口,继续返回结果
     * @param uid 客户唯一标识
     * @return SseEmitter
     */
    @GetMapping("/stream-sse1")
    public SseEmitter handleSse1(@RequestParam("uid") String uid) {
        SseEmitter emitter = new SseEmitter();
        sseEmitters.put(uid, emitter);
        // 在新线程中发送消息,以避免阻塞主线程
        new Thread(() -> {
            try {
                for (int i = 10; i < 15; i++) {
                    Map<String, Object> event = new HashMap<>();
                    String mes = "Hello, SSE " + (i+1);
                    event.put("message", mes);
                    logger.debug("emitter.send:  "+mes);
                    emitter.send(event);
                    Thread.sleep(200); // 每2秒发送一次
                }
            } catch (IOException | InterruptedException e) {
                emitter.completeWithError(e); // 发送错误
            }
        }).start();
        return emitter;
    }
    /**
     * 外界调用sendMsg接口,根据标识获取缓存的SseEmitter,继续返回结果
     * @param uid 客户唯一标识
     */
    @GetMapping("/sendMsg")
    public void sendMsg(@RequestParam("uid") String uid) {
        logger.debug("服务端发送消息 to " + uid);
        SseEmitter emitter = sseEmitters.get(uid);
        if(emitter != null){
            new Thread(() -> {
                try {
                    for (int i = 20; i < 30; i++) {
                        Map<String, Object> event = new HashMap<>();
                        String mes = "Hello, SSE " + (i+1);
                        event.put("message", mes);
                        logger.debug("emitter.send:  "+mes);
                        emitter.send(event);
                        Thread.sleep(200); // 每2秒发送一次
                    }
                    emitter.send(SseEmitter.event().name("stop").data(""));
                    emitter.complete(); // close connection
                    logger.debug("服务端主动关闭了连接 to " + uid);
                } catch (IOException | InterruptedException e) {
                    emitter.completeWithError(e); // error finish
                }
            }).start();
        }
    }
}
代码定义了3个接口,主要实现了两个功能:
stream-sse 接口用于模拟一次请求,批次返回结果,然后结束SseEmitter;
stream-sse1接口 & sendMsg接口
用于模拟一次请求,批次返回结果,缓存SseEmitter,后续还可以通过sendMsg接口,通知服务端继续返回结果;
客户端功能开发
Android客户端依赖OkHttp:
implementation 'com.squareup.okhttp3:okhttp:4.9.1'
implementation("com.squareup.okhttp3:okhttp-sse:4.9.1")
布局文件:activity_main.XML
<?xml version="1.0" encoding="utf-8"?>
<RelativeLayout xmlns:android="http://schemas.android.com/apk/res/android"
    xmlns:app="http://schemas.android.com/apk/res-auto"
    xmlns:tools="http://schemas.android.com/tools"
    android:layout_width="match_parent"
    android:layout_height="match_parent"
    tools:context=".MainActivity">
    <TextView
        android:id="@+id/tv"
        android:layout_above="@id/btn"
        android:layout_centerHorizontal="true"
        android:text="--"
        android:lines="15"
        android:gravity="center"
        android:layout_width="match_parent"
        android:layout_height="wrap_content"
        android:layout_margin="20dp"/>
    <Button
        android:layout_width="200dp"
        android:layout_height="50dp"
        android:id="@+id/btn"
        android:text="测试普通接口"
        android:layout_centerInParent="true"/>
    <Button
        android:layout_width="200dp"
        android:layout_height="50dp"
        android:id="@+id/btn1"
        android:layout_below="@id/btn"
        android:text="sse连接"
        android:layout_centerInParent="true"/>
    <Button
        android:layout_width="200dp"
        android:layout_height="50dp"
        android:id="@+id/btn2"
        android:layout_below="编程客栈@id/btn1"
        android:text="sse连接,携带参数"
        android:layout_centerInParent="true"/>
</RelativeLayout>
MainActivity.java
package com.cb.testsd;
import android.app.Activity;
import android.os.Bundle;
import android.view.View;
import android.widget.Button;
import android.widget.TextView;
import java.util.concurrent.TimeUnit;
import okhttp3.OkHttpClient;
import okhttp3.Request;
import okhttp3.Response;
import okhttp3.internal.sse.RealEventSource;
import okhttp3.sse.EventSource;
import okhttp3.sse.EventSourceListener;
public class MainActivity extends Activity {
    Button btn;
    Button btn1;
    Button btn2;
    TextView tv;
    @Override
    protected void onCreate(Bundle savedInstanceState) {
        super.onCreate(savedInstanceState);
        setContentView(R.layout.activity_main);
        btn = findViewById(R.id.btn);
        btn1 = findViewById(R.id.btn1);
        btn2 = findViewById(R.id.btn2);
        tv = findViewById(R.id.tv);
        btn.setOnClickListener(new View.OnClickListener() {
            @Override
            public void onClick(View v) {
                new Thread(new Runnable() {
                    @Override
                    public void run() {
                        testDate();
                    }
                }).start();
            }
        });
        btn1.setOnClickListener(new View.OnClickListener() {
            @Override
            public void onClick(View v) {
                new Thread(new Runnable() {
                    @Override
                    public void run() {
                        sse();
                    }
                }).start()编程客栈;
            }
        });
        btn2.setOnClickListener(new View.OnClickListener() {
            @Override
            public void onClick(View v) {
                new Thread(new Runnable() {
                    @Override
                    public void run() {
                        sseWithParams();
                    }
                }).start();
            }
        });
    }
    private void testDate(){
        OkHttpClient client = new OkHttpClient.Builder()
                .connectTimeout(10, TimeUnit.SECONDS)   // 建立连接的超时时间
                .readTimeout(10, TimeUnit.MINUTES)  // 建立连接后读取数据的超时时间
                .build();
        Request request = new Request.Builder()
                .url("http://192.168.43.102:58888/common/getCurDate")
                .build();
        okhttp3.Call call = client.newCall(request);
        try {
            Response response = call.execute(); // 同步方法
            if (response.isSuccessful()) {
                String responseBody = response.body().string(); // 获取响应体
                System.out.println(responseBody);
                tv.setText(responseBody);
            }
        } catch (Exception e) {
            e.printStackTrace();
        }
    }
    void sse(){
        Request request = new Request.Builder()
                .url("http://192.168.43.102:58888/sse/stream-sse")
                .addHeader("Authorization", "Bearer ")
                .addHeader("Accept", "text/event-stream")
                .build();
        OkHttpClient okHttpClient = new OkHttpClient.Builder()
                .connectTimeout(10, TimeUnit.SECONDS)   // 建立连接的超时时间
                .readTimeout(10, TimeUnit.MINUTES)  // 建立连接后读取数据的超时时间
                .build();
        RealEventSource realEventSource = new RealEventSource(request, new EventSourceListener() {
            @Override
            public void onEvent(EventSource eventSource, String id, String type, String data) {
                System.out.println(data);   // 请求到的数据
                String text = tv.getText().toString();
  编程客栈              tv.setText(data+"\n"+text);
                if ("finish".equals(type)) {    // 消息类型,add 增量,finish 结束,error 错误,interrupted 中断
                }
            }
        });
        realEventSource.connect(okHttpClient);
    }
    void sseWithParams(){
        Request request = new Request.Builder()
                .url("http://192.168.43.102:58888/sse/stream-sse1?uid=1")
                .addHeader("Authorization", "Bearer ")
                .addHeader("Accept", "text/event-stream")
                .build();
        OkHttpClient okHttpClient = new OkHttpClient.Builder()
                .connectTimeout(10, TimeUnit.SECONDS)   // 建立连接的超时时间
                .readTimeout(10, TimeUnit.MINUTES)  // 建立连接后读取数据的超时时间
                .build();
        RealEventSource realEventSource = new RealEventSource(request, new EventSourceListener() {
            @Override
            public void onEvent(EventSource eventSource, String id, String type, String data) {
                System.out.println(data);   // 请求到的数据
                String text = tv.getText().toString();
                tv.setText(data+"\n"+text);
            }
        });
        realEventSource.connect(okHttpClient);
    }
}
效果测试
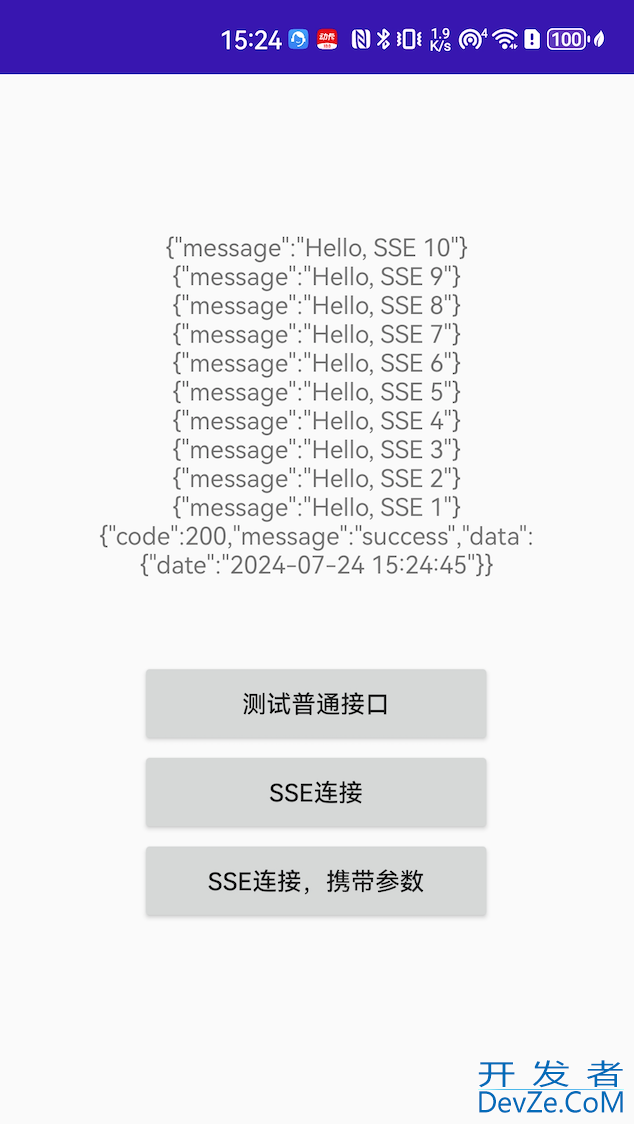
调用stream-sse接口
服务器分批次返回了结果:

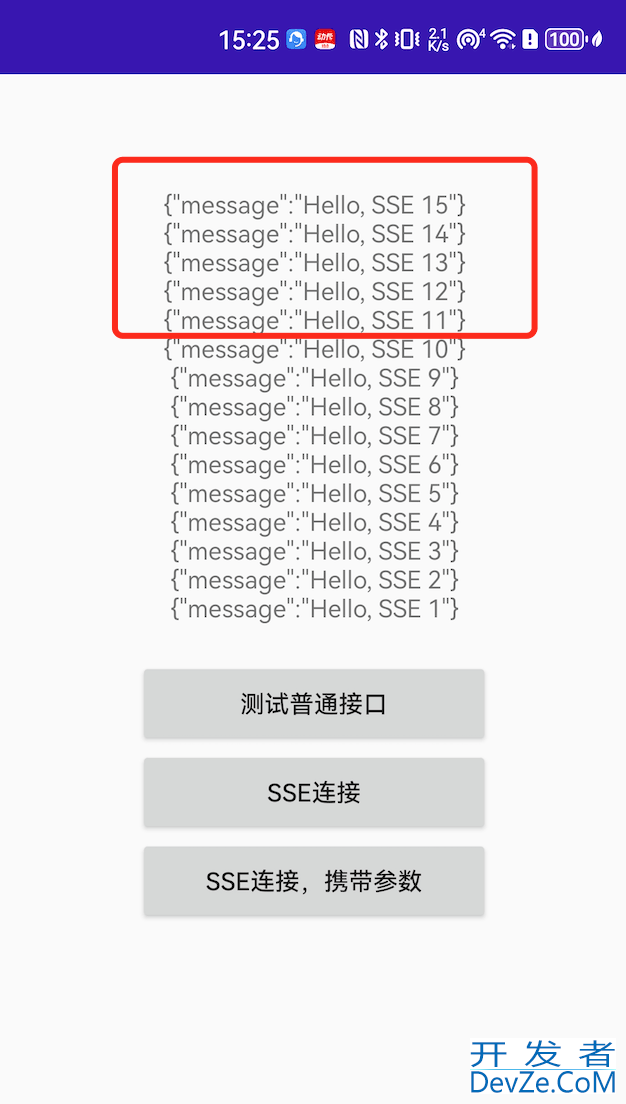
调用stream-sse1接口
服务器分批次返回了结果:

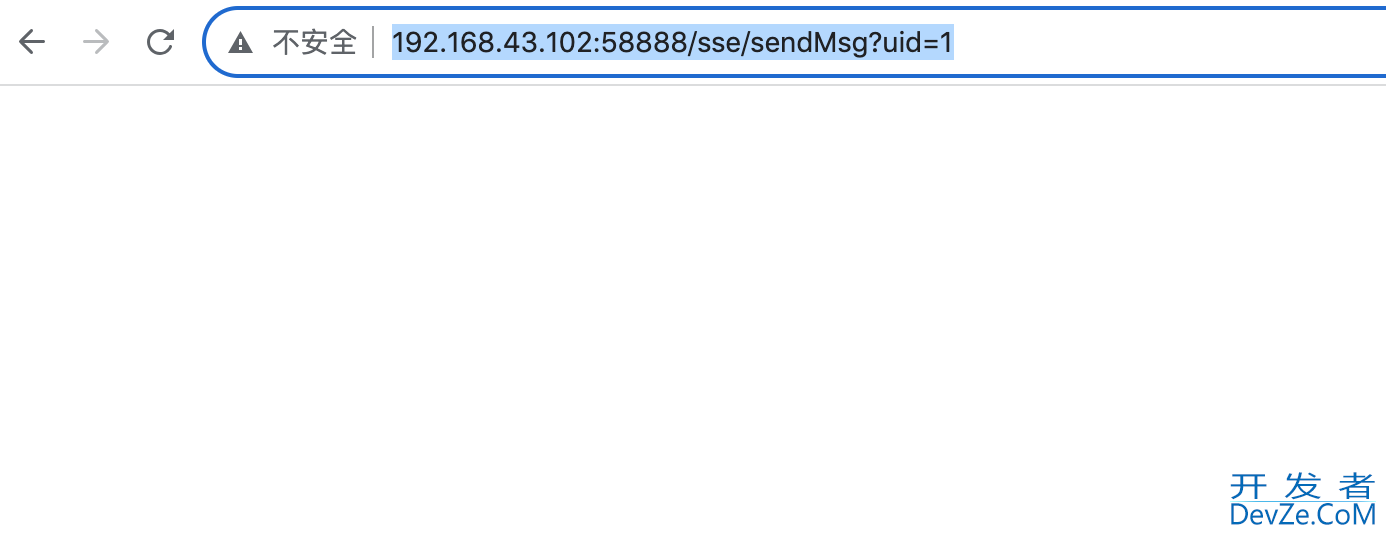
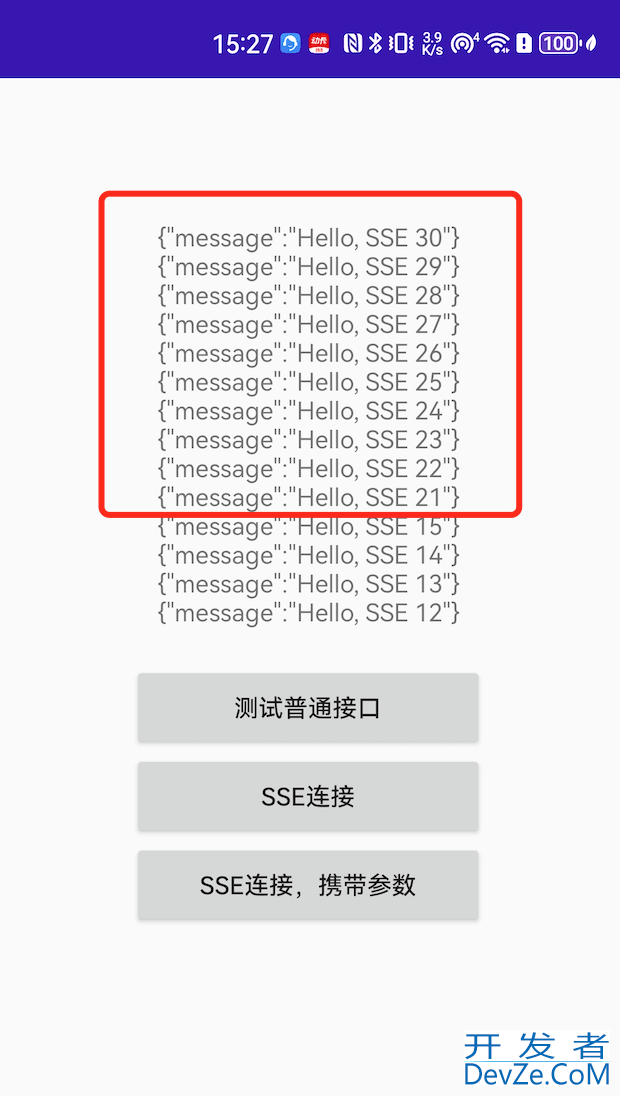
通过h5调用sendMsg接口,服务端继续返回结果:


到此这篇关于Android Springboot 实现SSE通信案例的文章就介绍到这了,更多相关Android Springboot SSE通信内容请搜索编程客栈(www.devze.com)以前的文章或继续浏览下面的相关文章希望大家以后多多支持编程客栈(www.devze.com)!


 加载中,请稍侯......
精彩评论