GO中的slice使用简介(源码分析slice)
目录
- GO-slice详解
- 简介
- slice分析
- 数据结构
- 切片的创建方式
- 源码分析
- copy函数的使用
- 问题解答
slice表示切片(分片),例如对一个数组进行切片,取出数组中的一部分值。在现代编程语言中,slice(切片)几乎成为一种必备特性,它可以从一个数组(列表)中取出任意长度的子数组(列表),为操作数据结构带来非常大的便利性,如python、perl等都支持对数组的slice操作,甚至perl还支持对hash数据结构的slice。
但Go中的slice和这些语言的slice不太一样,前面所说的语言中,slice是一种切片的操作,切片后返回一个新的数据对象。而Go中的slice不仅仅是一种切片动作,还是一种数据结构(就像数组一样)。
GO-slice详解
简介
slice(切片)是go中常见和强大的类型,这篇文章不是slice使用简介,从源码角度来分析slice的实现,slice的一些迷惑的使用方式,同时也讲清楚一些问题。
slice的底层实现是数组,是对数组的抽象
官方有slice相关的博客
https://go.dev/blog/slices-introhttps://go.dev/blog/slices
slice分析
数据结构
源码:https://github.com/golang/go/blob/master/src/runtime/slice.go#L14
slice结构如下:
type slice struct {
	array unsafe.Pointer // 数组指针
	len   int  //切片长度
	cap   int // 切片容量
}
array:为是底层数组的指针
len:切片中已有元素的个数
cap:底层数组的长度
原理概述:
切片的底层实现是数组,len是切片的个数,cap是底层数组的长度,当往切片中追加元素的时候,len++,如果len>cap,就会触发切片扩容,扩容逻辑是算一个新的cap,并且创建一个新的底层数组,将原来的数据copy过来。并且创建一个新的切片(slice)。
可以从一个切片中创建一个新的切片,底层数组是同用的,修改切片元素的时候会影响到新的切片。
如果所示:

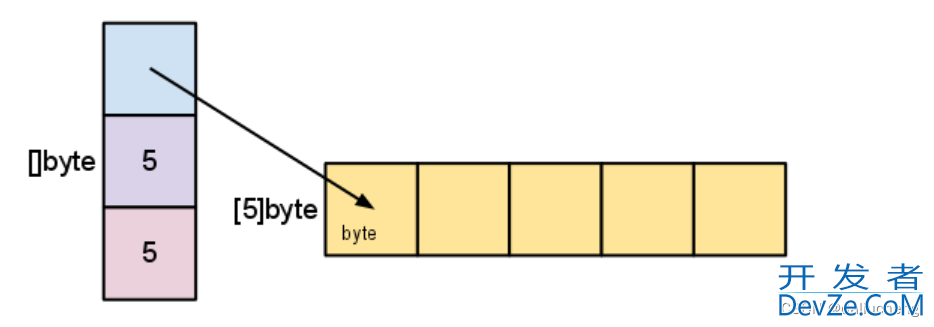
var s = make([]byte,5)对应的逻辑是,创建一个长度和容量为5的数组,如果所示
切片的创建方式
先看切片的创建方式,说这个问题之前,先看看切片的创建方式
声明
var vocabList []uint64
声明了一个[]uint64类型的切片,vocabList为切片的0值,
这得说一下go中nil值
在 Go 中,nil 是指针、接口、映射、切片、通道和函数类型的零值,表示未初始化的值。
具体的可以看:https://go101.org/article/nil.html
回到代码,这表示nil值,它的len和cap都是0,和nil比较结果为true,这里要说,nil值对应的具体的类型是在上下文中编译器推导出来的
package main
func main() {
	var vocabList []uint64
	println(vocabList == nil)
}
// output:
// true
通过new创建
var vocabList = *new([]uint64)
new是内建函数,用来分配指定类型的内容,返回指向内存地址的指针,并且给此地址分配此类型的0值。
字面量创建
var vocabList = []uint64{1,2,3,4}
make
var vocabList = make([]uint64,10)
make接受三个参数,在创建的时候指定类型,长度,容量,不指定容量,默认和长度一样
代码如下:
func main() {
	var vocabList = make([]uint64,10)
	fmt.Printf("slice:%v,len:%d,cap:%d",vocabList,len(vocabList),cap(vocabList))
}
// output:
// slice:[0 0 0 0 0 0 0 0 0 0],len:10,cap:10
从切片或数组截取
var vocabList = resList[3:5]
两个切片公用一个底层数组,但如果新创建的切片扩容了,就不共用了。
问题分析
主要分析几个问题
nil切片和空切片的差异
nil切片是通过 new 和声明方式创建的切片,go会给他们nil值,如下面的代码所示:
var vocabList []int
vocabList == nil //true
空切片是通过make,字面量方式创建的长度为0的切片,
vocabList := make([]int,0)
vocabList == nil // false
vocabList1 = []int{}
vocabList1 == nil //false
具体可以看这篇文章:https://www.jb51.net/jiaoben/288490px1.htm
我下面的代码和内容来于这篇文章
通过unsafe.Pointer可以将对应地址中的数据转换为任何符合go中类型的变量

可以看到,空切片的是有底层数组的,并且底层数组都一样,其实也可以说空切片执行了一个指定的地址空间,
这个地址空间在源码中有定义,当分配的大小为0的时候会返回这个地址,要说明的是这个地址空间不是固定的,不是写死的一个数,在不同的机器上运行会有不同的值。
源码:https://github.com/golang/go/blob/master/src/runtime/malloc.go#L948

两者的差异:
嵌套在结构体中不容易发现
package main
type Word struct {
	SenseIds []int
}
func main() {
	word := Word{}
	println(word.SenseIds == nil) //true
	word1 := Word{
		S编程enseIds: make([]int,0),
	}
	println(word1.SenseIds == nil) //false
}
json序列化
package main
import "encoding/json"
type Word struct {
	SenseIds []int `json:"sense_ids" `
}
func main() {
	word := Word{}
	marshal, err := json.Marshal(word)
	if err != nil {
		return
	}
	println(string(marshal)) //{"sense_ids":null}
	word1 := Word{
		SenseIds: []int{},
	}
	marshal1, err := json.Marshal(word1)
	if err != nil {
		return
	}
	println(string(marshal1)) //{"sense_ids":[]}
}
这个问题我深有体会
在做一个需求的时候,看到编辑器报黄色提示,提示我将 var a = []int{} 改为var a []int,当然,go官方也是这么建议的。我就改了,然后一个接口就报错了。给我一顿找,发现json返回了null。
除此之外,没有别的区别。
切片共用底层数组
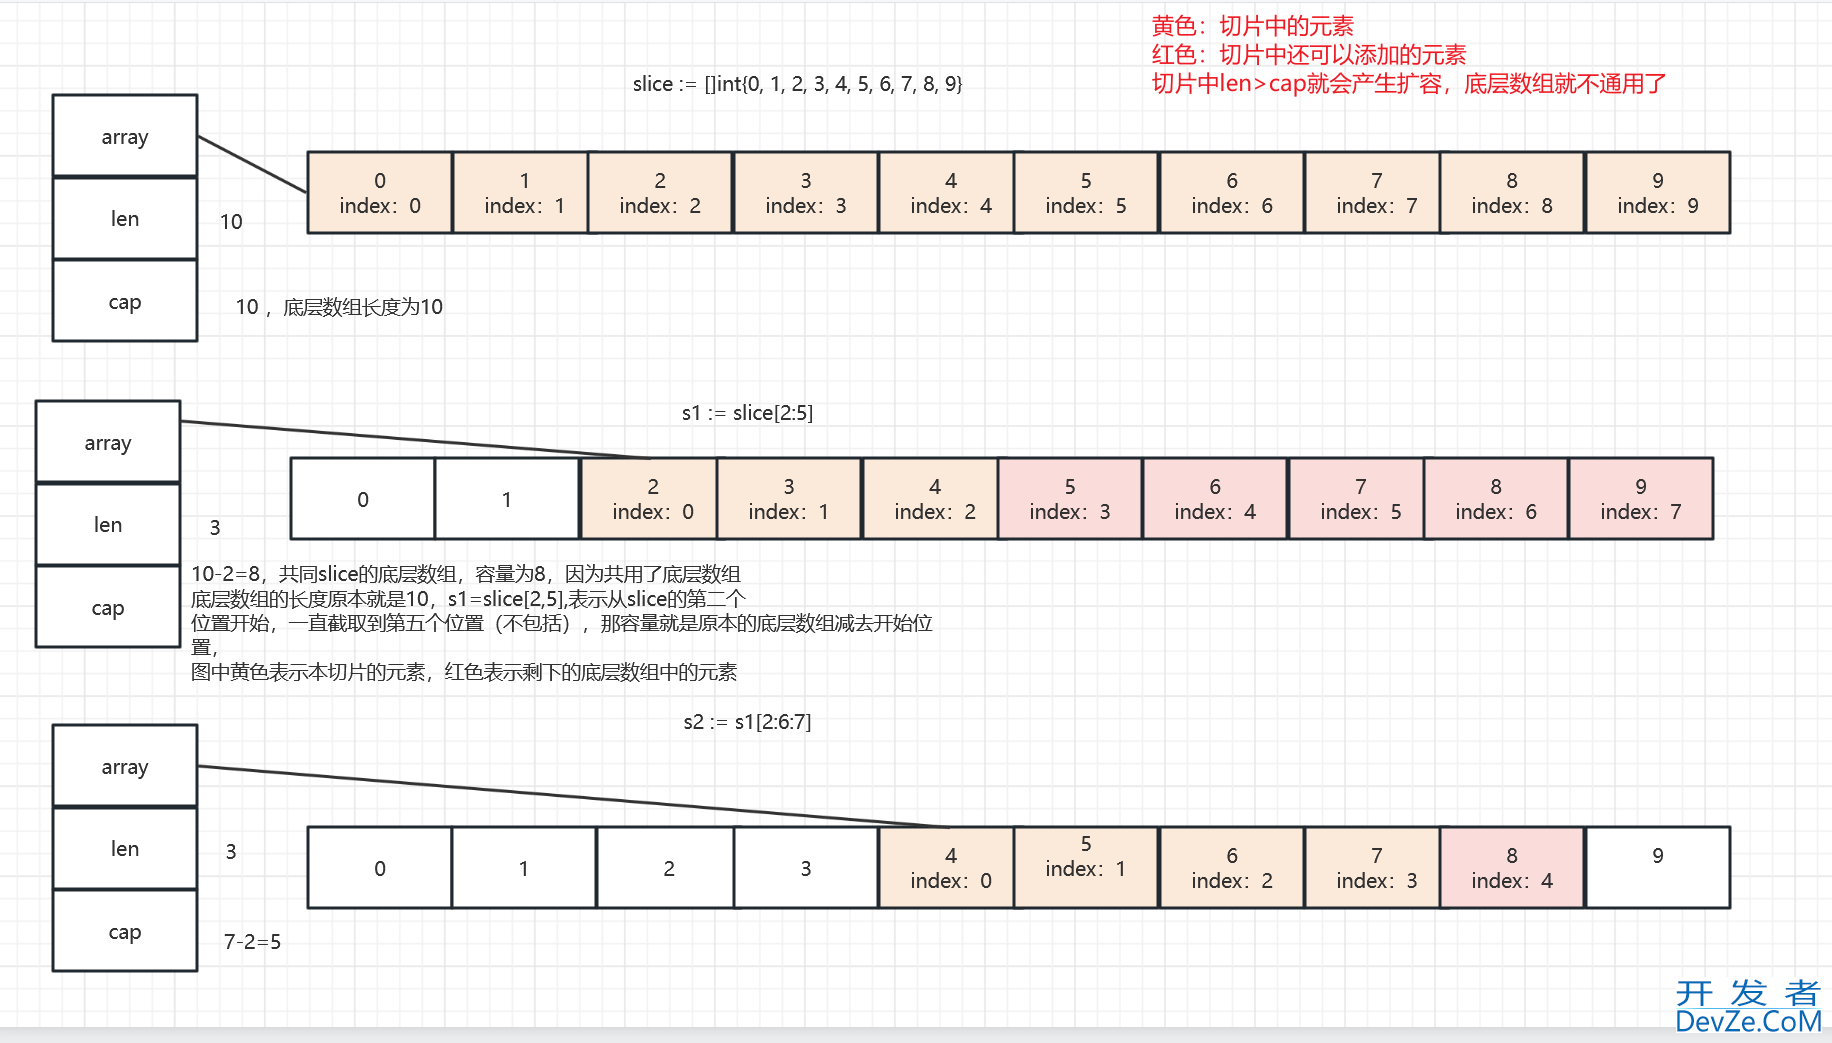
在做截取的时候,会创建一个新的slice,截取语法如下
bSlice := aSlice[start:stop:capacityIndex]
// satrt <= stop <= capacityIndex
//capacityIndex不是必须的,默认=原来切片的cap-startIndex
// 如果指定 新切片的容量为 capacityIndex-start
如图所示:
有了上面的例子,可以看如下代码
package main
import (
	"fmt"
)
func main() {
	slice := []int{0, 1, 2, 3, 4, 5, 6, 7, 8, 9}
	s1 := sljavascriptice[2:5]
	fmt.Println("============= 1 ==============")
	fmt.Printf("%v len:%d  cap:%d \n",slice,len(slice),cap(slice))
	fmt.Printf("%v len:%d  cap:%d \n",s1,len(s1),cap(s1))
	s2 := s1[2:6:7]
	fmt.Println("============= 2 ==============")
	fmt.Printf("%v len:%d  cap:%d \n",slice,len(slice),cap(slice))
	fmt.Printf("%v len:%d  cap:%d \n",s1,len(s1),cap(s1))
	fmt.Printf("%v len:%d  cap:%d \n",s2,len(s2),cap(s2))
    // 到这里是正确的切片操作,slice,s1,s2通用底层数组
	s2 = append(s2, 100) //s2追加100,此时s2中len=cap,还没有触发扩容操作
	fmt.Println("============= 3 ==============")
	fmt.Printf("%v len:%d  cap:%d \n",slice,len(slice),cap(slice))
	fmt.Printf("%v len:%d  cap:%d \n",s1,len(s1),cap(s1))
	fmt.Printf("%v len:%d  cap:%d \n",s2,len(s2),cap(s2))
	s2 = append(s2, 200)// 200加不进去了,触发扩容操作,此时s2的底层数组和s1,slice不一样了
	fmt.Println("============= 3 ==============")
	fmt.Printf("%v len:%d  cap:%d \n",slice,len(slice),cap(slice))
	fmt.Printf("%v len:%d  cap:%d \n",s1,len(s1),cap(s1))
	fmt.Printf("%v len:%d  cap:%d \n",s2,len(s2),cap(s2))
	s1[2] = 20 // s1和slice底层数组还是一样的
	fmt.Println("============= 3 ==============")
	fmt.Printf("%v len:%d  cap:%d \n",slice,len(slice),cap(slice))
	fmt.Printf("%v len:%d  cap:%d \n",s1,len(s1),cap(s1))
	fmt.Printf("%v len:%d  cap:%d \n",s2,len(s2),cap(s2))
}
输出如下:
============= 1 ==============
[0 1 2 3 4 5 6 7 8 9] len:10  cap:10
[2 3 4] len:3  cap:8
============= 2 ==============
[0 1 2 3 4 5 6 7 8 9] len:10  cap:10
[2 3 4] len:3  cap:8
[4 5 6 7] len:4  cap:5
============= 3 ==============
[0 1 2 3 4 5 6 7 100 9] len:10  cap:10
[2 3 4] len:3  cap:8
[4 5 6 7 100] len:5  cap:5
============= 3 ==============
[0 1 2 3 4 5 6 7 100 9] len:10  cap:10
[2 3 4] len:3  cap:8
[4 5 6 7 100 200] len:6  cap:10
============= 3 ==============
[0 1 2 3 20 5 6 7 100 9] len:10  cap:10
[2 3 20] len:3  cap:8
[4 5 6 7 100 200] len:6  cap:10
源码分析
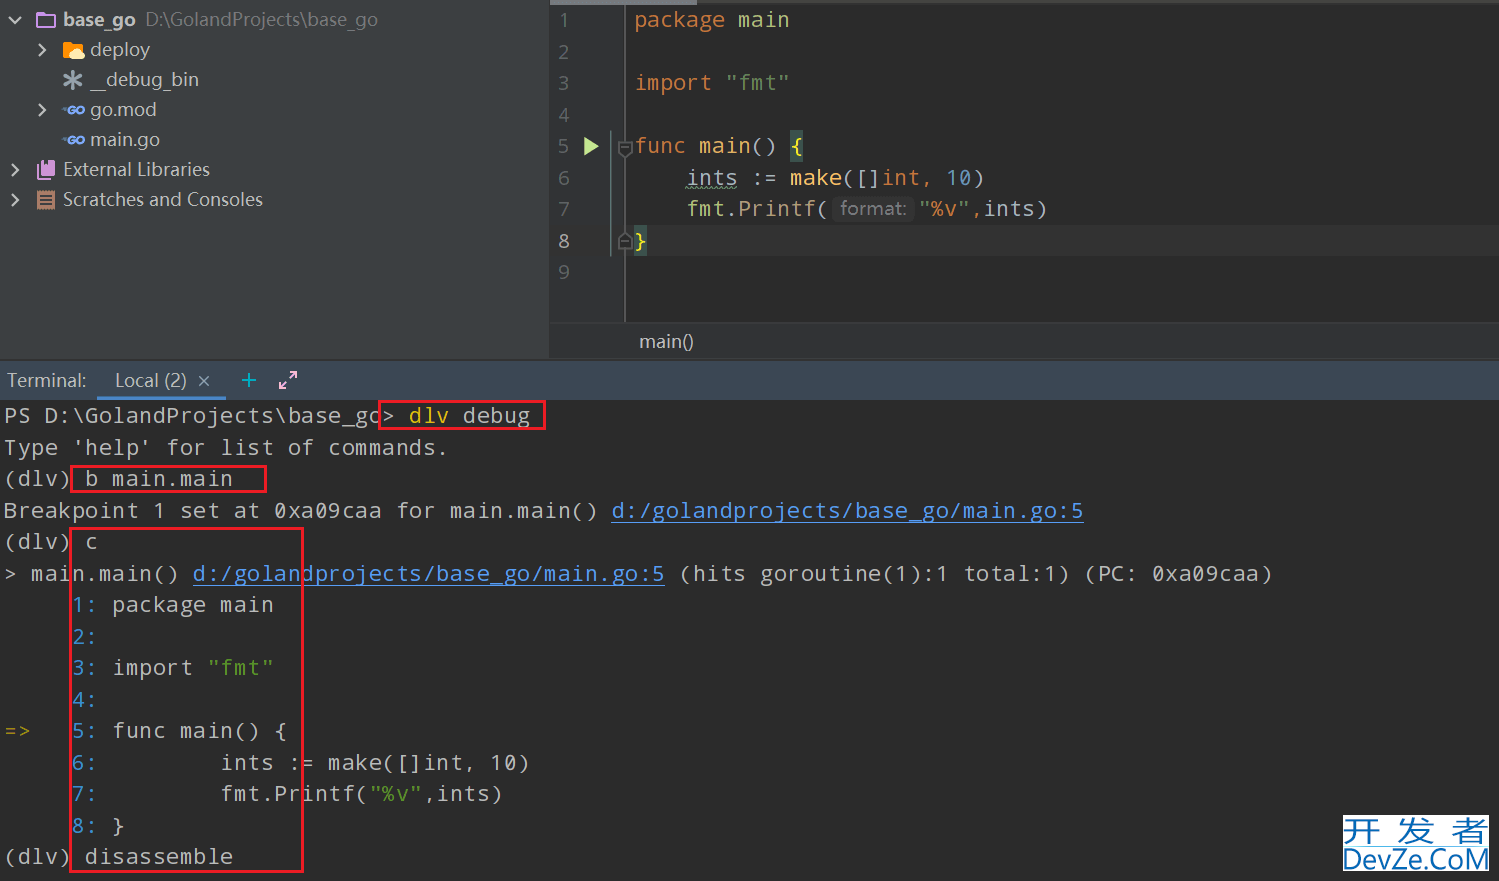
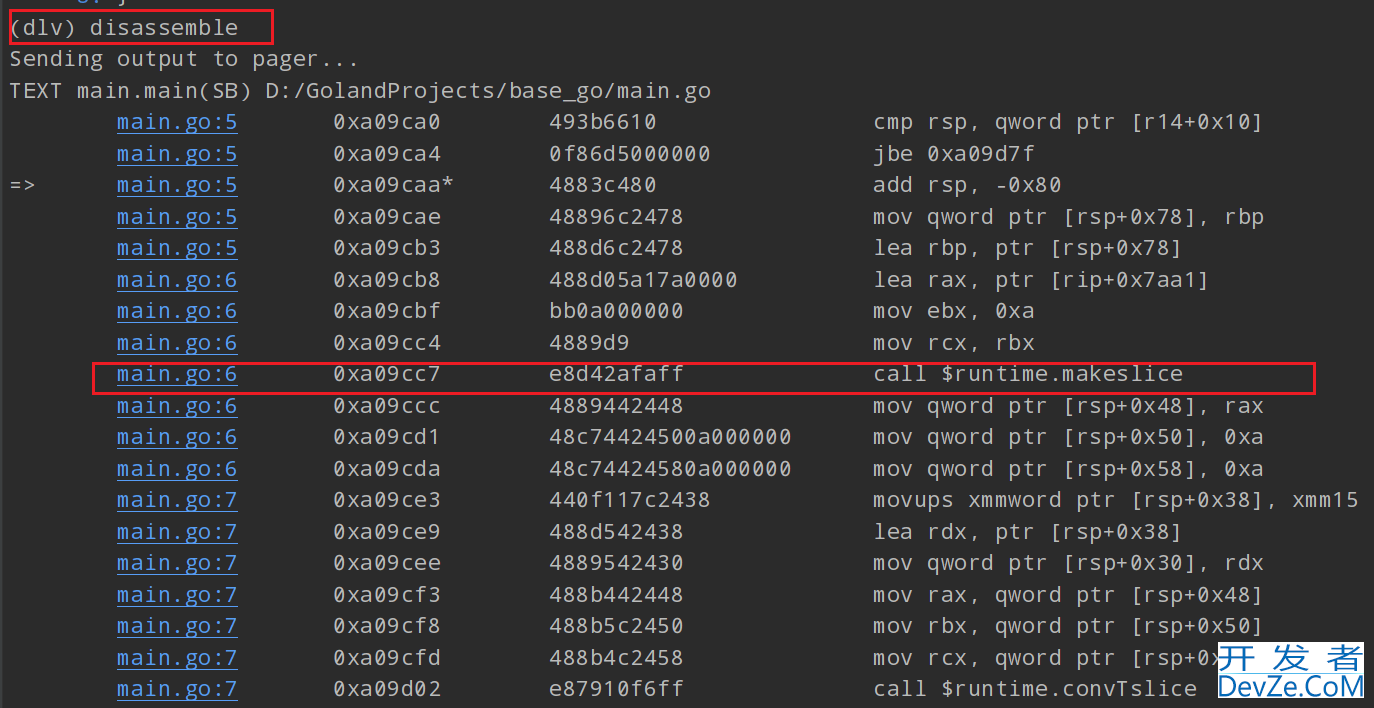
make创建切片
使用dlv或者go提供的汇编工具可以看到 make调用了什么函数
源码:https://github.com/golang/go/blob/master/src/runtime/slice.go#LL88C18-L88C18

切片的扩容规则
版本不同,扩容规则可能不一样,例子中go版本为:

代码如下:
package main
import (
	"fmt"
	"unsafe"
)
func main() {
	ints := make([]int, 0) // 创建了一个长度为0的切片
	i := *(*[3]int)(unsafe.Pointer(&ints)) // 利用Pointer将slice转换为长度为3的int数组,此操作可以查看slice结构体中各个字段的数值
	fmt.Printf("slice1:%v \n",i)
	fmt.Printf("slice:%v \n",ints)
	var ints1 = append(ints, 1) // 追加一个元素
	i2 := *(*[3]int)(unsafe.Pointer(&ints1))
	fmt.Printf("slice2 %v \n",i2)   // slice对应的底层数组发生了扩容操作,底层数组已经变了
	fmt.Printf("slice2:%v \n",ints)
}
用dlv 查看它的汇编代码,看扩容操作调用了那些函数
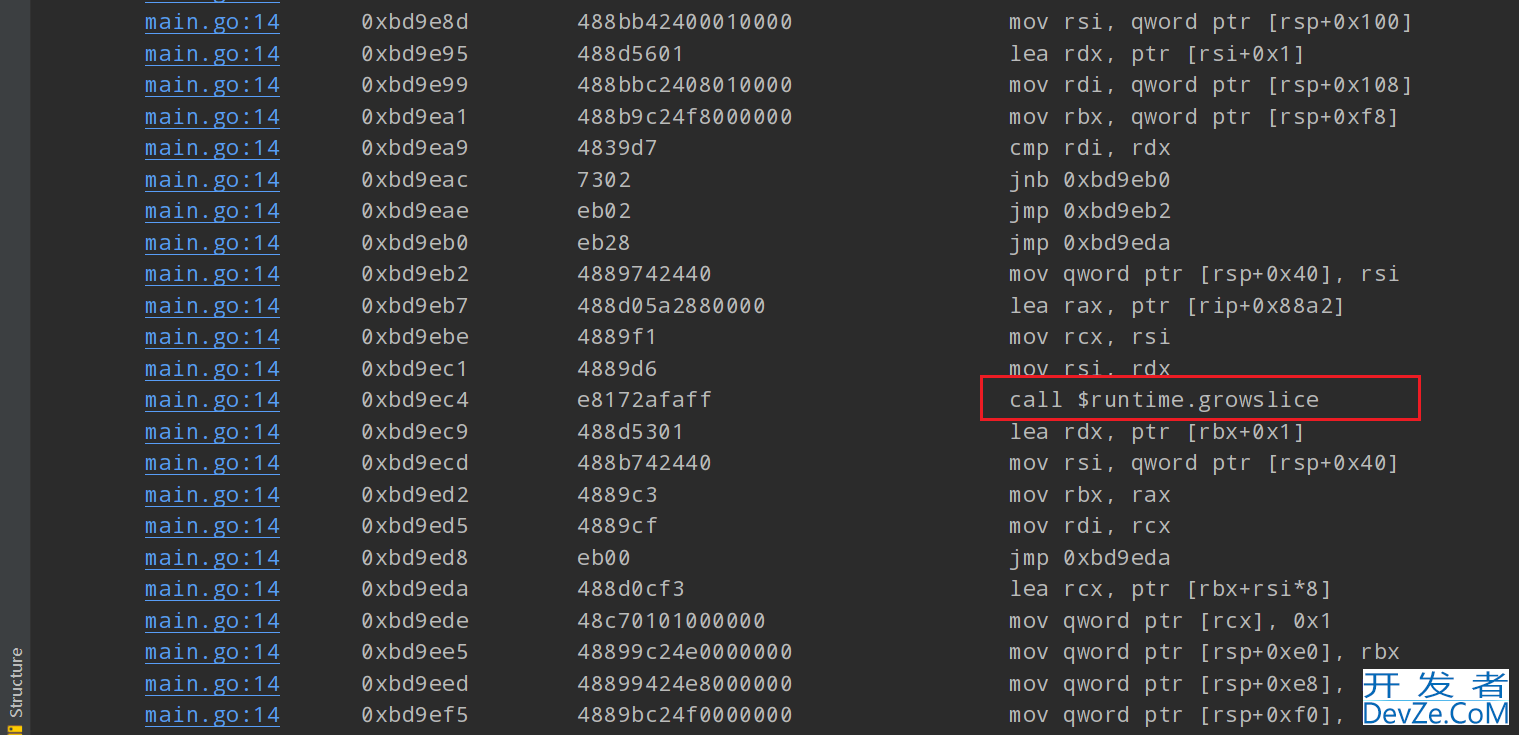
源码链接:https://github.com/golang/go/blob/master/src/runtime/slice.go#LL157C10-L157C10
// 函数入参说明如下
//1. et 类型
//2. old 老切NbbqKzQ片
//3. cap 需要分配的指定容量,为了方便期间,调用这个函数的时候cap传递的都是老的slice的cap
func growslice(et *_type, old slice, cap int) slice {
	if raceenabled { // 是否启动竞争检测
		callerpc := getcallerpc()
		racereadrangepc(old.array, uintptr(old.len*int(et.size)), callerpc, abi.FuncPCABIInternal(growslice))
	}
	if msanenabled { //内存检查,确保没有未初始化的内存被使用
		msanread(old.array, uintptr(old.len*int(et.size)))
	}
	if asanenabled { // 检查内存访问是否越界
		asanread(old.array, uintptr(old.len*int(et.size)))
	}
	if cap < old.cap {
		panic(errorString("growslice: cap out of range"))
	}
	if et.size == 0 {
	    // 正常是不会这样的,但为了安全还是处理了0的情况
		return slice{unsafe.Pointer(&zerobase), old.len, cap}
	}
	// 开始计算新的cap
	newcap := old.cap
	doublecap := newcap + newcap // 2倍
	if cap > doublecap { // 新的cap要是老的2倍
		newcap = cap
	} else {
		const threshold = 256
		if old.cap < threshold { // cap小于256,newCap为oldCap的两倍
			newcap = doublecap
		} else {
			for 0 < newcap && newcap < cap {
				// Transition from growing 2x for small slices
				// to growing 1.25x for large slices. This formula
				// gives a smooth-ish transition between the two.
				// 这个公式可以当超过256之后i,可以实现1.25到2倍的平滑过渡
				newcap += (newcap + 3*threshold) / 4  // 这个公式化简一下 newCap = oldCap*1.25 + 192(3/4*256)
			}
			// Set newcNbbqKzQap to the requested cap when
			// the newcap calculation overflowed.
			if newcap <= 0 { // 防止溢出
				newcap = cap
			}
		}
	}
    // 下面的逻辑是对上面计算出来的newCap来做对齐操作,上面的计算不是真正的结果,下面还需要做内存对齐操作。
	var overflow bool
	var lenmem, newlenmem, capmem uintptr
	switch {
	case et.size == 1:
		lenmem = uintptr(old.len)
		newlenmem = uintptr(cap)
		capmem = roundupsize(uintptr(newcap))
		overflow = uintptr(newcap) > maxAlloc
		newcap = int(capmem)
	case et.size == goarch.PtrSize:
		lenmem = uintptr(old.len) * goarch.PtrSize
		newlenmem = uintptr(cap) * goarch.PtrSize
		capmem = roundupsize(uintptr(newcap) * goarch.PtrSize)
		overflow = uintptr(newcap) > maxAlloc/goarch.PtrSize
		newcap = int(capmem / goarch.PtrSize)
	case isPowerOfTwo(et.size):
		var shift uintptr
		if goarch.PtrSize == 8 {
			// Mask shift for better code generation.
			shift = uintptr(sys.Ctz64(uint64(et.size))) & 63
		} else {
			shift = uintptr(sys.Ctz32(uint32(et.size))) & 31
		}
		lenmem = uintptr(old.len) << shift
		newlenmem = uintptr(cap) << shift
		capmem = roundupsize(uintptr(newcap) << shift)
		overflow = uintptr(newcap) > (maxAlloc >> shift)
		newcap = int(capmem >> shift)
	default:
		lenmem = uintptr(old.len) * et.size
		newlenmem = uintptr(cap) * et.size
		capmem, overflow = math.MulUintptr(et.size, uintptr(newcap))
		capmem = roundupsize(capmem)
		newcap = int(capmem / et.size)
	}
	// The check of overflow in addition to capmem > maxAlloc is needed
	// to prevent an overflow which can be used to trigger a segfault
	// on 32bit architectures with this example program:
	//
	// type T [1<<27 + 1]int64
	//
	// var d T
	// var s []T
	//
	// func main() {
	//   s = append(s, d, d, d, d)
	//   print(len(s), "\n")
	// }
	if overflow || capmem > maxAlloc {
		panic(errorString("growslice: cap out of range"))
	}
	var p unsafe.Pointer
    // 下面是分配新的数组
	if et.ptrdata == 0 { // 原slice底层数组为0,也就是nil切片,
		p = mallocgc(capmem, nil, false)
		// The append() that calls growslice is going to overwrite from old.len to cap (which will be the new length).
		// Only clear the part that will not be overwritten.
		memclrNoHeapPointers(add(p, newlenmem), capmem-newlenmem) // 然后使用memclrNoHeapPointers函数来清除新分配的内存
	} else {
		// Note: can't use rawmem (which avoids zeroing of memory), because then GC can scan uninitialized memory.
		p = mallocgc(capmem, et, true) // 分配新的底层数组
		if lenmem > 0 && writeBarrier.enabled { // 之前有数据,并且写屏障已经开启
			// Only shade the pointers in old.array since we know the destination slice p
			// only contains nil pointers because it has been cleared during alloc.
			bulkBarrierPreWriteSrcOnly(uintptr(p), uintptr(old.array), lenmem-et.size+et.ptrdata)
		}
	}
	// copy元素
	memmove(p, old.array, lenmem)
   // 创建新的切片返回
	return slice{p, old.len, newcap}
}
总结如下:
- 确定新容量,cap小于256,直接2倍,大于256,新容量=老容量*1.25 * 3/4 * 256
- 用新容量来做内存对齐操作
- 分配新数组
- copy数组
- 创建切片返回
还有一点:
append的操作汇编并没有调用函数,在汇编层面就做了,直接往底层数组添加元素,只有数组已经满的情况下才会触发扩容操作
内存对齐相关东西之后在说
我们来一个例子来验证一下上面的代码逻辑:
package main
import "fmt"
func main() {
	var s = []int{}
	oldCap := cap(s)
	for i := 0; i < 2048; i++ {
		s = append(s, i)
		newCap := cap(s)
		if newCap != oldCap {
			// 追加元素,当容量发生变化的时候,打印,扩容之前的元素,cap,导致扩容的元素,和扩容之后的cap
			fmt.Printf("[%d -> %4d] cap = %-4d    after append %-4d  cap = %-4d\n", 0, i-1, oldCap, i, newCap)
			oldCap = newCap
		}
	}
}
// outPut
[0 ->   -1] cap = 0     |  after append 0     cap = 1
[0 ->    0] cap = 1     |  after append 1     cap = 2
[0 ->    1] cap = 2     |  after append 2     cap = 4
[0 ->    3] cap = 4     |  after append 4     cap = 8
[0 ->    7] cap = 8     |  after append 8     cap = 16
[0 ->   15] cap = 16    |  after append 16    cap = 32
[0 ->   31] cap = 32    |  after append 32    cap = 64
[0 ->   63] cap = 64    |  after append 64    cap = 128
[0 ->  127] cap = 128   |  after append 128   cap = 256    // 256之前都是2倍
[0 ->  255] cap = 256   |  after append 256   cap = 512    // 1.25 * 256 + 192 = 512
[0 ->  511] cap = 512   |  after append 512   cap = 848    // 1.25 * 512 + 192 = 832
[0 ->  847] cap = 848   |  编程客栈after append 848   cap = 1280
[0 -> 1279] cap = 1280  |  after append 1280  cap = 1792
[0 -> 1791] cap = 1792  |  after append 1792  cap = 2560
copy函数的使用
copy函数底层调用的是
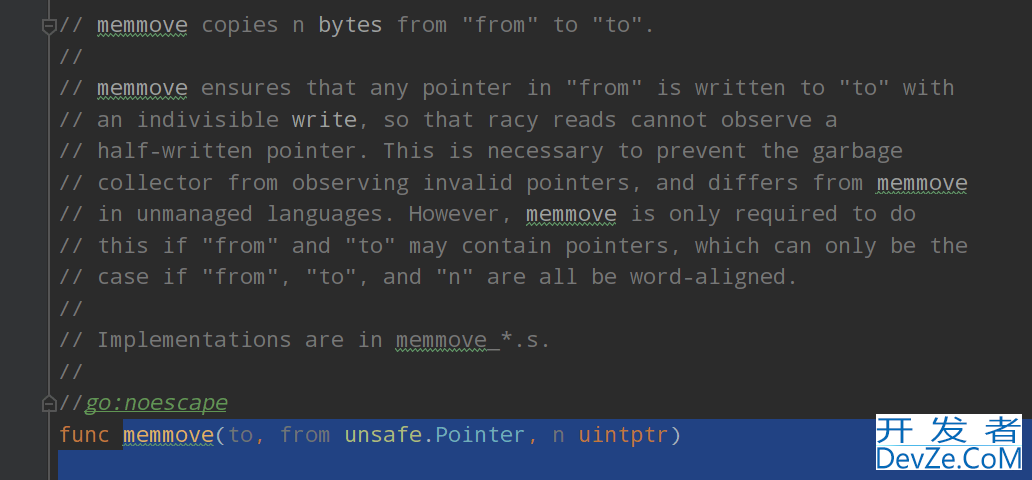
底层数组共用,那copy函数就可以完成一下几种操作
移动slice中的元素
func main() {
	var vocabs = []int{1,2,3,4,5,6,7,8,9}
	// 现在将5去除掉,将5之后的移动到前面
	copy(vocabs[4:],vocabs[5:])
	fmt.Printf("%v",vocabs)
}
//outPut
[1 2 3 4 6 7 8 9 9]
slice合并
func main() {
	ints := make([]int, 10)
	i1 := make([]int,0, 5)
	for i := 0; i < 5; i++ {
		i1 = append(i1, i)
	}
	i2 := make([]int,0, 5)
	for i := 5; i < 10; i++ {
		i2 = append(i2, i)
	}
	copy(ints,i1) // 从i1全部复制到ints中
	copy(ints[len(i1):],i2) // 将i2复制到ints的len(i1)位置开始一直到结束的数组中
	fmt.Printf("%v\n",i1)
	fmt.Printf("%v\n",i2)
	fmt.Printf("%v\n",ints)
}
// output
[0 1 2 3 4]
[5 6 7 8 9]
[0 1 2 3 4 5 6 7 8 9]
长度不够的copy,依dist为准
package main
import "fmt"
func main() {
	ints := make([]int, 3)
	i1 := make([]int,0, 10)
	for i := 0; i < 10; i++ {
		i1 = append(i1, i)
	}
	copy(ints,i1)
	fmt.Printf("%v",ints)
}
//outPut:
[0 1 2]
问题解答
nil 切片可以添加元素吗?
可以
nil切片就是切片声明,追加的时候切片长度为0,会引发扩容操作,扩容的时候会给分配一个新的数组。
nil切片和空切片有区别吗?
nil切片有两种方式
声明new创建
空切片有两种:
字面量创建但没有任何的元素make创建长度指定为0
使用方式除了下面两点没有别的区别:
嵌套结构体,不显性创建为niljson序列化会为null
slice扩容规则
说到前面:它在确定cap之后有内存对齐操作
小于256,是原cap的2倍大于256,是原来的1.25倍+3/4*256
到这里就结束了。
到此这篇关于GO中的slice详解的文章就介绍到这了,更多相关go slice详解内容请搜索我们以前的文章或继续浏览下面的相关文章希望大家以后多多支持我们!


 加载中,请稍侯......
精彩评论