SpringBoot热部署和整合Mybatis的过程
目录
- 一、SpringBoot热部署
- 1.1 添加DevTools依赖
- 1.2 在idea中设置自动编译
- 1.3 在Idea设置自动运行
- 二、SpringBoot整合MyBATis
- 2.1 准备数据
- 2.2 添加相关依赖www.devze.com
- 2.3 在配置文件进行数据源配置
- 2.4 编写Mapper接口和Mapper文件
- 2.www.devze.com5 测试
一、SpringBoot热部署
热部署,就是在应用正在运行的时候升级软件,却不需要重新启动应用。即修改完代码后不需要重启项目即可生效。在SpringBoot中,可以使用DevTools工具实现热部署
1.1 添加DevTools依赖
首先我们需要在pom文件中引入devtools的依赖,如下:
<!-- 热部署工具 -->
<dependency> <groupId>org.springframework.boot</groupId> <artifactId>spring-boot-devtools</artifactId> <optional>true</optional></dependency>
1.2 在idea中设置自动编译
点击 File-->Settings
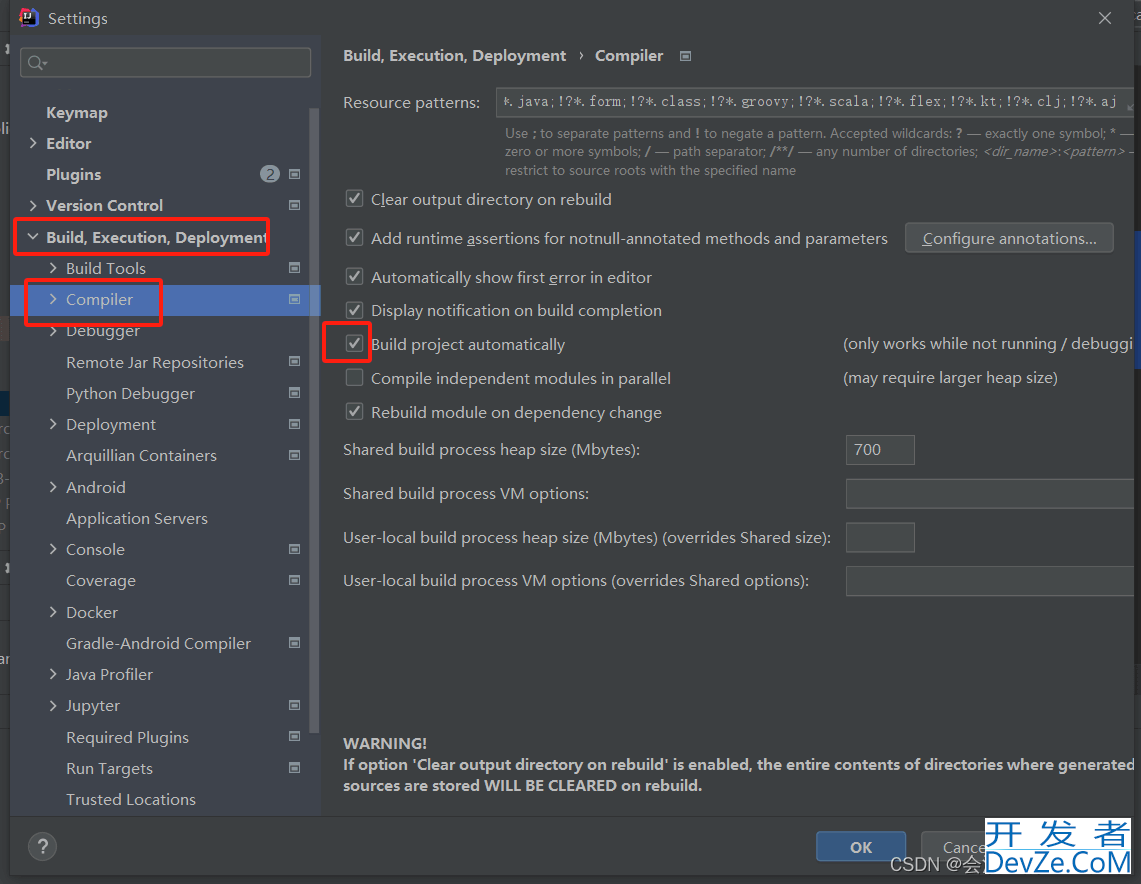
如上图,勾选上。
1.3 在Idea设置自动运编程行
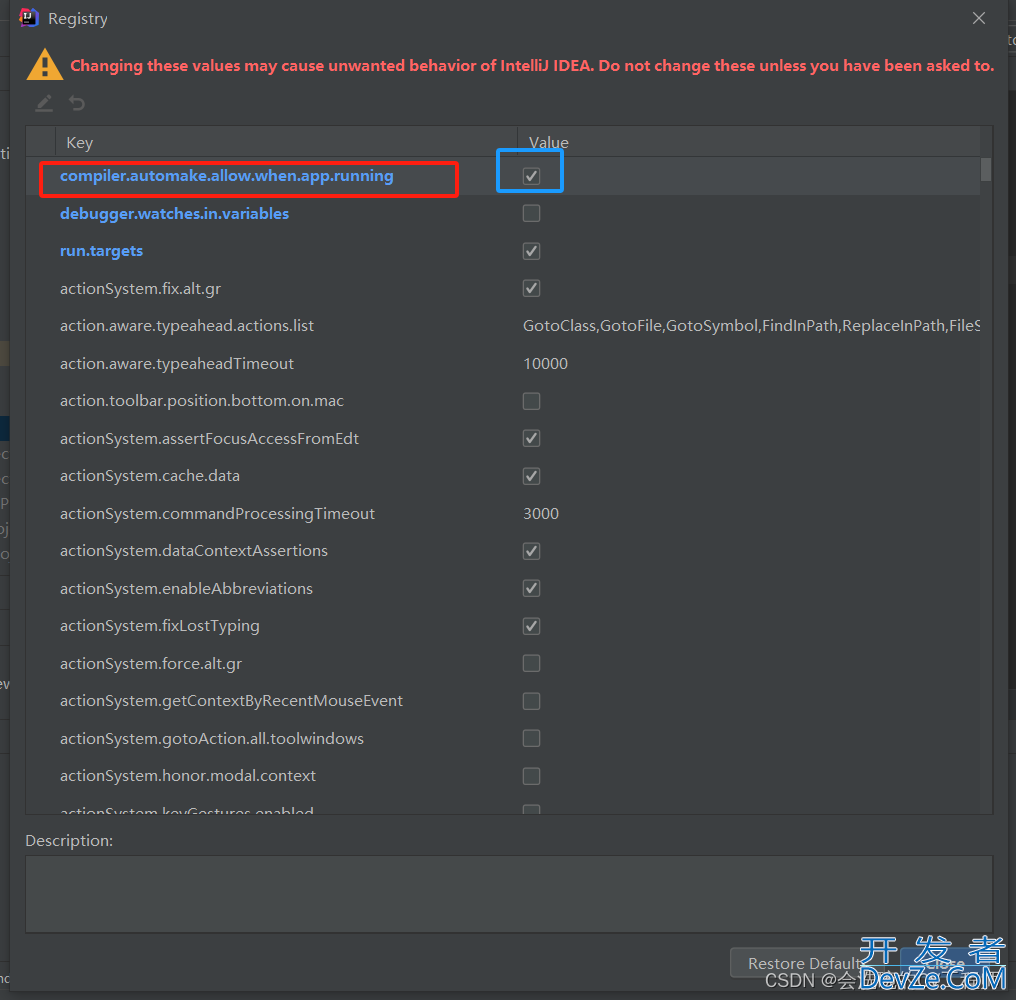
快捷键 Ctrl+Shift+Alt+/ 后点击 Registry ,勾选complier.automake.allow.when.app.running
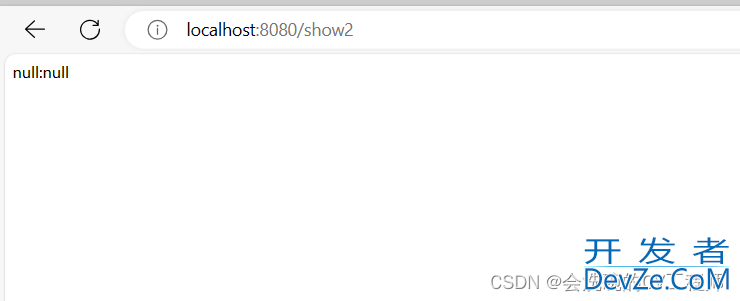
然后我们来测试一下,运行项目,然后在运行时往/show2路径修改输出看看是否不用重启项目也能发生改变。
修改之后,在控制台可以看到:重新运行了一下项目。

并且再次访问可以出现我们新添加的数据
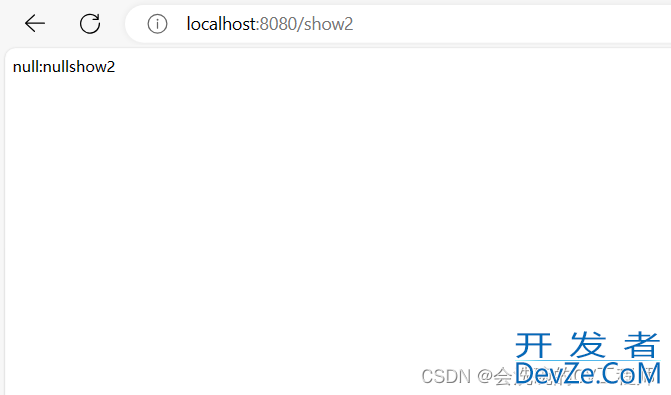
则说明我们的热部署生效
二、SpringBoot整合Mybatis
Spring整合MyBatis时需要进行大量配置,而SpringBoot整合MyBatis则可以简化很多配置:
2.1 准备数据
-- ----------------------------
-- Table structure for student
-- ----------------------------
DROP TABLE IF EXISTS `student`;
CREATE TABLE `student`  (
  `id` int NOT NULL AUTO_INCREMENT,
  `name` varchar(255) CHARACTER SET utf8 COLLATE utf8_general_ci NULL DEFAULT NULL,
  `sex` varchar(255) CHARACTER SET utf8 COLLATE utf8_general_ci NULL DEFAULT NULL,
  `address` varchar(255) CHARACTER SET utf8 COLLATE utf8_general_ci NULL DEFAULT NULL,
  PRIMARY KEY (`id`) USING BTREE
) ENGINE = InnoDB AUTO_INCREMENT = 3 CHARACTER SET = utf8 COLLATE = utf8_general_ci ROW_FORMAT = Dynamic;

-- ----------------------------
-- Records of student
-- ----------------------------
INSERT INTO `student` VALUES (1, 'LYL', '男', '广州');
INSERT INTO `student` VALUES (2, 'HQX', '女', '揭阳');
添加pojo类:
package com.example.springbootdemo3.pojo;
public class Student {
    private int id;
    private String name;
    private String sex;
    private String address;
    public Student() {
    }
    public Student(int id, String name, String sex, String address) {
        this.id = id;
        this.name = name;
        this.sex = sex;
        this.address = address;
    }
    public int getId() {
        return id;
    }
    public void setId(int id) {
        this.id = id;
    }
    public String getName() {
        return name;
    }
    public void setName(String name) {
        this.name = name;
    }
    public String getSex() {
        return sex;
    }
    public void setSex(String sex) {
        this.sex = sex;
    }
    public String getAddress() {
        return address;
    }
    public void setAddress(String address) {
        this.address = address;
    }
    @Override
    public String toString() {
        return "Student [" +
                "id=" + id +
                ", name='" + name + '\'' +
                ", sex='" + sex + '\'' +
                ", addres编程客栈s='" + address + '\'' +
                " ]";
    }
}
2.2 添加相关依赖
那么这里我们需要添加mysql驱动和Mabatis依赖
<dependency>
    <groupId>org.mybatis.spring.boot</groupId>
    <artifactId>mybatis-spring-boot-starter</artifactId>
    <version>2.3.0</version&编程客栈gt;
</dependency>

<dependency>
    <groupId>mysql</groupId>
    <artifactId>mysql-connector-Java</artifactId>
    <scope>runtime</scope>
</dependency>
2.3 在配置文件进行数据源配置
然后在配置文件进行如下配置,配置数据源和sql日志输出
# 配置数据源
spring:
  datasource:
    driver-class-name: com.mysql.cj.jdbc.Driver
    url: jdbc:mysql:///student?serverTimezone=UTC
    username: root
    password: 666666
# mybatis配置
mybatis:
  # 映射文件位置
  mapper-locations: com/example/springbootdemo3/mapper/*Mapper.XML
  # 别名
  type-aliases-package: com.example.springbootdemo3.pojo
#日志格式
logging:
  pattern:
    console: '%d{YYYY-MM-dd HH:mm:ss.SSS} %clr(%-5level) --- [%-15thread]%cyan(%-50logger{50}):%msg%n'
2.4 编写Mapper接口和Mapper文件
然后新建一个mapper包,里面新建一个StudentMapper接口
package com.example.springbootdemo3.mapper;

import com.example.springbootdemo3.pojo.Student;
import org.apache.ibatis.annotations.Mapper;

import java.util.List;

@Mapper
public interface StudentMapper {
    List<Student> findAll();
}
这里还要在resources目录下新建一个与StudentMapper同级目录和同名的.xml文件
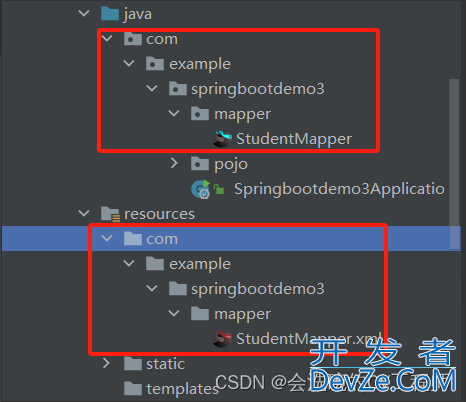
内容如下:
<?xml version="1.0" encoding="UTF-8"?>
<!DOCTYPE mapper
        PUBLIC "-//mybatis.org//DTD Mapper3.0//EN"
        "http://mybatis.org/dtd/mybatis-3-mapper.dtd">
<mapper namespace="com.example.springbootdemo3.mapper.StudentMapper">
    <select id="findAll" resultType="com.example.springbootdemo3.pojo.Student">
        select * from student;
    </select>
</mapper>
2.5 测试
OK,从上面我们已经新建了一个查询所有的方法啊,现在在测试类我们看看能否成功获取数据库信息。测试类代码如下:
package com.example.springbootdemo3.mapper;
import com.example.springbootdemo3.pojo.Student;
import org.junit.jupiter.api.Test;
import org.springframework.beans.factory.annotation.Autowired;
import org.springframework.boot.test.context.SpringBootTest;
import java.util.List;
@SpringBootTest
public class StudentMapperTest {
    @Autowired
    private StudentMapper studentMapper;
    @Test
    public void testFindAll(){
        List<Student> students = studentMapper.findAll();
        students.forEach(System.out::println);
    }
}
OK,可以看到也是能够成功获取信息的。

到此这篇关于SpringBoot热部署和整合Mybatis的文章就介绍到这了,更多相关SpringBoot热部署内容请搜索编程客栈(www.devze.com)以前的文章或继续浏览下面的相关文章希望大家以后多多支持编程客栈(www.devze.com)!


 加载中,请稍侯......
精彩评论