Windows平台下配置VS Code的C++环境教程
目录
- 一、下载VS Code
- 二、下载CPP插件
- 三、安装编译器和调试器
- 四、设置系统环境变量
- 五、修改VScode调试、编译配置文件
- 总结
一、下载VS Code
下载链接:https://code.visualstudio.com/Do编程客栈wnload
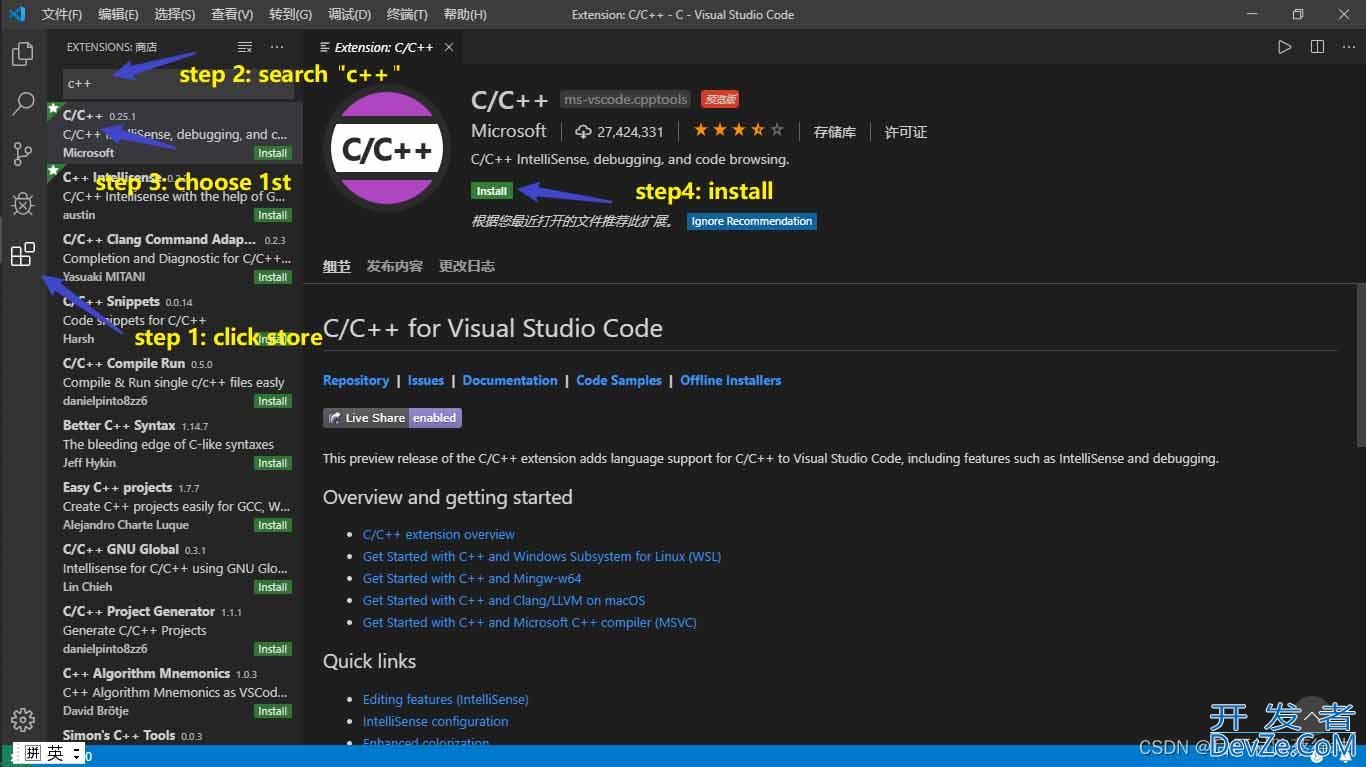
二、下载CPP插件
三、安装编译器和调试器
下载地址:https://sourceforge.net/projects/mingw-w64/files/
下载的文件:进入网站后不要点击 “Download Lasted Version”,往下滑,找到最新版的 “x86_64-posix-seh”。
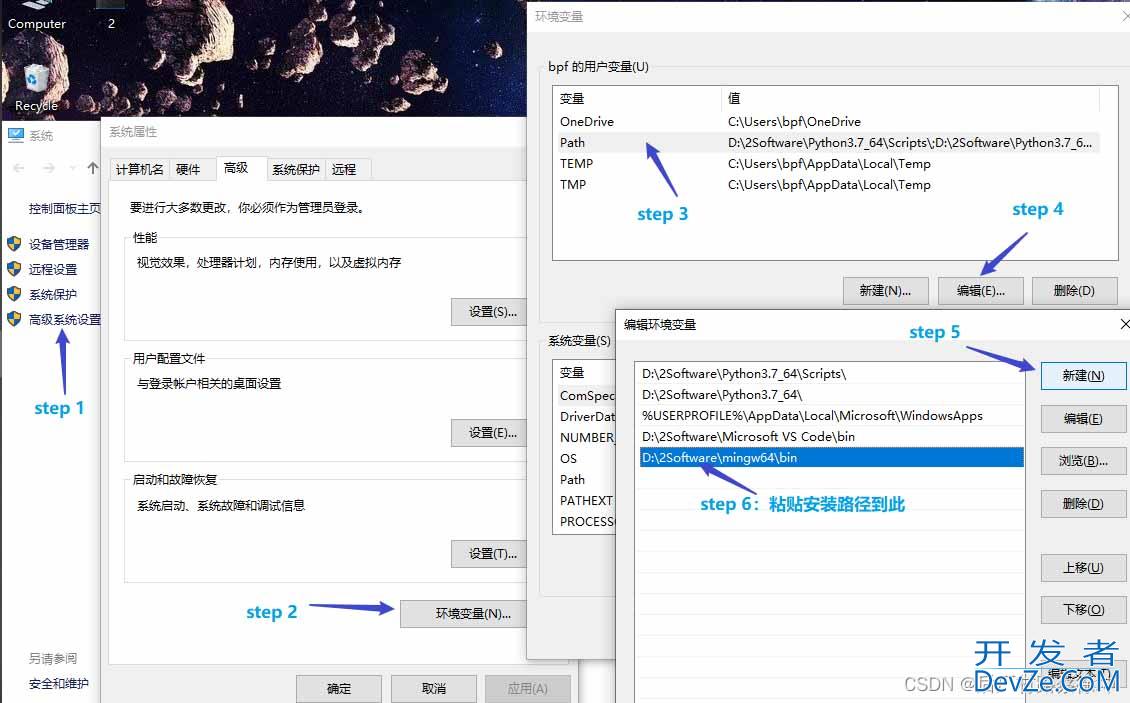
四、设置系统环境变量
验证:
按下 win + R,输入cmd,回车键之后输入g++,再回车,如果提示javascript以下信息[1],则环境变量配置成功。
如果提示以下信息[2],则环境变量配置失败。
[1]:g++: fatal error: no input files
[2]:'g++' 不是内部或外部命令,也不是可运行的程序或批处理文件。
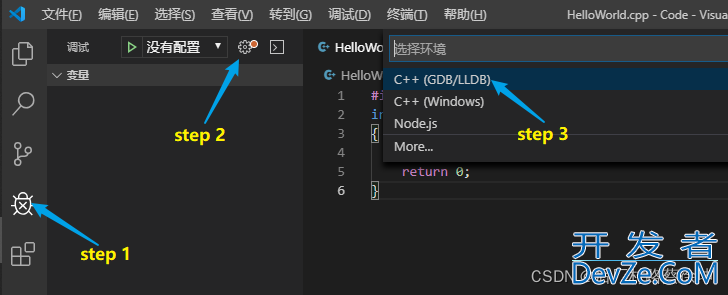
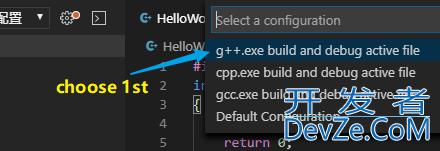
五、修改VScode调试、编译配置文件
文件夹中.vscode文件主要用于防止调试器和编译器配置文件
{
    "version": "0.2.0",
    "configurations": [
      {
        "name": "g++.exe - Build and debug active file",
        "type": "cppdbg",
        "request": "launch",
        "program": "${fileDirname}\\${fileBasenameNoExtension}.exe",
        "args": [],
        "stopAtEntry": false,
        "cwd": "${fileDirname}",
        "environment": [],
        "externalConsole": true,
        "MIMode": "gdb",
        "miDebuggerPath": "D:\\mingw64\\bin\\gdb.exe",
        "setupCommands": [
          {
            "description": "Enable pretty-printing for gdb",
            "text": "-enable-pretty-printing",
 android           "ignoreFailures": true
          }
        ],
        "preLaunchtask": "C/C++: g++.exe bu编程客栈ild active file"
      }
    ]
  }
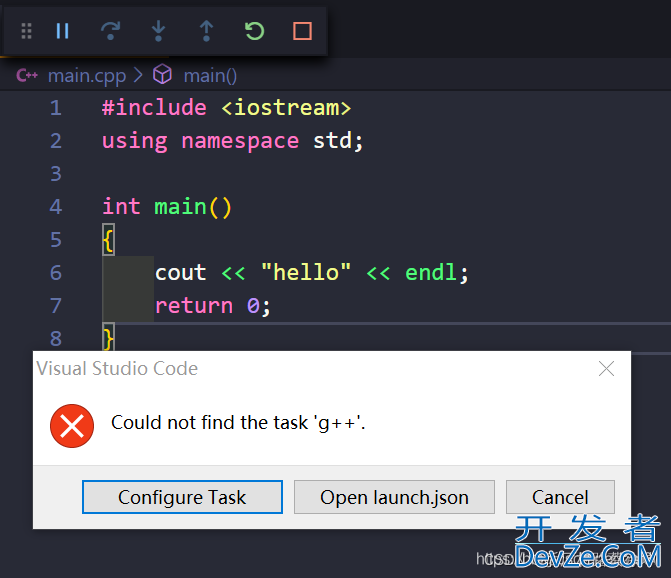
{
    "tasks": [
      {
        "type": "cppbuild",
        "label": "C/C++: g++.exe build active file",
        "command": "D:\\mingw64\\bin\\g++.exe",
        "args": ["-g", "${file}", "-o", "${fileDirname}\\${fileBasenameNoExtension}.exe"],
        "options": {
          "cwd": "${fileDirname}"
        },
        "problemMatcher": ["$gcc"],
        "group": {
          "kind": "build",
          "isDefault": true
        },
        "detail": "compil编程客栈er: D:\\mingw64\\bin\\g++.exe"
      }
    ],
    "version": "2.0.0"
  }
总结
以上为个人经验,希望能给大家一个参考,也希望大家多多支持我们。


 加载中,请稍侯......
精彩评论