使用Python自制一个回收站清理器
经常笔记本电脑的回收站存储了很多的文件,需要打开回收站全部选中进行清理。
但是要是做成python自动化,再将其配置成定时任务就不需要再去手动操作了。或者就是直接双击运行即可完成所有回收站的文件清理。
由于实现过程需要调用Windows的终端命令,所以需要安装winshell。然而有的小伙伴没有安装pypiwin32就会报错没有win32con模块,因此,新的python环境安装这两个非标准库就OK了。
pipinstallwinshell

pipinstallpypiwin32
其实真正可以使用到的代码块只有一行,就是直接调用终端完成回收站的清理操作。try…catch只是为了捕获异常,防止直接抛出。
#It'simportingthewinshellmodule.
importwinshell

try:
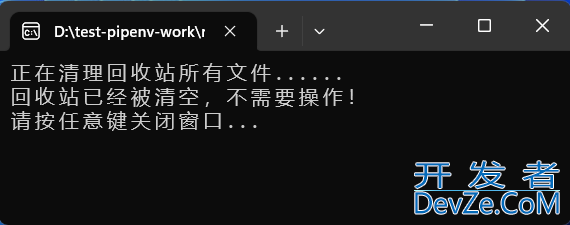
print('正在清理回收站所有文件......')

#It'semptyingtherecyclebin.
winshell.recycle_bin().empty(confirm=False,show_progress=False,sound=True)

print('回收站已经清理完成!')
except:
print('回收站已经被清空,不需要操作!')

input("请按任意键关闭窗口...")
上述的代码块已经能够完成功能了,然后直接使用pyinstaller打包成exe,项目内容较小这里直接采用单文件方式进行打包。
pyinstaller-F-i.\recycle.ico.\recycle.py
程序打包完成后生成recycle.exe,可以修改成任意名称.exe,双击执行即可完成回收站清理。
recycle.exe

知识补充
除了上文,小编还给大家整理了用Python实现的其他实用小工具,希望对大家有所帮助
批量图片格式转换器
经常在不同的工作场景中需要使用不同的图片格式来完成相应的操作,因此开发了这款批量转换图片格式的操作工具。
下文介绍的图片转换过程主要包含了四种图片格式的相互转换,分别是jpeg/jpg/png/bmp,通过获取Image图片对象从而保存为任意的图片格式。
今天使用到的图片处理库就是PIL,不仅包含了强大的图像处理能力,还可用于图像归档/批量处理等方面。
pipinstallpillow
然后,直接将PIL模块的Image模块导入到我们的代码块中,注意这里安装的名称是pillow,但是导入的模块名称却是PIL。
#ImportingtheImagemodulefromthePILpackage.
fromPILimportImage

#`g`isageneratorfunctionthatreturnsageneratorobject.
fromloguruimportlogger

#Importingtheosmodule.
importos
定义一下该应用能够支持的图片格式,如有其他图片格式转换需要可以在此处进行扩展。
#Alistofimageformatsthattheprogramwillsupport.
images=['jpeg','jpg','bmp','png']
这里首先开发一个单个图片格式转换的函数transImage,最后在批量处理中调用该函数即可完成批量操作。
deftransImage(source_image=None,target_type=None,target_path=None):
"""
Thisfunctiontakesanimageandconvertsittoadifferentfiletype

:paramsource_image:Theimageyouwanttoconvert
:paramtarget_type:Thetypeofimageyouwanttoconvertto
"""
ifsource_imageisNoneortarget_typeisNone:
logger.error('源图片路径或目标格式不能为空!')
return
try:
img=Image.open(source_image)
base_name=os.path.basename(source_image)
target_image_path=os.path.join(target_path,base_name.split('.')[0]+'.'+target_type)
img.save(target_image_path)
logger.info('当前源图片:{}格式转换完成!'.format(source_image))
except:
logger.error('当前源图片:{}格式转换发生异常!'.format(source_image))
然后,开发一个批量图片处理处理的函数main_BATch,用于直接读取某个文件夹下面的所有图片执行格式转换。
defmain_batch(source_path=None,target_type=None):
"""
Thisfunctiontakesanimageandconvertsittoadiff编程客栈erentfiletype

:paramsource_image:Theimageyouwanttoconvert
:paramtarget_type:Thetypeofimageyouwanttoconvertto
:return:theimagethatwasconvertedtoadifferentfiletype.
"""
ifsource_pathisNoneortarget_typeisNone:
logger.info('源图片批量文件夹路径或目标格式不能为空!')
return
try:
forfile_nameinos.listdir(source_path):
source_file_type=file_name.split('.')[1]
ifsource_file_typeinimagesandtarget_typeinimages:
transImage(os.path.join(source_path,file_name),target_type,source_path)
else:
logger.error('图片格式不符合要求,请自行扩展!')
except:
logger.error('批量图片格式转换失败,请检查参数是否设置正确!')


#Callingthemain_batchfunctionwiththesource_pathandtarget_typearguments.
main_batch(source_path='D:/test-data-work',target_type='png')

python+winjs32com轻松完成批量Excel文件的加密!
在办公的过程中面对一些重要数据的加密通常都能够借助wps/office来完成,但是面对批量处理的时候还是有些麻烦。
下文主要说明如何使用python的三方模块完成对Excel文件的批量加密操作。


其中主要使用到的三方模块就是win32com,这里需要注意的是在安装该库的时候对应的名称是pywin32。
pipinstallpywin32
接下来,将需要的几个python模块都导入到代码块中进行后续的业务开发。
#It'simportingthewin32com开发者_JS教程.clientmodule.
importwin32com.client

#Importingtheosmodule.
importos

fromloguruimportlogger
然后,开发一个单个文件的加密函数excel_set_password_one完成文件加密操作。
defexcel_set_password_one(source_file_path,target_file_path,password):
"""
IttakesanExcelfile,setsapasswordonit,andsavesittoanewfile.

:paramsource_file_path:ThepathtotheExcelfileyouwanttosetapasswordjson
:paramtarget_file_path:Thepathtothefileyouwanttosavethepassword-protectedfileto
:parampassword:thepasswordyouwanttosetfortheexcelfile
"""

excel=win32com.client.Dispatch("Excel.Application")

#It'sopeningtheExcelfile.
wb=excel.Workbooks.Open(souhttp://www.devze.comrce_file_path,False,False,None,'')

#It'sturningoffthealertthatpopsupwhenyoutrytosaveafilewithapassword.
excel.DisplayAlerts=False

#It'ssavingthefiletoanewfilewithapassword.
wb.SaveAs(target_file_path,None,password,'')

js#It'sclosingtheExcelapplication.
excel.Quit()
单个excel文件加密过程开发完成之后,需要再创建一个函数batch_main可以完成批量执行每个excel文件加密的操作。
defbatch_main(batch_dir,password):
"""
Thisfunctiontakesadirectoryoffilesandapassword,andthenencryptsallthefilesinthedirectorywiththe
password

:parambatch_dir:Thedirectorywherethebatchfilesarelocated
:parampassword:Thepasswordtousefortheencryptedzipfile
"""
logger.info('批量处理Excel文件加密过程开始!')
ifbatch_dirisNoneorbatch_dir.strip()=='':
logger.debug('批量处理的文件路径不能为空!')
return
ifpasswordisNoneorpassword.strip()=='':
logger.debug('批量处理的文件加密路径不能为空!')
return
forfile_nameinos.listdir(batch_dir):
iffile_name.__contains__('xlsx'):
source_file_path=os.path.join(batch_dir,file_name)
target_file_path=os.path.join(batch_dir,file_name.split('.')[0]+'_已加密.xlsx')
excel_set_password_one(source_file_path,target_file_path,password)

logger.info('批量处理Excel文件加密过程完成!')
最后一步,使用main函数调用批量文件加密的batch_main函数即可完成对所有该文件夹下面的文件加密。
if__name__=='__main__':
batch_main('D:/test-data-work','123456')

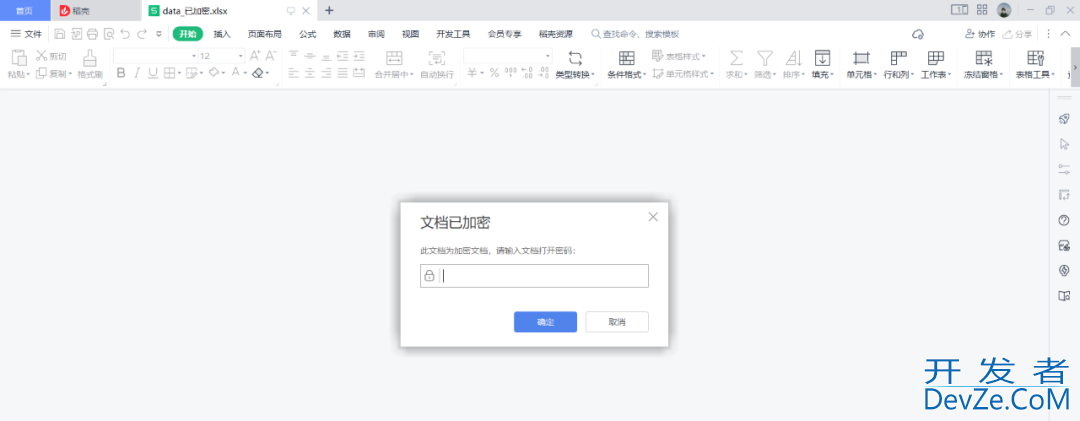
D:\Python\Python311\python.exeD:\pycharm-projects\the-public\test020\test7.py
2023-01-1910:35:36.799|INFO|__main__:batch_main:64-批量处理Excel文件加密过程开始!
2023-01-1910:35:40.529|INFO|__main__:batch_main:77-批量处理Excel文件加密过程完成!
到此这篇关于使用Python自制一个回收站清理器的文章就介绍到这了,更多相关Python回收站清理器内容请搜索我们以前的文章或继续浏览下面的相关文章希望大家以后多多支持我们!


 加载中,请稍侯......
精彩评论