centos虚拟机部署opengauss数据库详细图文教程
目录
- 一、基本信息
- 1、虚拟机安装的Centos版本
- 2、opengauss版本
- 3、opengauss和gaussdb的区别
- 二、安装步骤
- 1、服务器创建目录
- 2、解压
- 3、编辑/etc/profile文件,在末尾加上ulimit -c unlimited,然后重新加载该文件
- 4、关闭防火墙
- 5、配置python环境
- 6、验证python环境
- 7、linux中权限最大的用户是root,Gauss数据库官方默认以dbgrp为用户组,omm为用户。
- 8、进入/srv/yutu/opengauss/script 目录下,创建clusterconfig.XML文件
- 9、执行vim /etc/profile命令打开profile文件,添加如下命令:
- 10、执行预安装
- 11、正式安装
- 12、启动gauss数据库命令
- 12、查看gauss数据库信息,使用navicate连接
- 13、使用navicate连接报错
- 14、修改两个文件pg_hba.conf和PostgreSQL.conf文件
- 15、重启数据库
- 总结
一、基本信息
1、虚拟机安装的centos版本

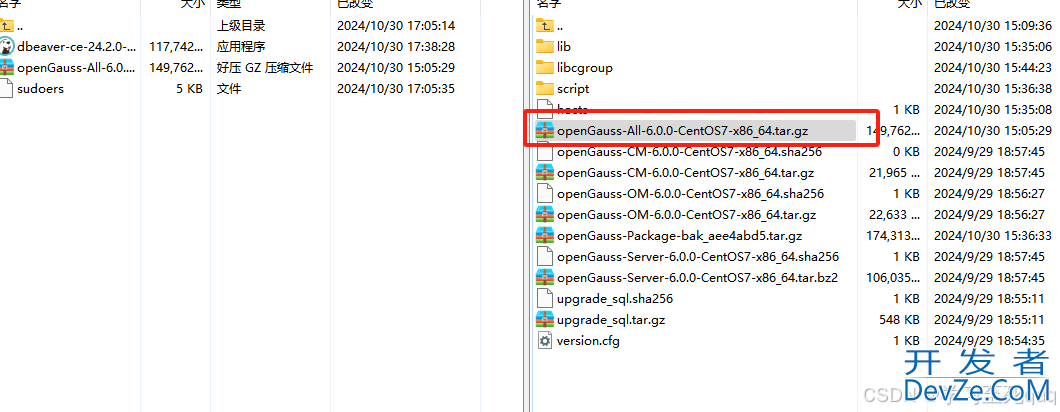
2、opengauss版本
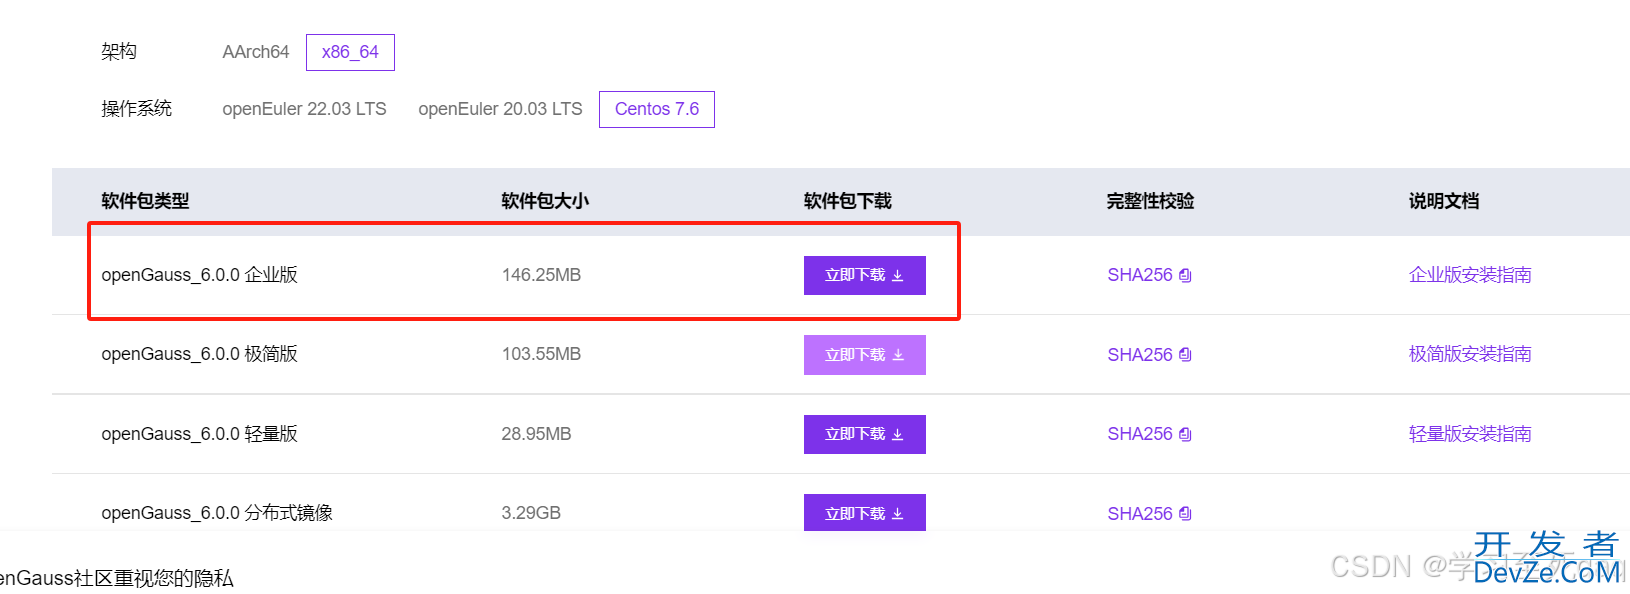
地址:https://opengauss.org/zh/download/
3、opengauss和gaussdb的区别
高斯数据库(GaussDB)是云数据库,需要购买。
openGaussDB是开源数据库,可以免费安装部署。
二、安装步骤
1、服务器创建目录
/srv/yutu/opengauss
并授权
chmod -R 775 /srv/yutu/opengauss
将下载的压缩文件上传到该目录下
2、解压
tar -zxvf openGauss-All-6.0.0-CentOS7-x86_64.tar.gz
下面的解压文件是上面的解压操作后得到的tar -zxvf openGauss-OM-6.0.0-CentOS7-x86_64.tar.gz
3、编辑/etc/profile文件,在末尾加上ulimit -c unlimited,然后重新加载该文件
source /etc/profile
4、关闭防火墙
systemctl stop firewalld
5、配置python环境
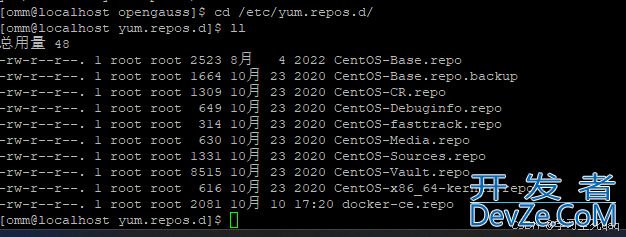
yum install python3.6*
如果报错可以配置yum源
6、验证python环境

7、linux中权限最大的用户是root,Gauss数据库官方默认以dbgrp为用户组,omm为用户。

8、进入/srv/yutu/opengauss/script 目录下,创建clusterconfig.xml文件
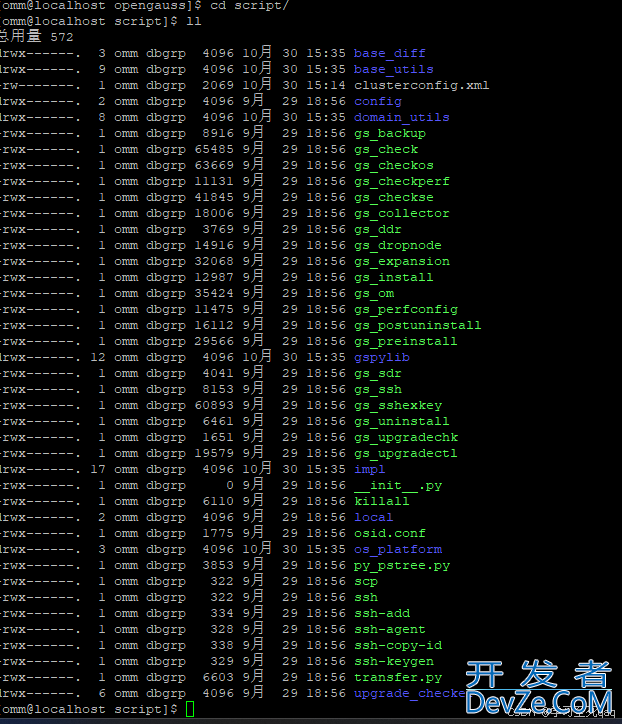
<?xml version="1.0" encoding="UTF-8"?>
<ROOT>
  <!-- 整体信息 -->
  <CLUSTER>
  <!-- 数据库名称 -->
    <PARAM name="clusterName" value="opengauss" />
  <!-- 数据库节点名称(hostname) -->
    <PARAM name="nodeNames" value="localhost.localdomain" />
  <!-- 节点IP,与nodeNames一一对应 -->
    <PARAM name="backIp1s" value="192.168.44.129"/>
  <!-- 数据库安装目录-->
    <PARAM name="gaussdbAppPath" value="/opt/huawei/install/app" />
  <!-- 日志目录-->
    <PARAM name="gaussdbLogPath" value="/var/log/omm" />
  <!-- 临时文件目录-->
    <PARAM name="tmpMppdbPath" value="/opt/huawei/tmp" />
  <!--数据库工具目录-->
    <PARAM name="gaussdbToolPath" value="/opt/huawei/install/om" />
  <!-编程客栈-数据库core文件目录-->
    <PARAM name="corePath" value="/opt/huawei/corefile"/>
  <!-- openGauss类型,此处示例为单机类型,“single-inst”表示单机一主多备部署形态-->
    <PARAM name="clusterType" value="single-inst"/>
  </CLUSTER>
  <!-- 每台服务javascript器上的节点部署信息 -->
  <DEVICELIST>
      <!-- node1上的节点部署信息 -->
      <DEVICE sn="1000001">
          <!-- node1的hostname -->
          <PARAM name="name" value="localhost.localdomain"/>
          <!-- node1所在的AZ及AZ优先级 -->
          <PARAM name="azName" value="AZ1"/>
          <PARAM name="azPriority" value="1"/>
          <!-- node1的IP,如果服务器只有一个网卡可用,将backIP1和sshIP1配置成同一个IP -->
          <PARAM name="backIp1" value="192.168.44.129"/>
          <PARAM name="sshIp1" value="192.168.44.129"/>
          <!--DBnode-->
          <PARAM name="dataNum" value="1"/>
          <!--DBnode端口号-->
          <PARAM name="dataPortBase" value="26000"/>
          <!--DBnode主节点上数据目录,及备机数据目录-->
          <PARAM name="dataNode1" value="/opt/huawei/install/data/db1"/>
          <!--DBnode节点上设定同步模式的节点数-->
          <!--><PARAM name="dataNode1_syncNum" value="0"/><-->
      </DEVICE>
  </DEVICELIST>
</ROOT>
保存后退出
9、执行vim /etc/profile命令打开profile文件,添加如下命令:
export LD_LIBRARY_PATH=/srv/yutu/opengauss/script/gspylib/clib:$LD_LIBRARY_PATH
export GPHOME=/opt/huawei/install/om
export PATH=$GPHOME/script/gspylib/pssh/bin:$GPHOME/script:$PATH
export LD_LIBRARY_PATH=$GPHOME/script/gspylib/clib:$LD_LIBRARY_PATH
export LD_LIBRARY_PATH=$GPHOME/lib:$LD_LIBRARY_PATH
export PYTjavascriptHONPATH=$GPHOME/lib
保存退出
source /etc/profile
10、执行预安装
/srv/yutu/opengauss/script该目录下进行
./gs_preinstall -U omm -G dbgrp -X ./clusterconfig.xml
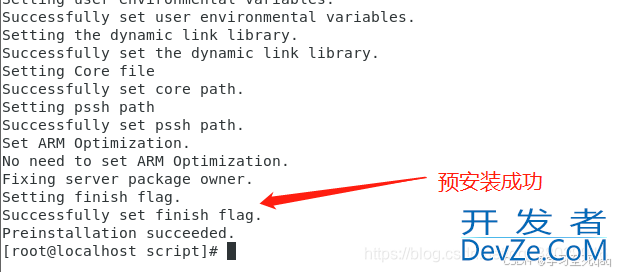
通过openGauss提供的gs_checkos工具来检查系统状态

到这里就预安装结束
11、正式安装
切换到omm用户
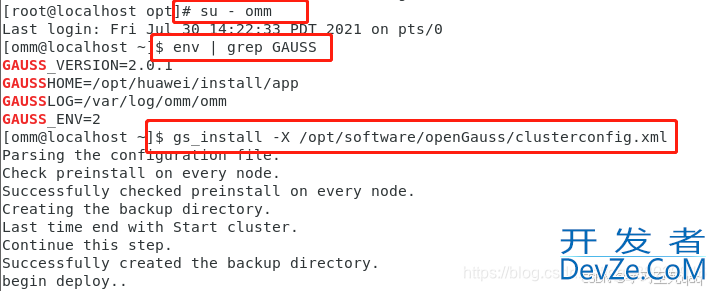
在执行过程中,用户需根据提示输入数据库的密码,密码具有一定的复杂度,为保证用户正常使用该数据库,请记住输入的数据库密码。
设置的密码要符合复杂度要求:
最少包含8个字符;
不能和用户名和当前密码(ALTER)相同,或和当前密码反序;
至少包含大写字母(A-Z),小写字母(a-z),数字,非字母数字字符(限定为~!@#$%^&*()-_=+|[{}];:,<.>/?)四类字符中的三类字符。
12、启动gauss数据库命令
在omm用户下,执行gs_om -t start命令和gs_om -t stop命令启动或关闭数据库。
gs_om -t start
gs_om -t stopgs_om -t restart
12、查看gauss数据库信息,使用navicate连接
gs_om -t status --detail
13、使用navicate连接报错
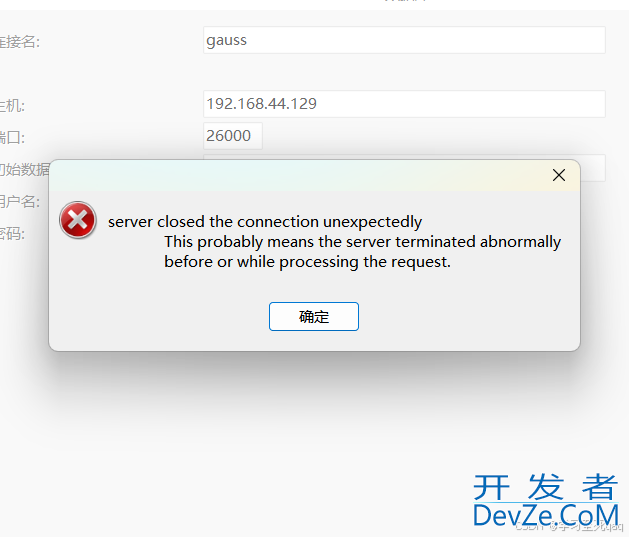
14、修改两个文件pg_hba.conf和postgresql.conf文件
配置文件都在/opt/huawei/install/data/db1目录下
vim /gaussdb/data/db1/pg_hba.conf
host all all 192.168.56.1/32 md5
host all all 0.0.0.0/0 md5
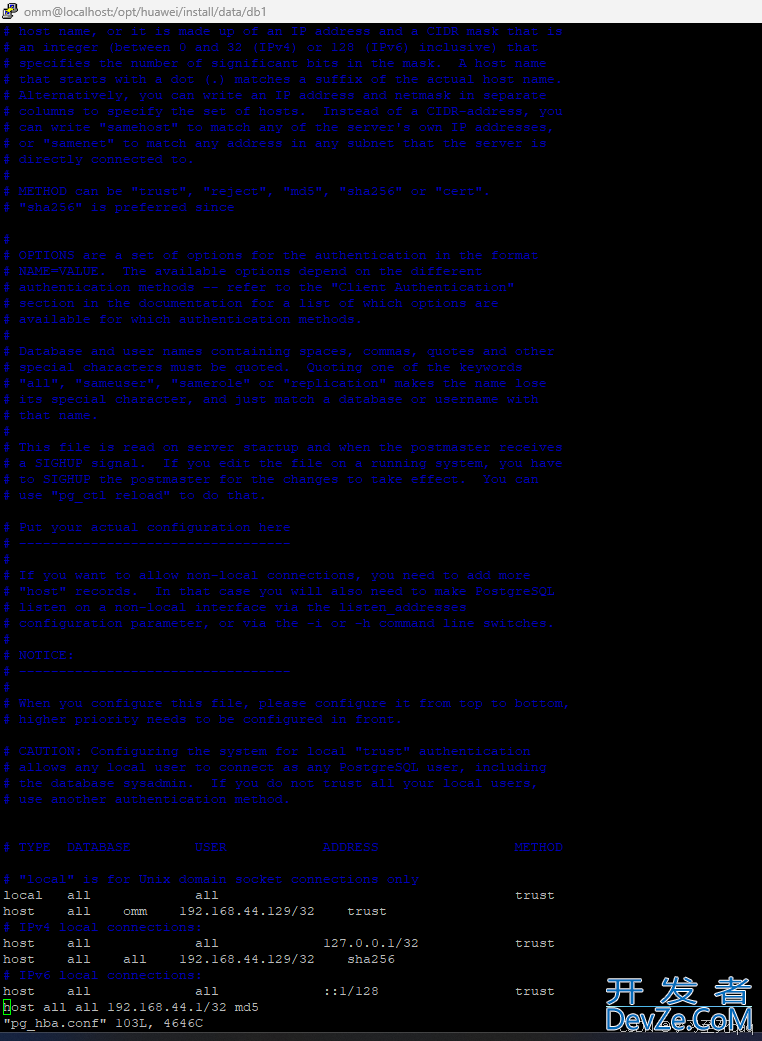
修改文件postgresql.conf
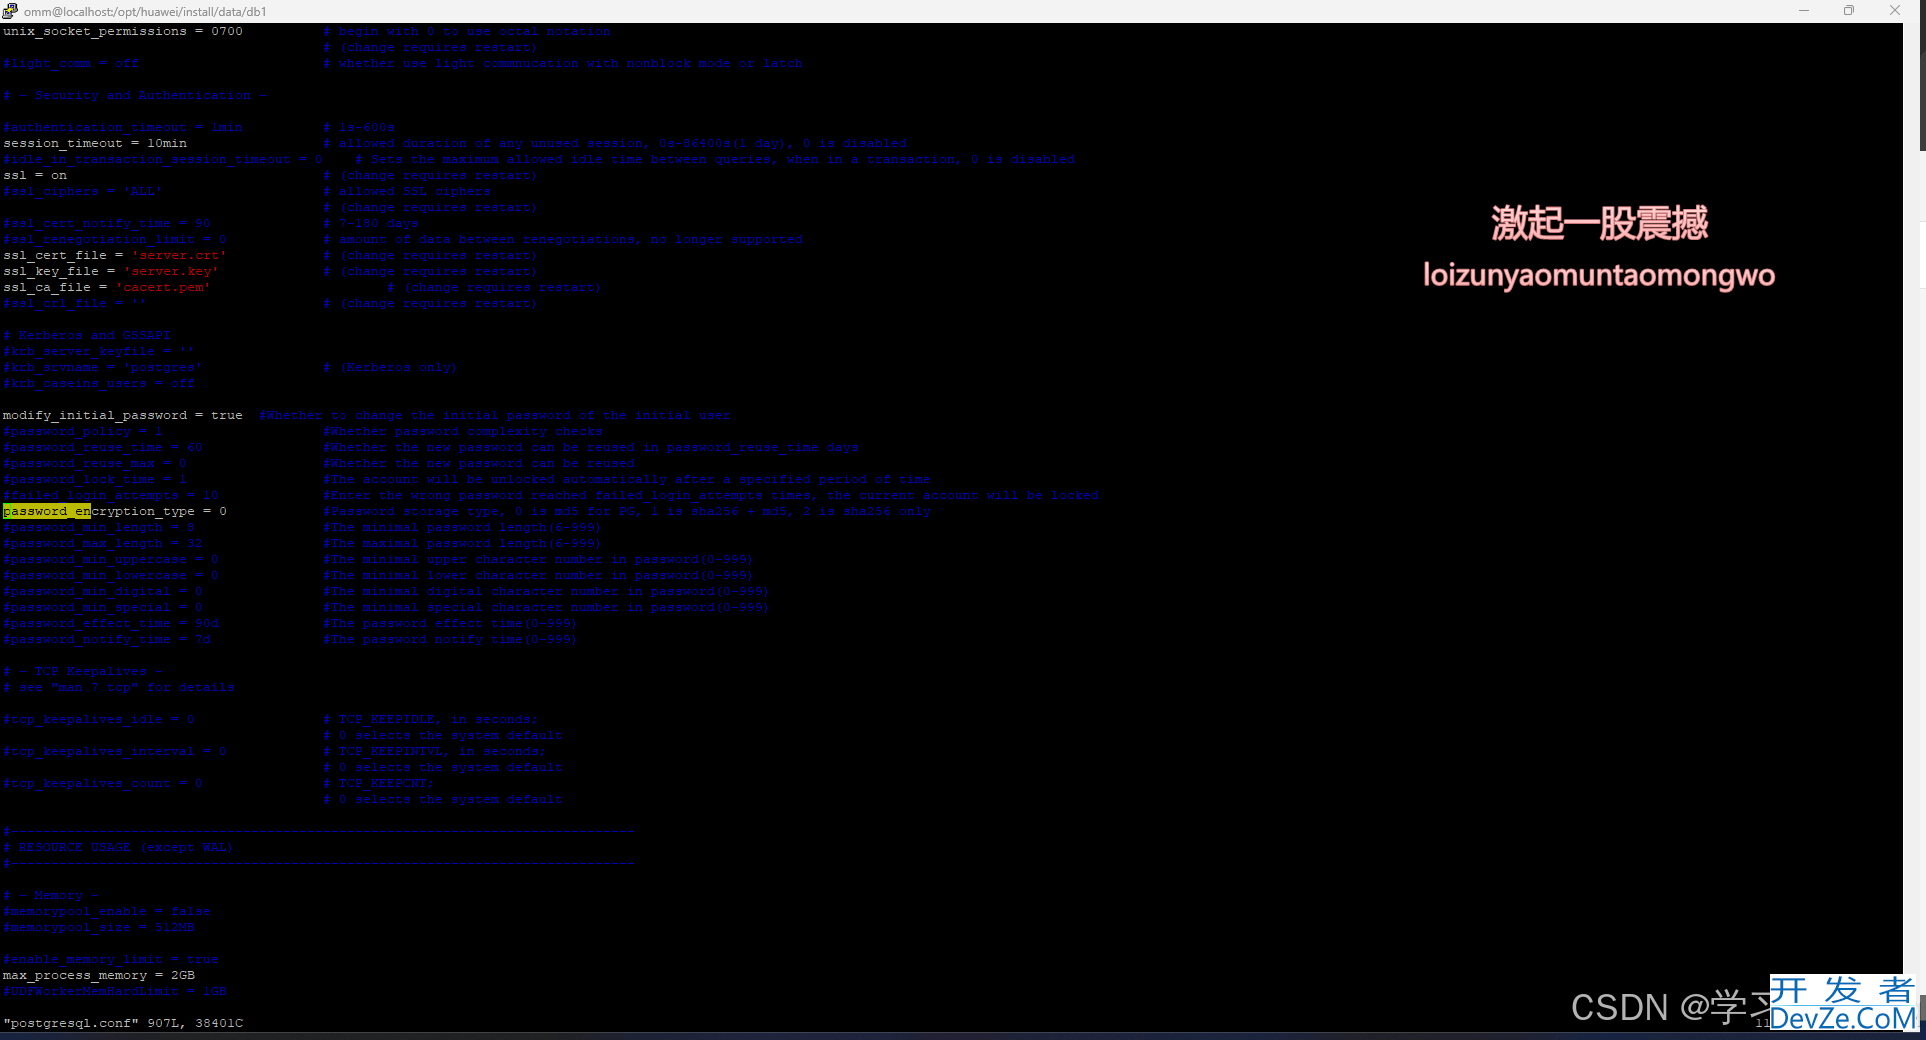
vi /gaussdb/data/db1/postgresql.conf
1.listen_addresses = '*'
2.local_blind_address = '0.0.0.0'
3.将password_encrytion_type前面的#删除,并且将其赋值为0
password_encrytion_type = 0
15、重启数据库
gs_om -t restart
#连接数据库gsql -d postgres -p 26000create user test password “test@1234”;alter role jni sysadmin;
[omm@opengauss root]$ gsql -d postgres -p 26000
openGauss=# create user test with password "test@123";
CREATE ROLE
openGauss=# GRANT ALL PRIVILEGES to test;
ALTER ROLE
openGauss=# create database hjl owner test;
CREATE DATABASE
openGauss=# \l
                          List of databases
   Name    | Owner | Encoding  | Collate | Ctype | Access
privileges
-----------+-------+-----------+---------+-------+--------
-----------
 db_tpcc   | test  | SQL_ASCII | C       | C     |
 postgres  | omm   | SQL_ASCII | C       | C     |
 template0 | omm   | SQL_ASCII | C       | C     | =c/omm
          +
           |       |           |         |       | omm=CTc
/omm
 template1 | omm   | SQL_ASCII | C       | C     | =c/omm
          +
           |       |           |         |       | omm=CTc
/omm
(4 rows)
[omm@opengauss root]$ gsql -d db_tpcc -p 26000 -U test
Password for user test:

db_tpcc=> create table mytable(firstcol int);
CREATE Thttp://www.devze.comABLE
db_tpcc=> insert into mytable values (100);
INSERT 0 1
db_tpcc=> select * from mytabjavascriptle;
 firstcol
----------
      100
(1 row)

db_tpcc=> \q

到此结束
总结
到此这篇关于centos虚拟机部署opengauss数据库的文章就介绍到这了,更多相关centos虚拟机部署opengauss数据库内容请搜索编程客栈(www.devze.com)以前的文章或继续浏览下面的相关文章希望大家以后多多支持编程客栈(www.devze.com)!


 加载中,请稍侯......
精彩评论